

How to Use Studio Mode (Preview Before Going Live)
Studio Mode is a professional production feature that lets you preview and edit your next scene before switching it live to your audience. It creates a split-view interface with an editor/preview side and a live/program side, so you can prepare content safely without affecting what viewers see.
What Is Studio Mode?
In normal mode, when you click a scene, it immediately goes live to your audience. This is simple but risky - any mistake is instantly visible.
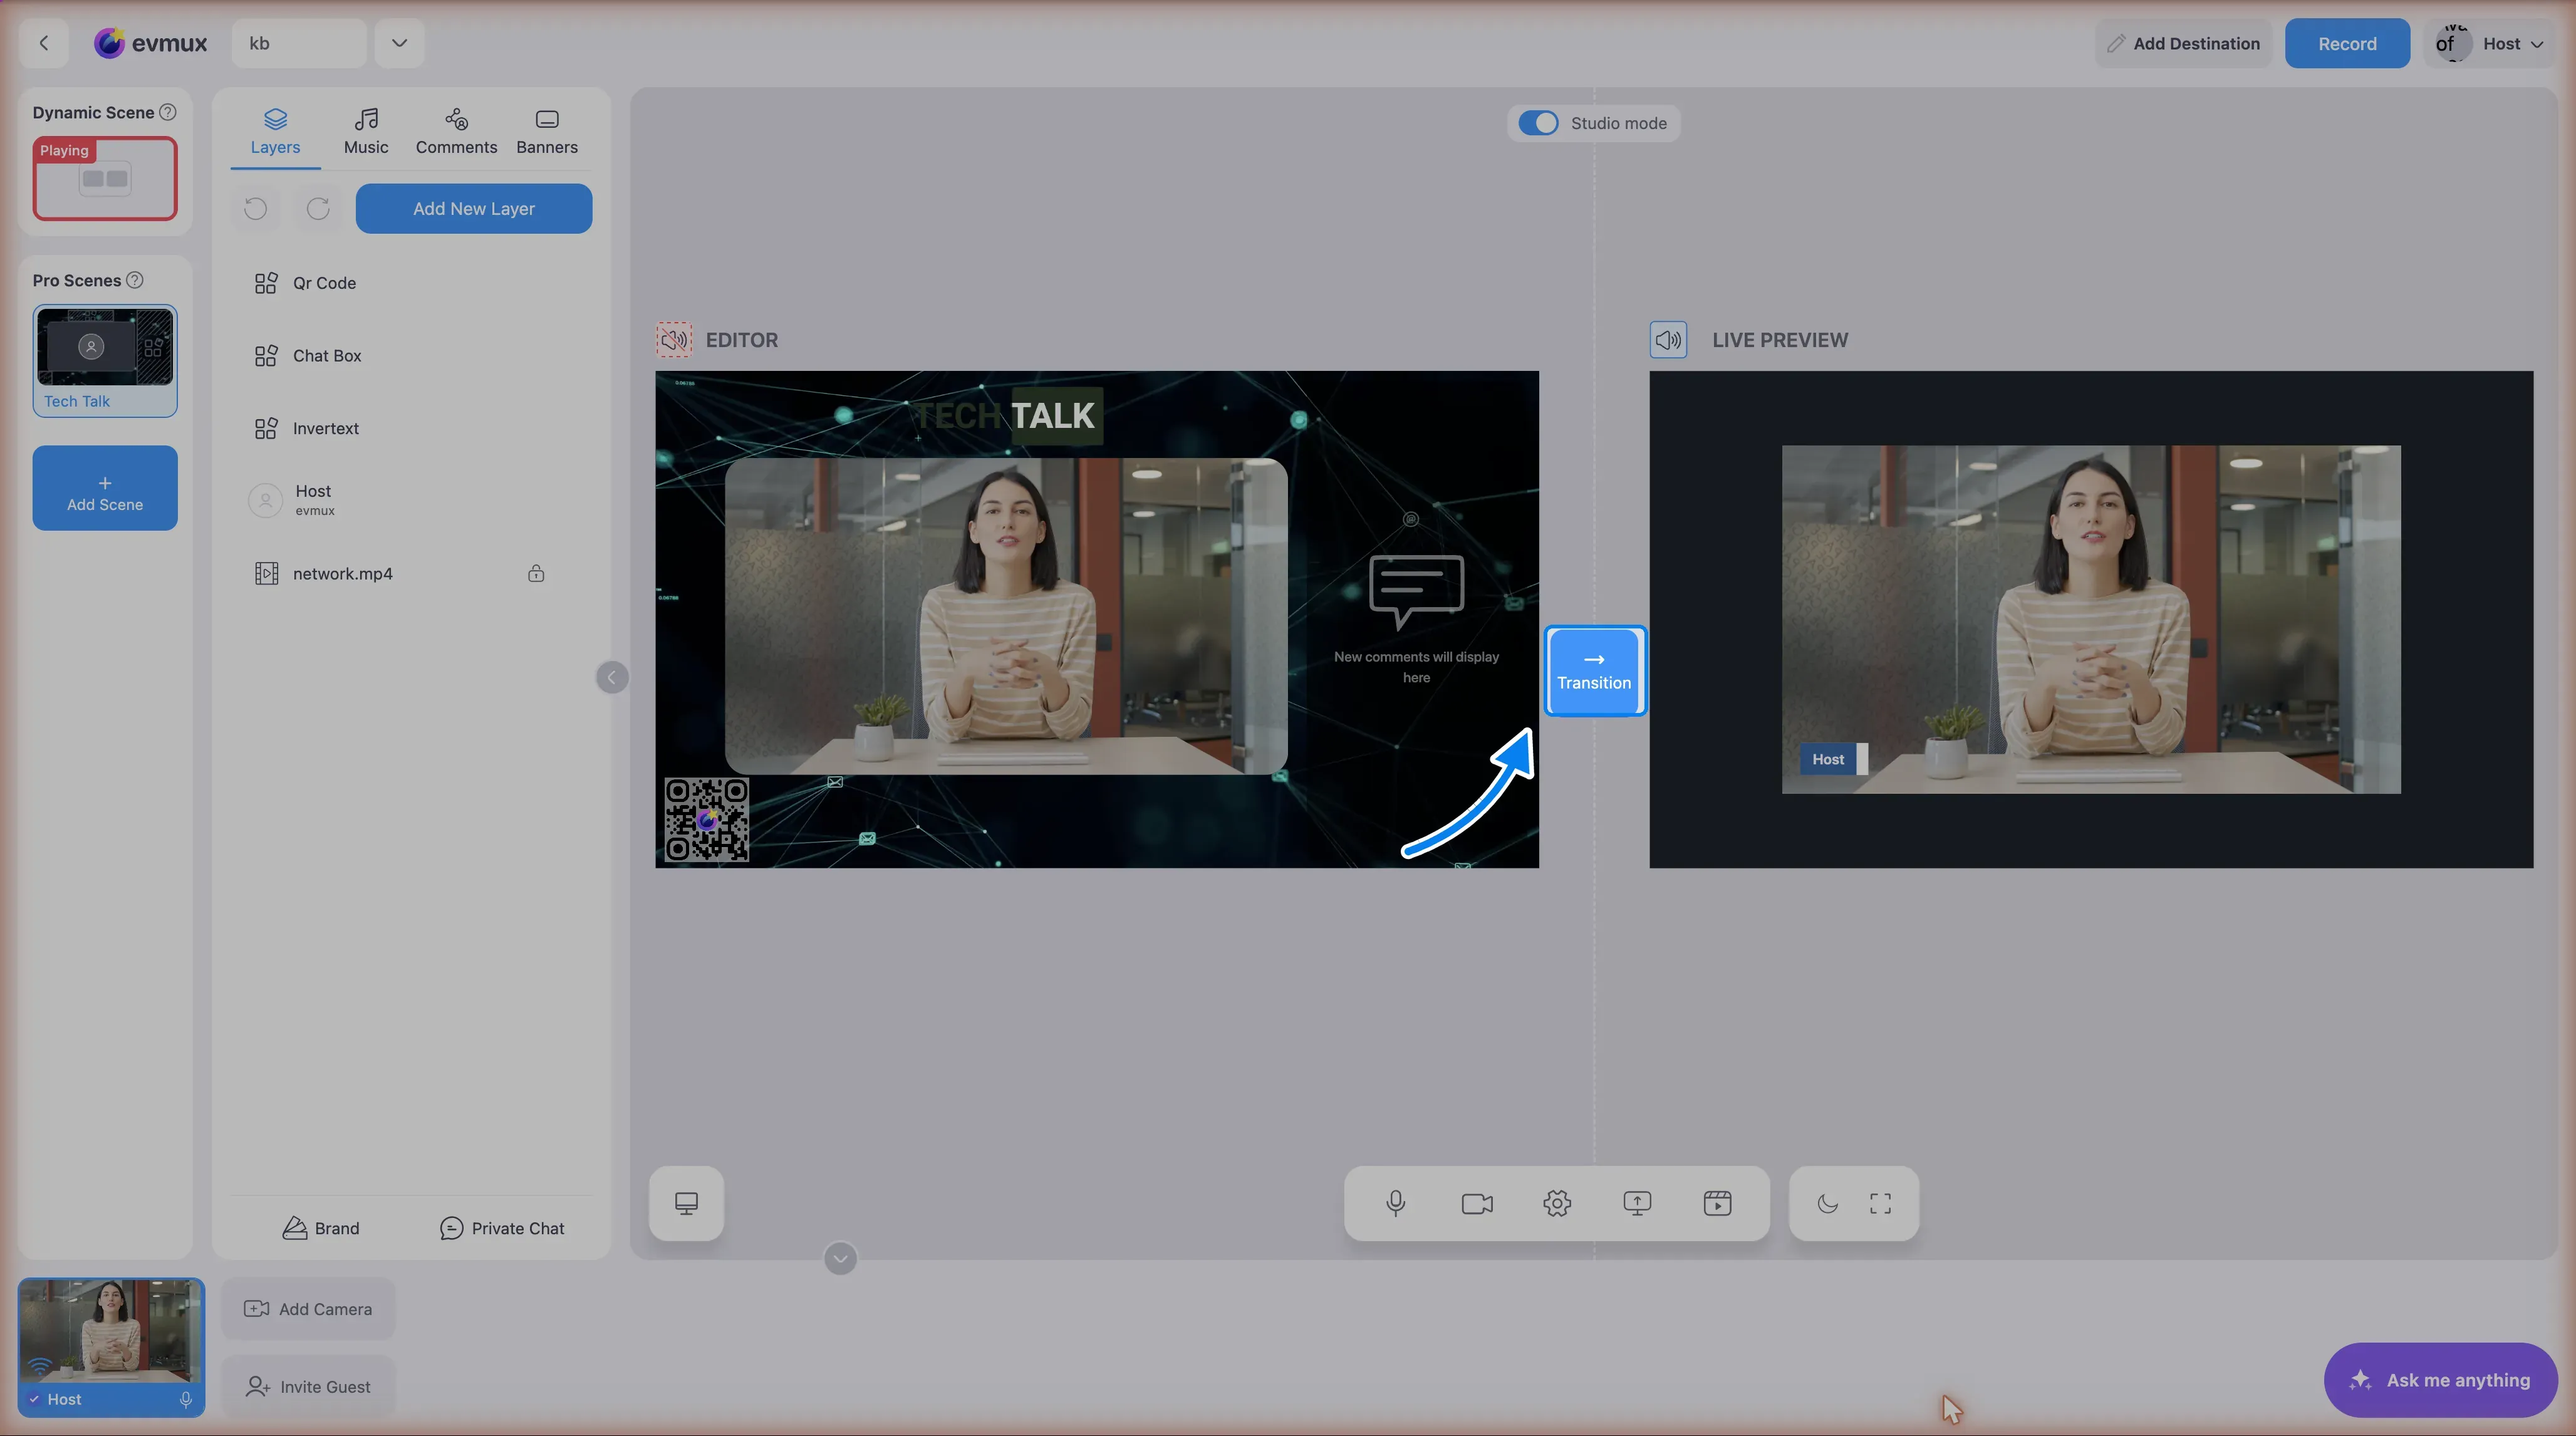
In Studio Mode, the editor is split into two views:
| Side | Shows | Purpose |
|---|---|---|
| Left (Editor/Preview) | The scene you’re editing | Prepare, adjust layers, make changes - viewers don’t see this |
| Right (Live/Program) | The scene currently broadcasting | What your audience sees right now |
You work on the left side, and only when you’re ready, you push that scene live to the right side.
There is no separate “Transition” button in the toolbar. What you use is the play button on the scene tile itself: in Studio Mode, hovering a scene in the Scenes panel reveals a play (▶) button on it, and clicking that is what sends the scene live (with its stinger, if one is configured). Outside Studio Mode there is no play button at all — clicking the tile switches to the scene immediately.
How to Enable Studio Mode
- Look at the top center of the scene preview
- Find the “Studio mode” toggle
- Click it to enable
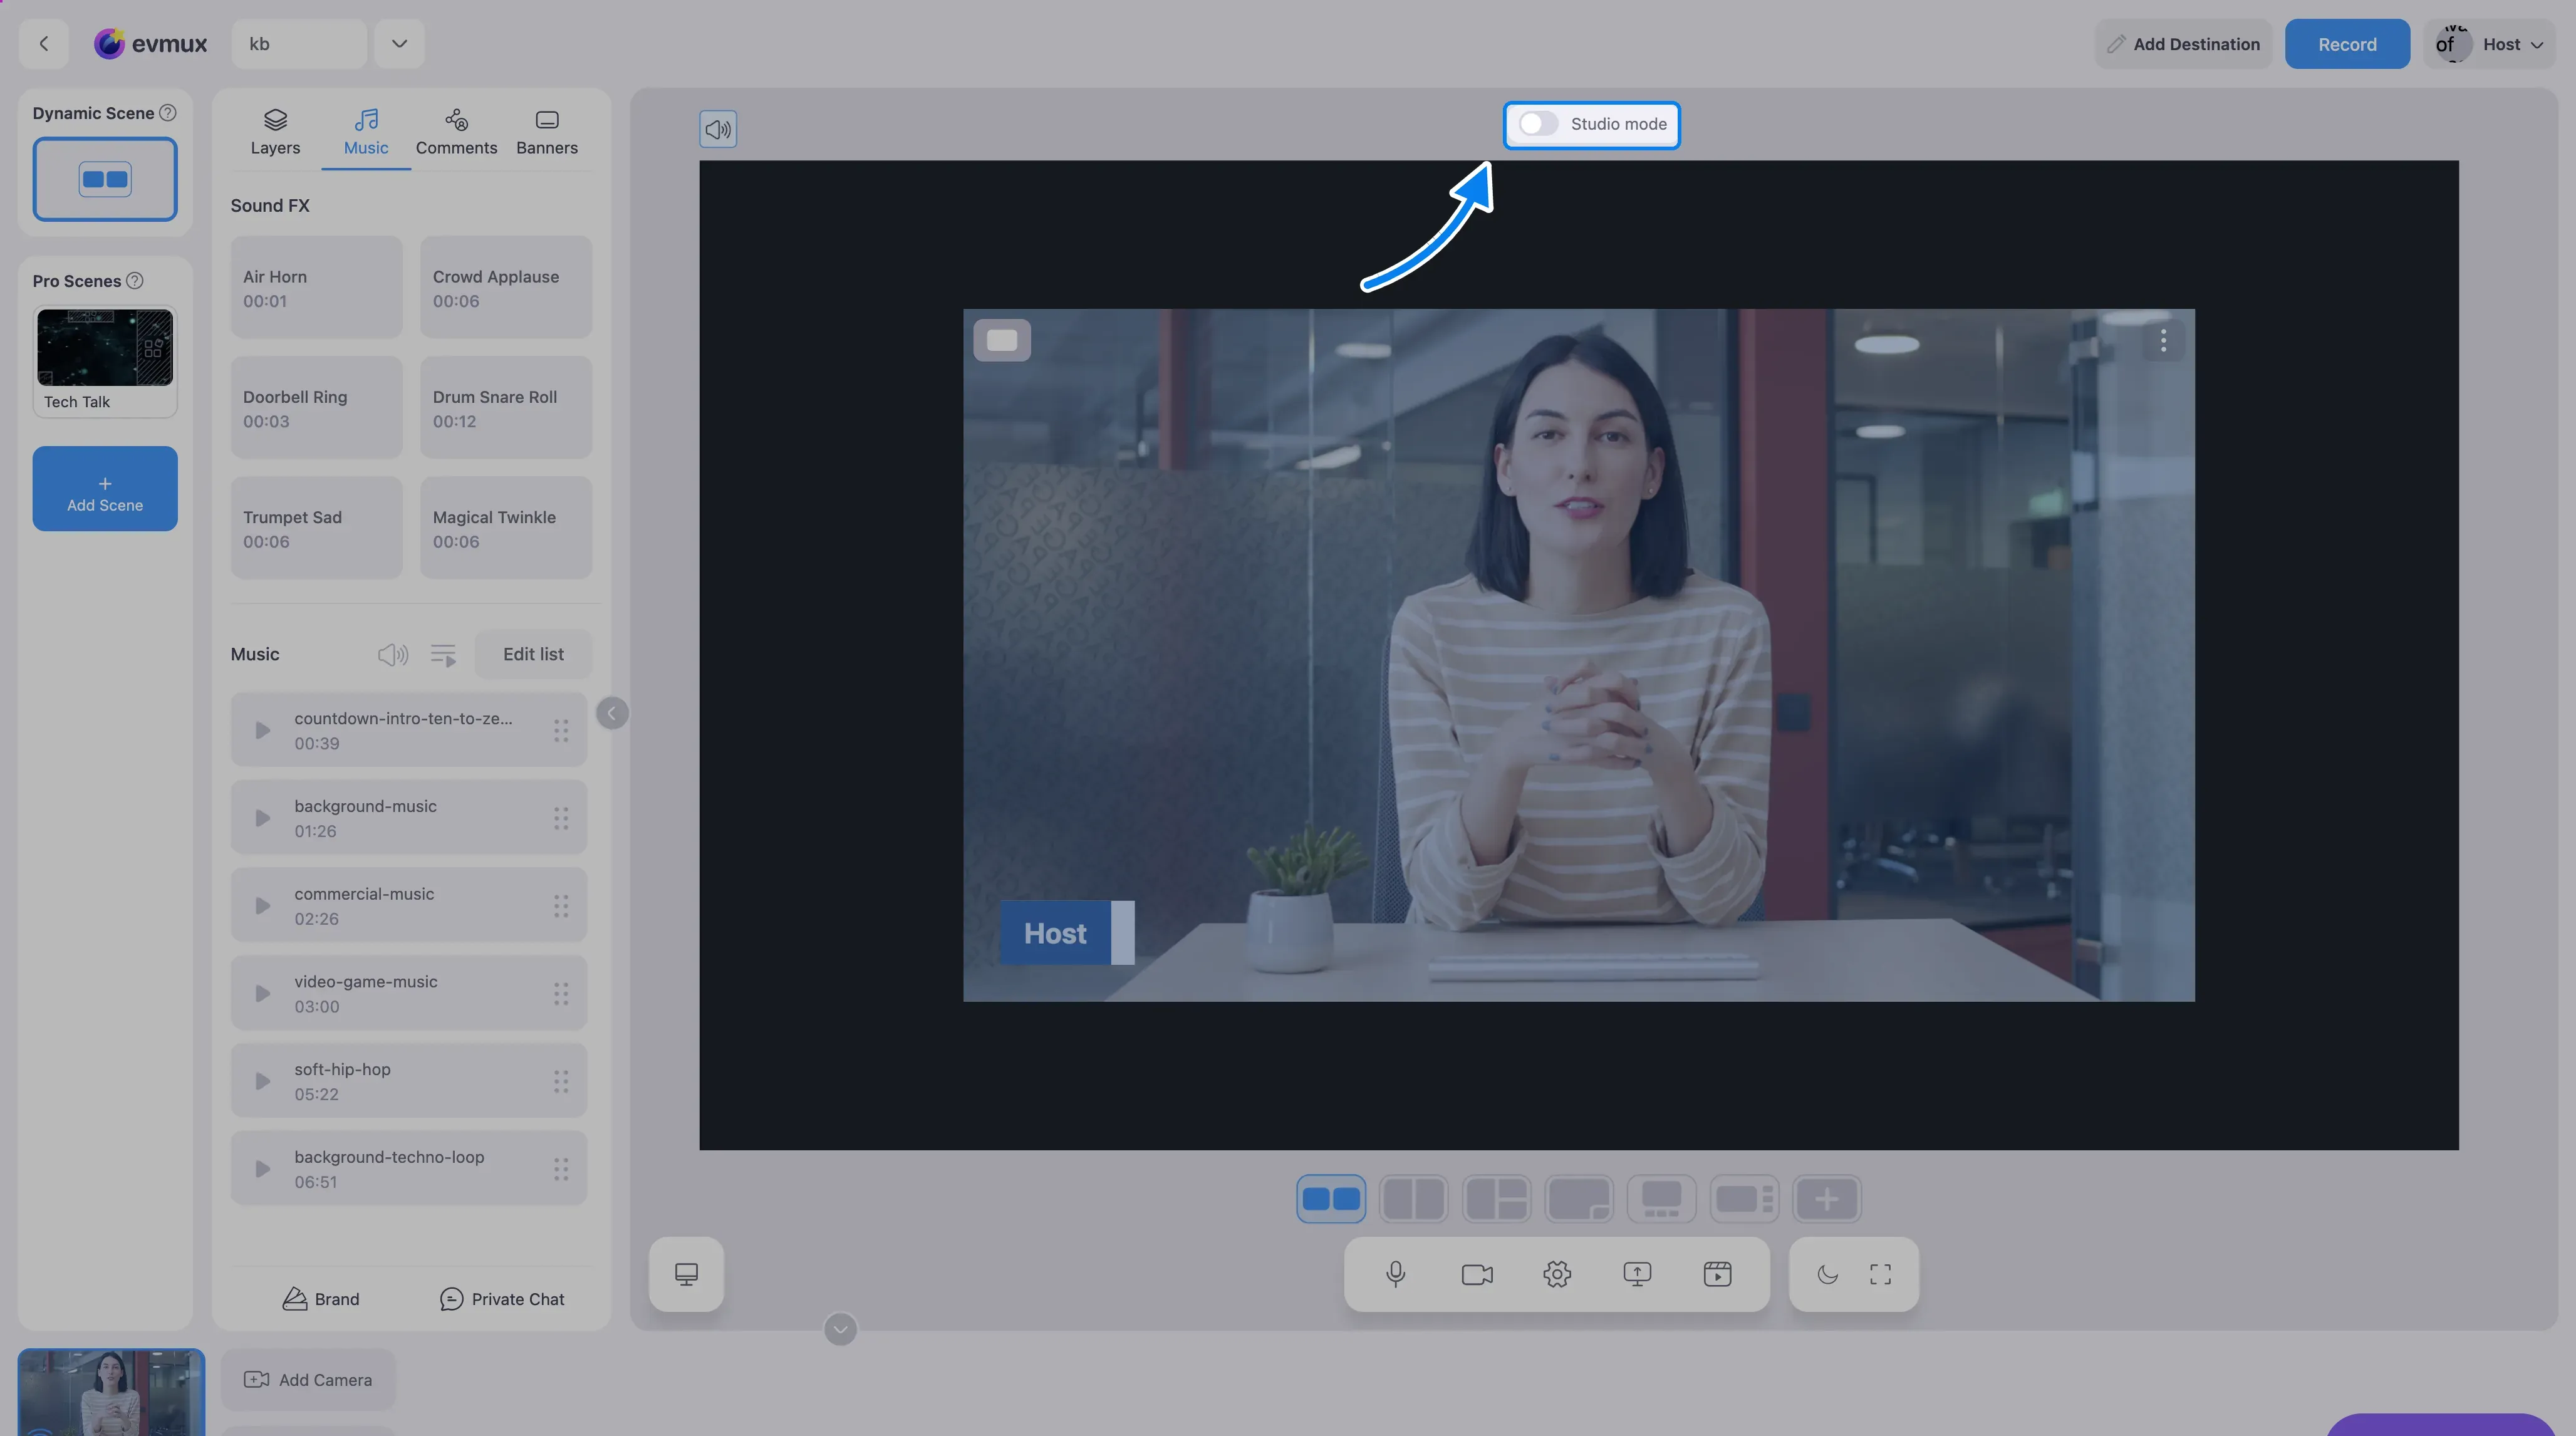
On first use, a dialog appears explaining:
“Studio Mode will level up your production quality by giving you the ability to see changes before you apply them to your live show”
A demo video is shown to help you understand the feature.
Note: Studio Mode is not available on mobile.
How to Use Studio Mode
Step 1: Select a Scene to Edit (Preview)
- Click on any scene in the Scenes panel (left sidebar)
- The scene loads in the left/editor side only
- Your audience still sees the current live scene on the right
- Edit layers, add content, adjust positioning - none of this affects the live broadcast
With Studio mode on, the preview splits in two: Editor on the left is the scene you are working on, Live Preview on the right is what your audience sees, and the Transition button between them pushes the editor scene live. The scene that is on air carries a Playing label in the scenes column.
Step 2: Apply Changes Live (Transition)
When you’re ready to show the edited scene to your audience:
- Hover over the scene you want to push live in the Scenes panel
- A blue Play button (▶) appears on the right edge of the scene item
- Click the Play button to transition this scene to live
- If the scene has a stinger/transition configured, the transition animation plays
- The scene is now live - it moves to the right side, and your audience sees it
Step 3: Prepare the Next Scene
- Click a different scene in the Scenes panel to start editing it on the left
- The live side continues showing the current broadcast scene
- Repeat the process: edit on the left, transition to live when ready
The Transition Button (Play Button)
- Appearance: White play icon (▶) on a blue circle (#0096ff), 40x40px
- Location: Appears on the right edge of scene items in the Scenes panel when you hover
- Only visible: In Studio Mode, and only on scenes that are NOT currently live
- What it does: Switches the hovered scene to live, applying any configured stinger/transition effect
Scene Indicators in Studio Mode
| Indicator | Meaning |
|---|---|
| Blue border on scene item | Currently selected in the editor (preview side) |
| Red/pink border + “Playing” label | Currently broadcasting live (program side) |
| Play button (▶) on hover | Click to transition this scene to live |
Keyboard Shortcuts
Studio Mode works with scene navigation hotkeys:
- Next Scene shortcut - In Studio Mode, transitions the next scene live (with stinger if configured)
- Previous Scene shortcut - In Studio Mode, transitions the previous scene live (with stinger if configured)
Configure these in Settings > Hotkeys.
Studio Mode + Stingers/Transitions
Studio Mode works together with per-scene stingers:
- Configure a transition on a scene: right-click scene > “Stinger / Transition” > choose effect
- When you click the Play button in Studio Mode, the configured transition plays during the switch
- A progress indicator shows during the transition animation
- After the transition completes, the new scene is fully live
This gives you the smoothest possible scene switching: prepare on the left, transition with animation to the right.
Studio Mode vs Normal Mode
| Behavior | Normal Mode | Studio Mode |
|---|---|---|
| Click a scene | Goes live immediately | Loads in editor only (preview) |
| Edit a layer | Changes visible to audience instantly | Changes only visible in editor until transitioned |
| Switch scenes | Direct switch, may look rough | Smooth transition via Play button |
| Scene preparation | Not possible while live | Full editing while another scene is live |
| Split view | Single view | Dual view (editor + live) |
When to Use Studio Mode
| Scenario | Recommended |
|---|---|
| Professional broadcast with multiple scenes | Yes - preview before going live |
| Live show with frequent scene changes | Yes - smooth transitions |
| Solo casual stream with one scene | Not needed |
| Training/learning evmux | Not needed initially |
| Multi-editor production | Yes - prepare scenes collaboratively |
Tips
- Drag the divider between editor and live sides to adjust the split ratio
- Always check the live side before transitioning to confirm what your audience currently sees
- Set up stingers on scenes for professional-looking transitions when using the Play button
- Use hotkeys for quick scene transitions during fast-paced broadcasts
- Turn off Studio Mode when you want simple, direct scene switching