

How to Add a Streaming Destination (YouTube, Facebook, etc.)
This guide shows you how to connect streaming platforms like YouTube, Facebook, or Twitch so you can broadcast your content.
Where to Add Destinations
You can open your Destinations settings from either the Dashboard or the Studio (the Editor). In the Studio it opens as a popup: on desktop, click the Destinations button at the top-right; on mobile, open the main menu (burger icon) and choose Destinations.
Quick Steps
- Open the Editor (Studio)
- Click the Destinations button at the top-right (on mobile: main menu / burger → Destinations)
- In the Destinations popup, click the + button to add a new destination
- Select your platform (YouTube, Facebook, etc.)
- Log in to the platform in the window that opens and authorize access
- Done! Your destination is ready for broadcasting
Step-by-Step Guide
Step 1: Open the Editor (Studio)
- Go to the Evmux Dashboard
- Click on your studio to open it
- You should now be in the Editor interface with the scene and panels
Step 2: Open the Destinations Popup
- On desktop, click the Destinations button at the top-right of the Studio
- On mobile, open the main menu (burger icon) and choose Destinations
- The Destinations popup opens, showing your current destinations (“Destinations (X Active)”)
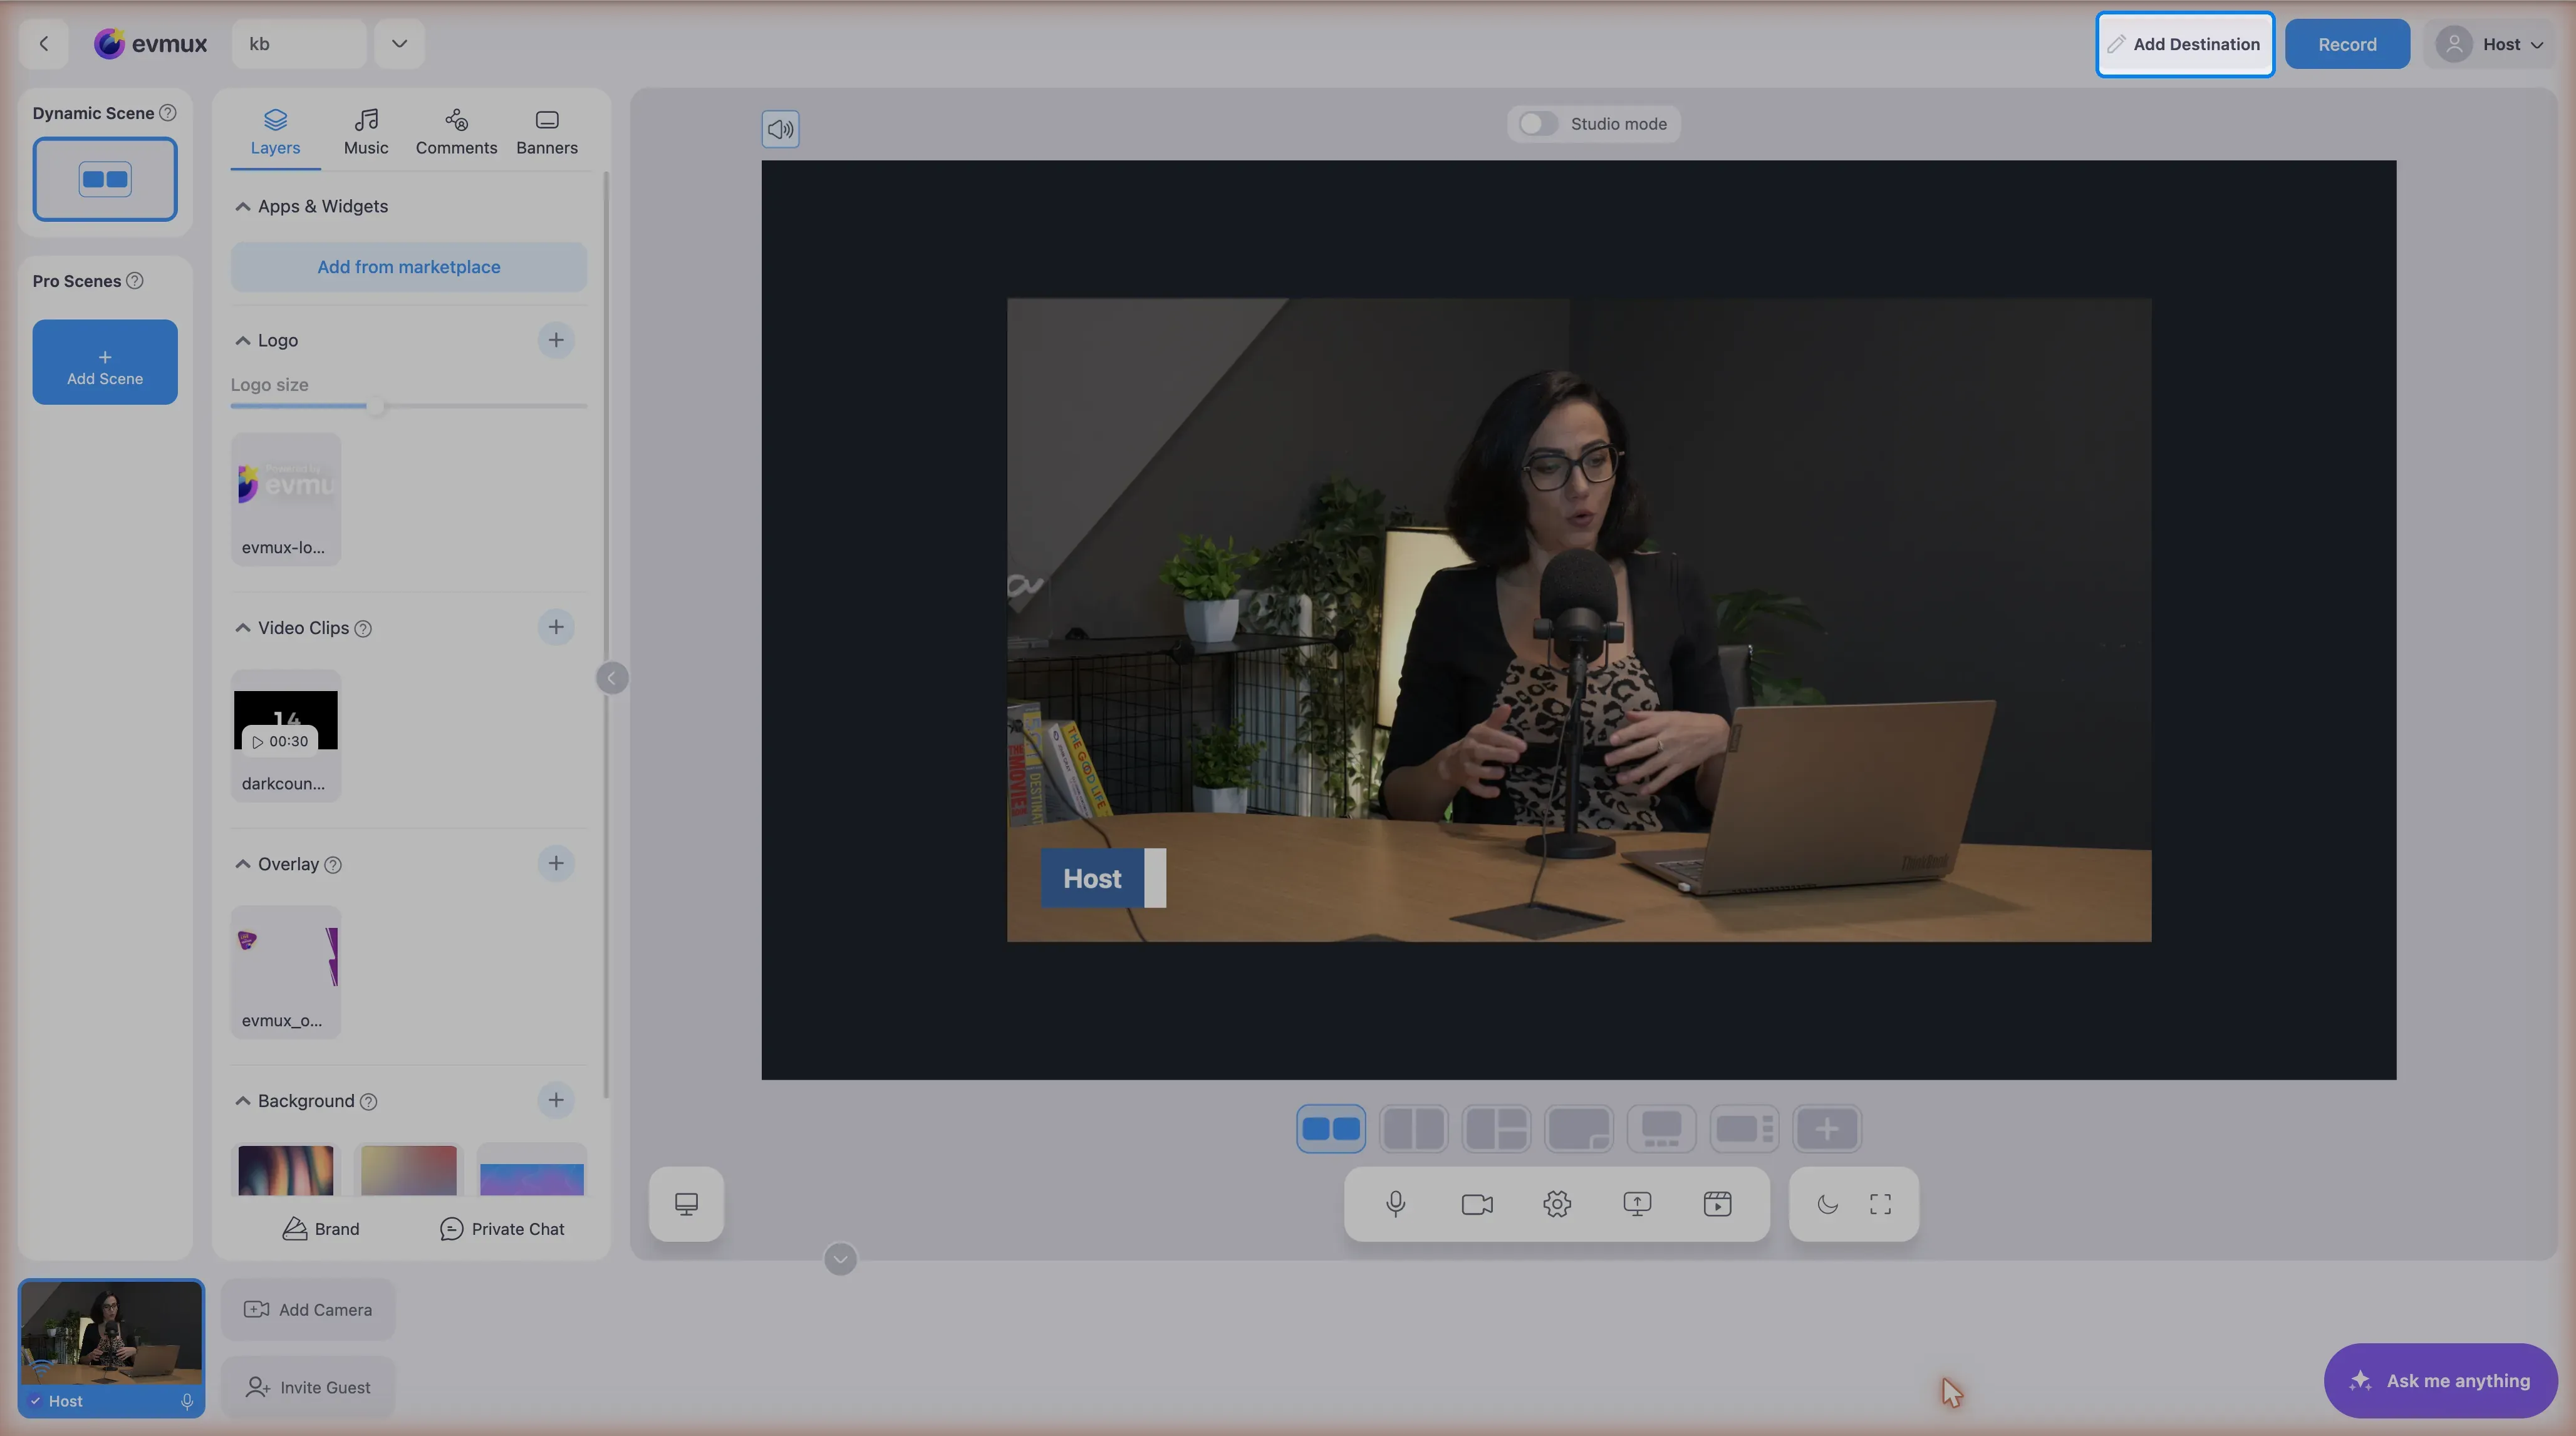
Step 3: Add a New Destination
- In the Destinations popup, find the + button (tooltip says “Add new”)
- Click the + button
- A dialog opens showing all available platforms
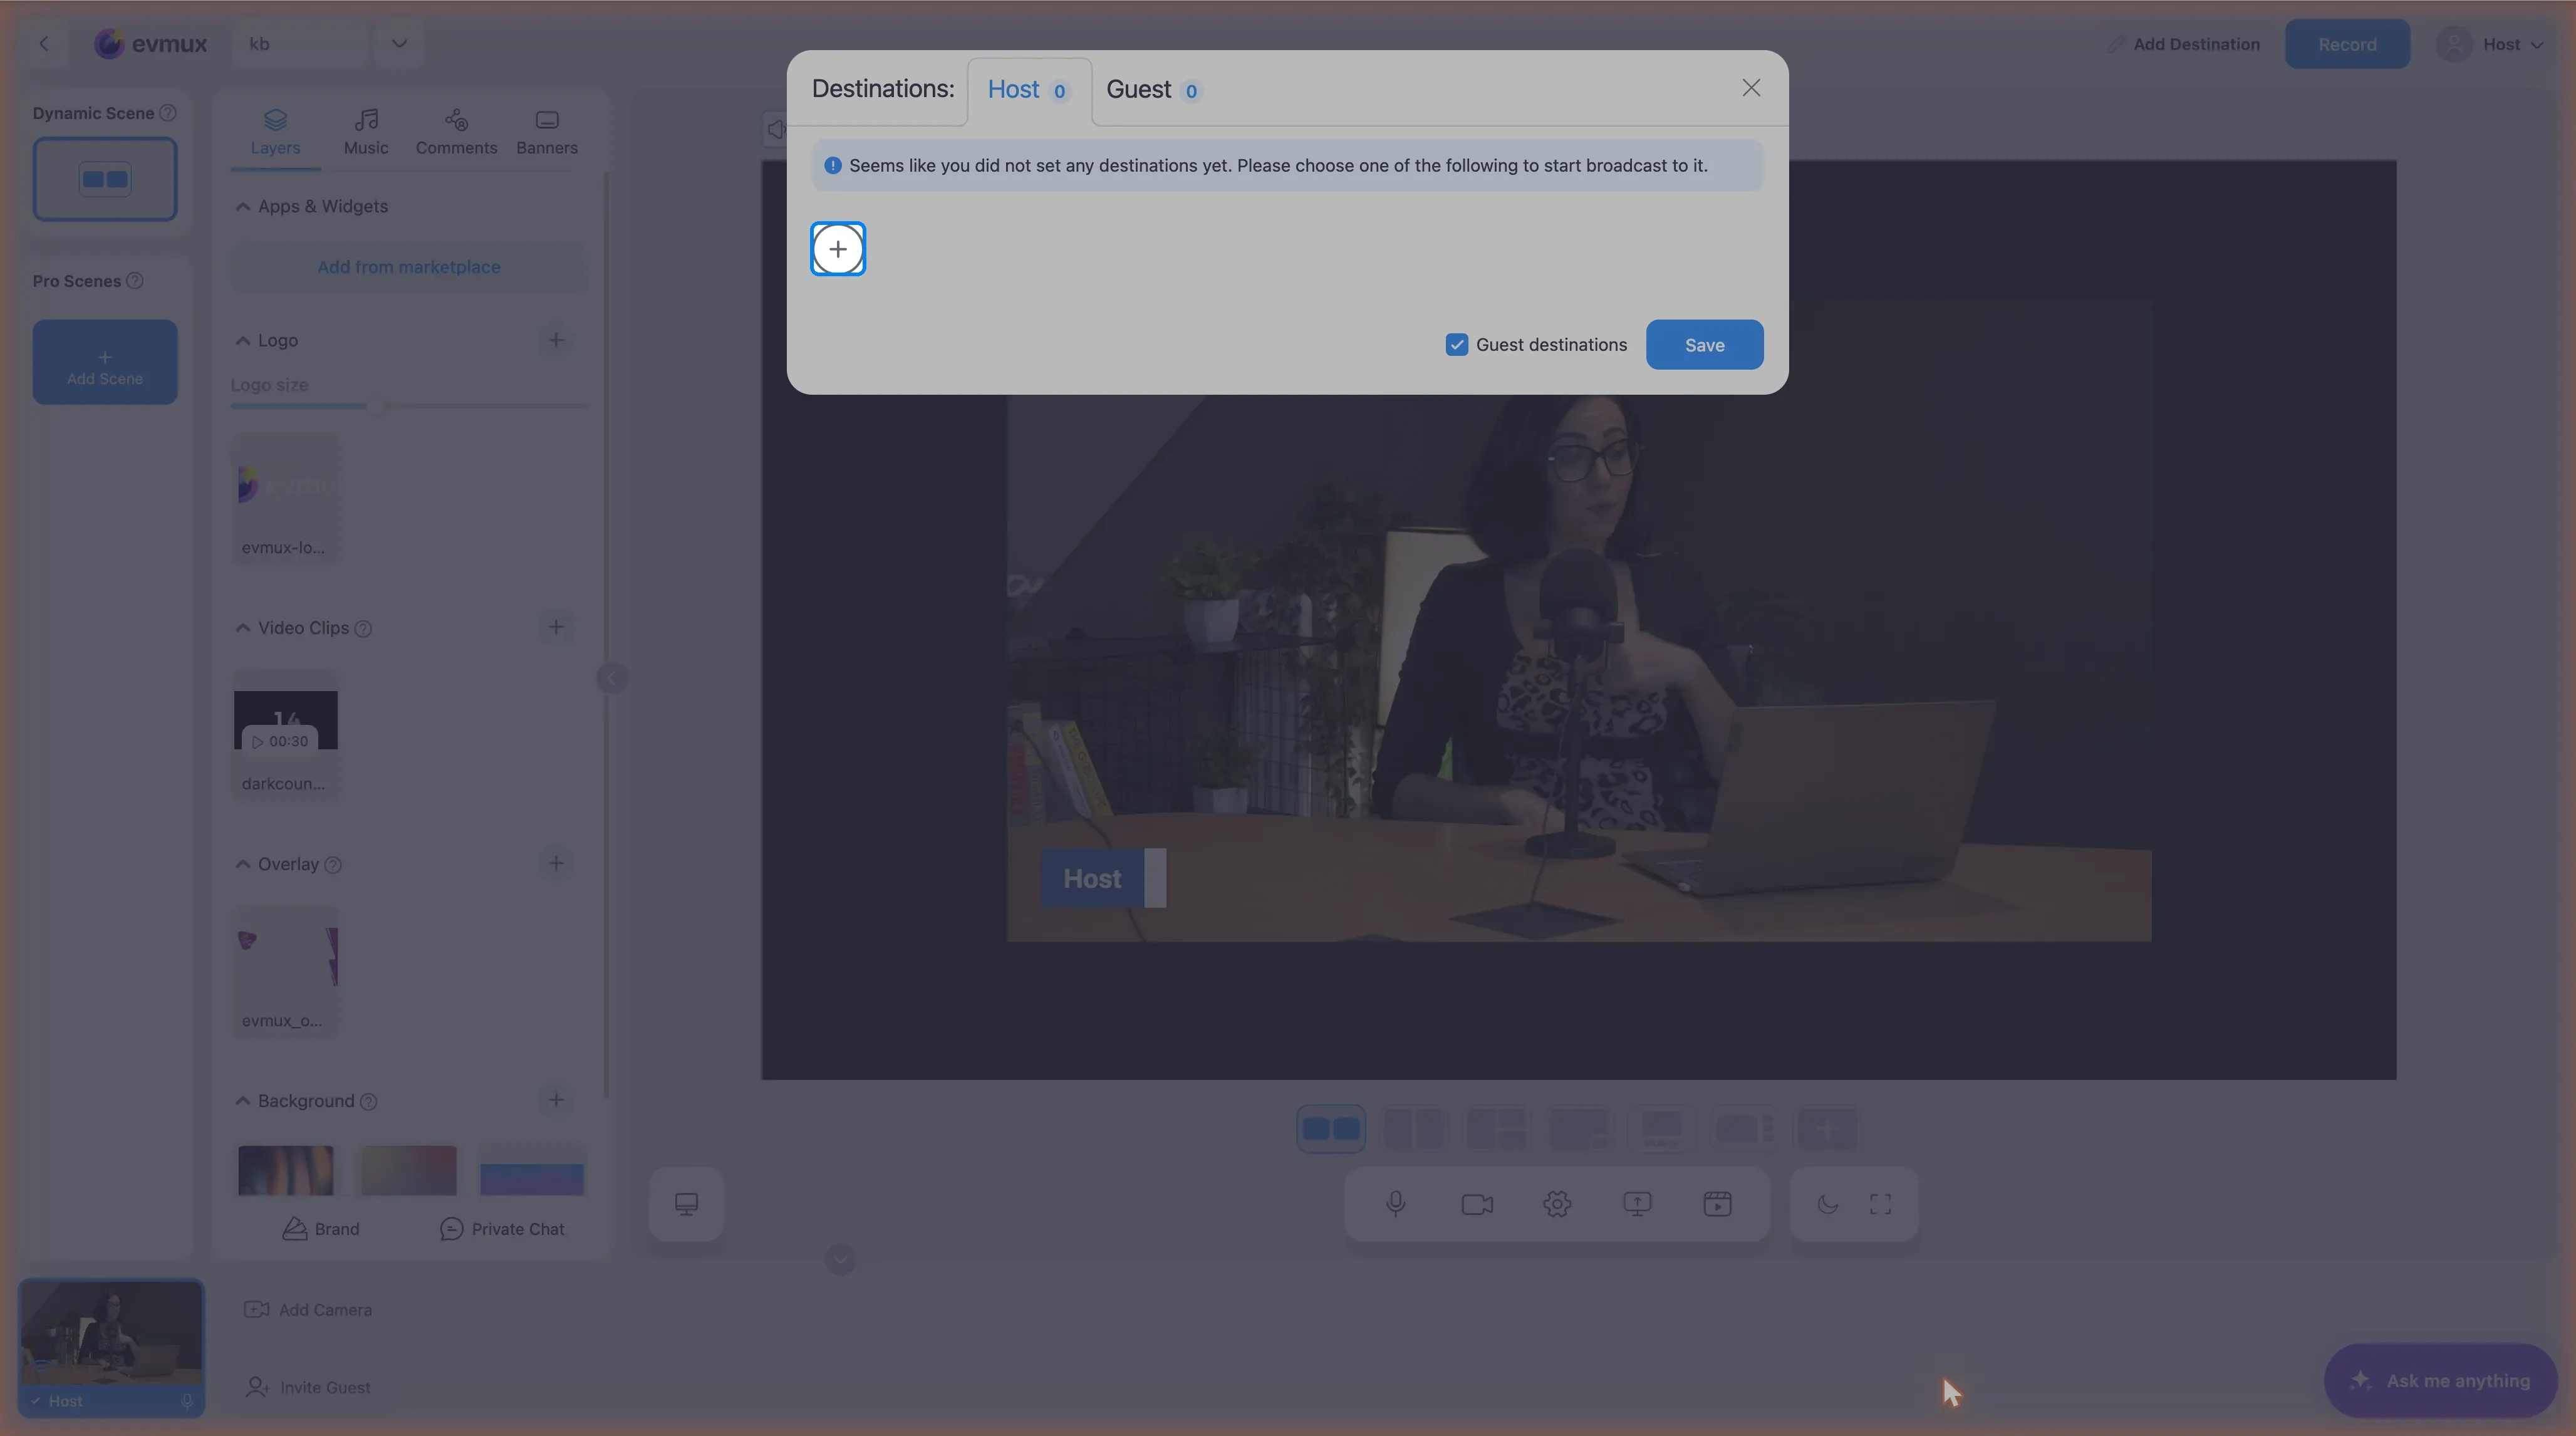
Step 4: Select Your Platform
Choose from the available streaming platforms:
Popular platforms:
- YouTube
- Twitch
- TikTok
Other platforms:
- Instagram, X (Twitter), Telegram
- Kick, Rumble, Steam, Vimeo
- Dacast, Amazon Live
- Evmux Player
- Custom RTMP (for any other platform)
Click on the platform you want to add.
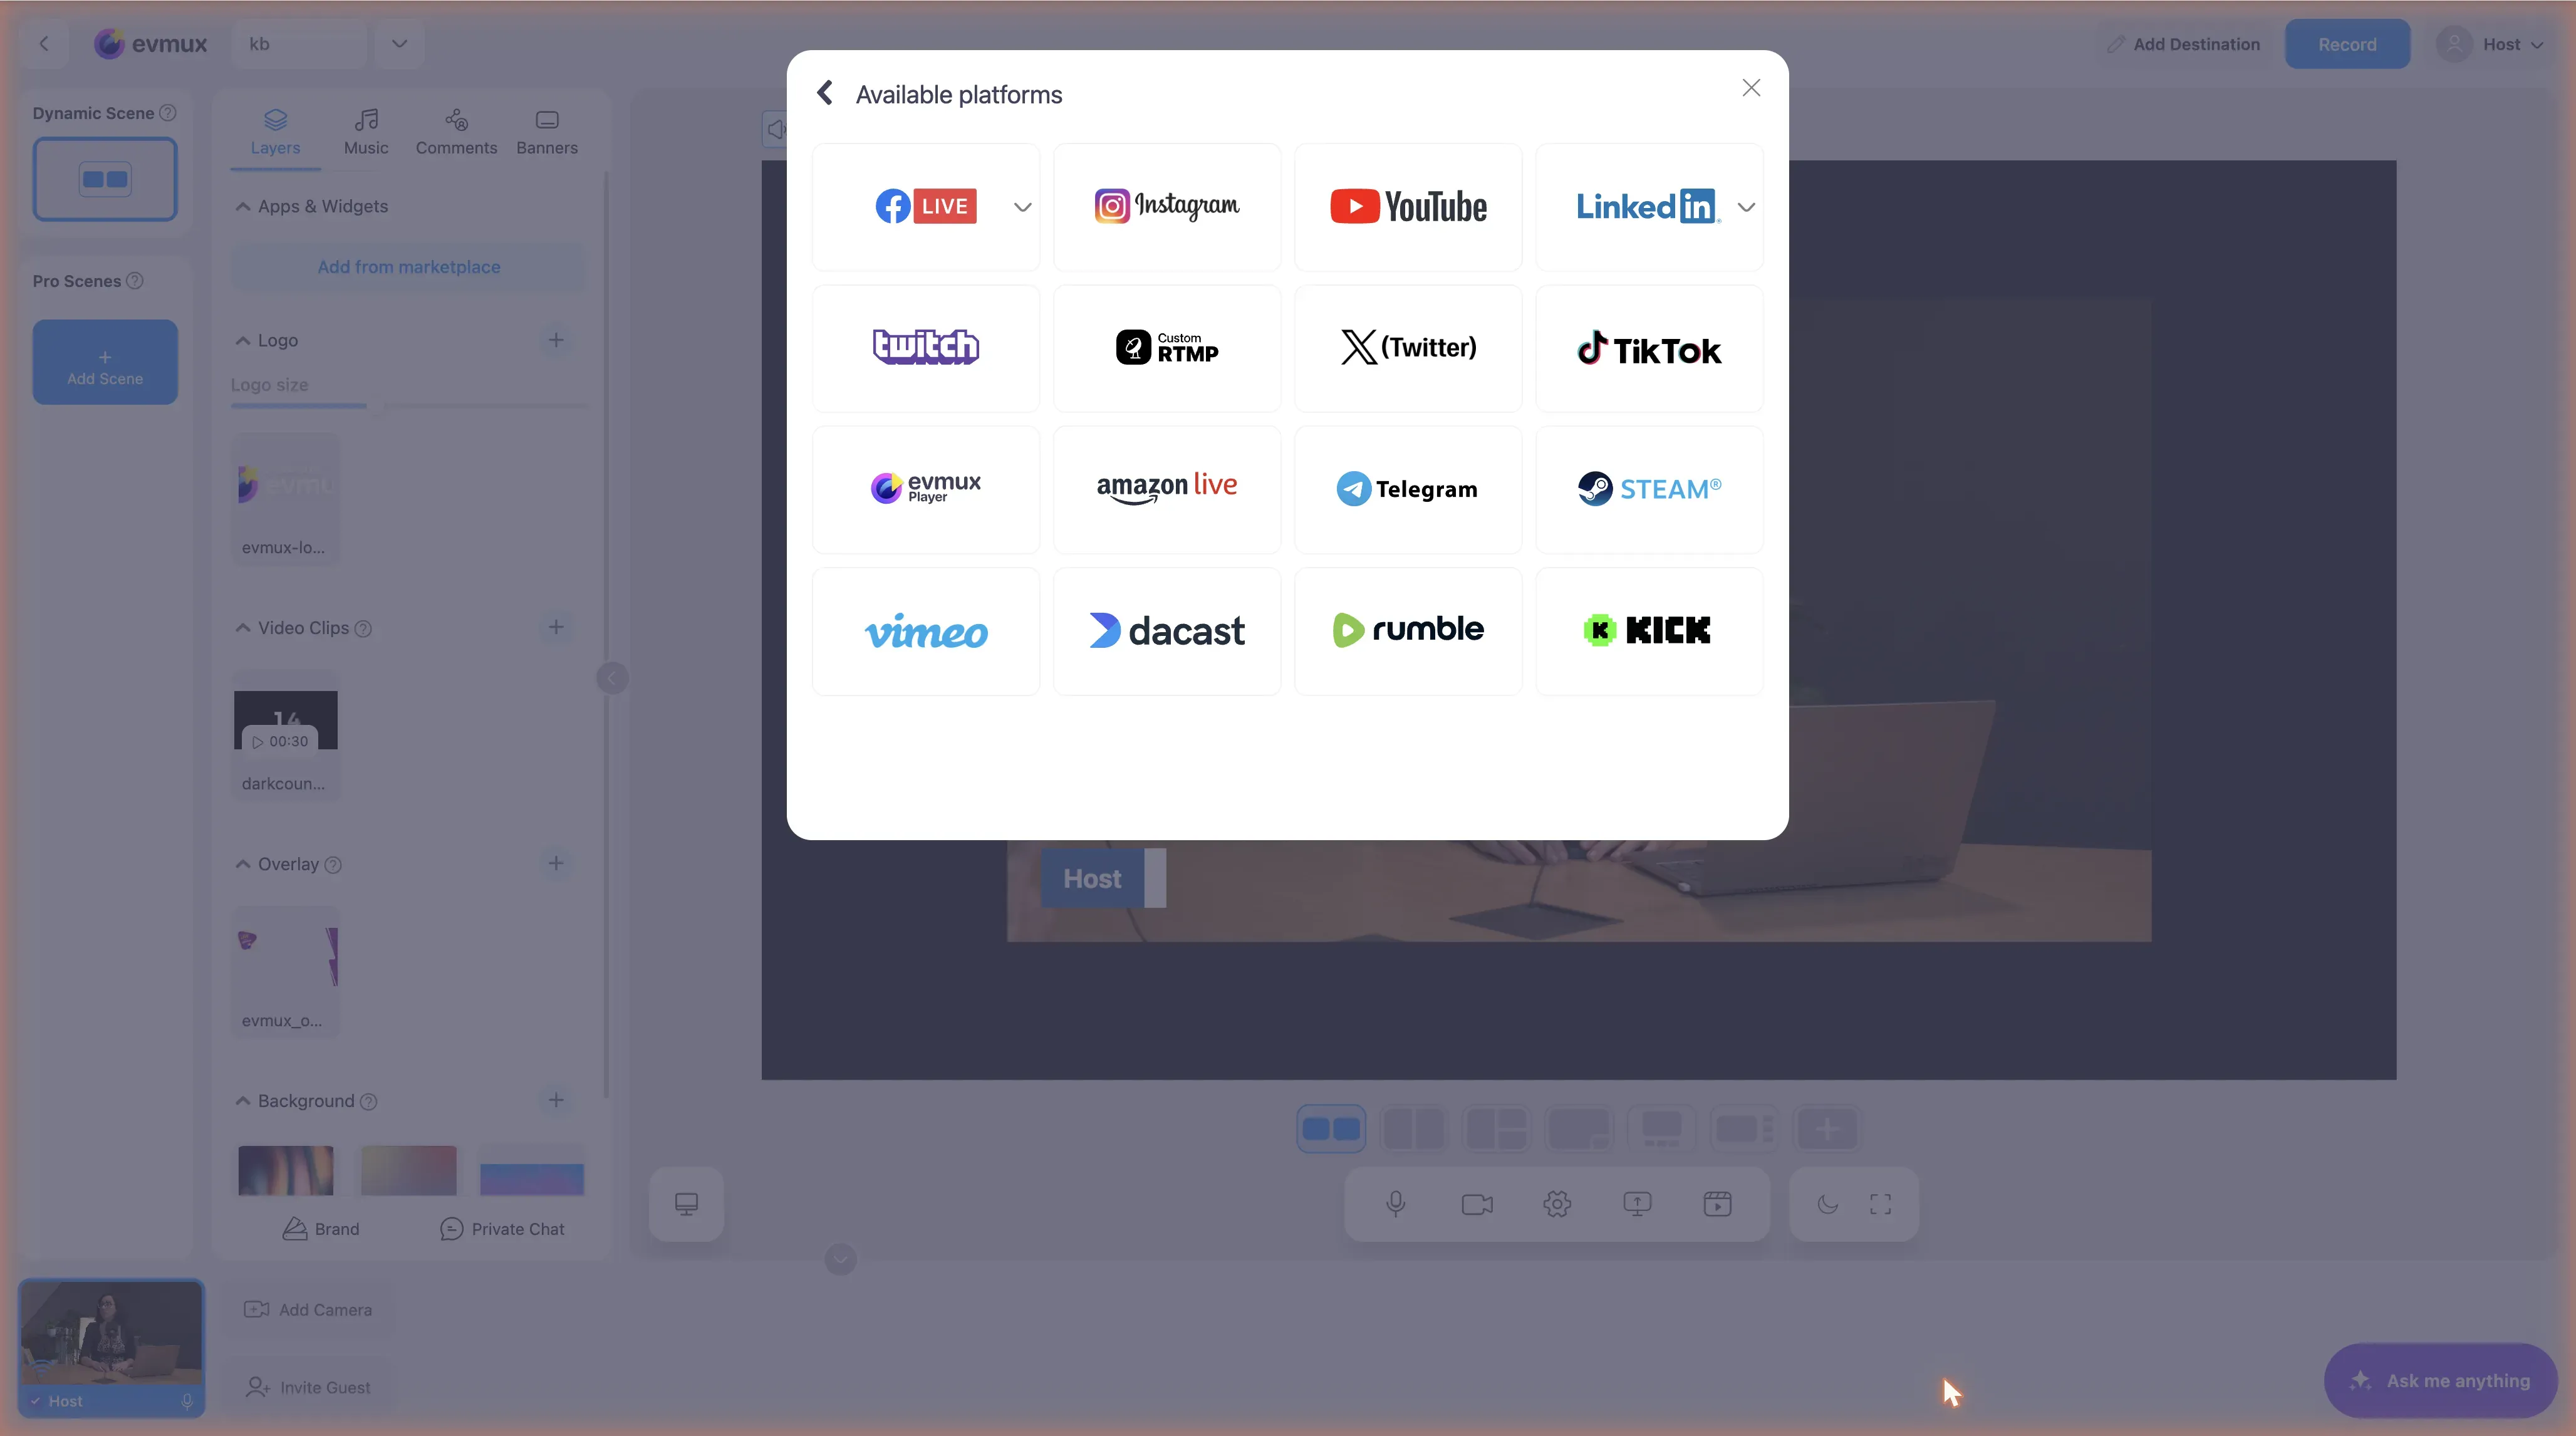
Step 5: Connect Your Account
- Clicking a platform tile opens that platform’s login window straight away
- The studio shows “Waiting for you to connect … in the popup” until you finish
- Log in to your account (YouTube, Facebook, etc.)
- Grant Evmux permission to stream on your behalf
- The popup closes automatically when done
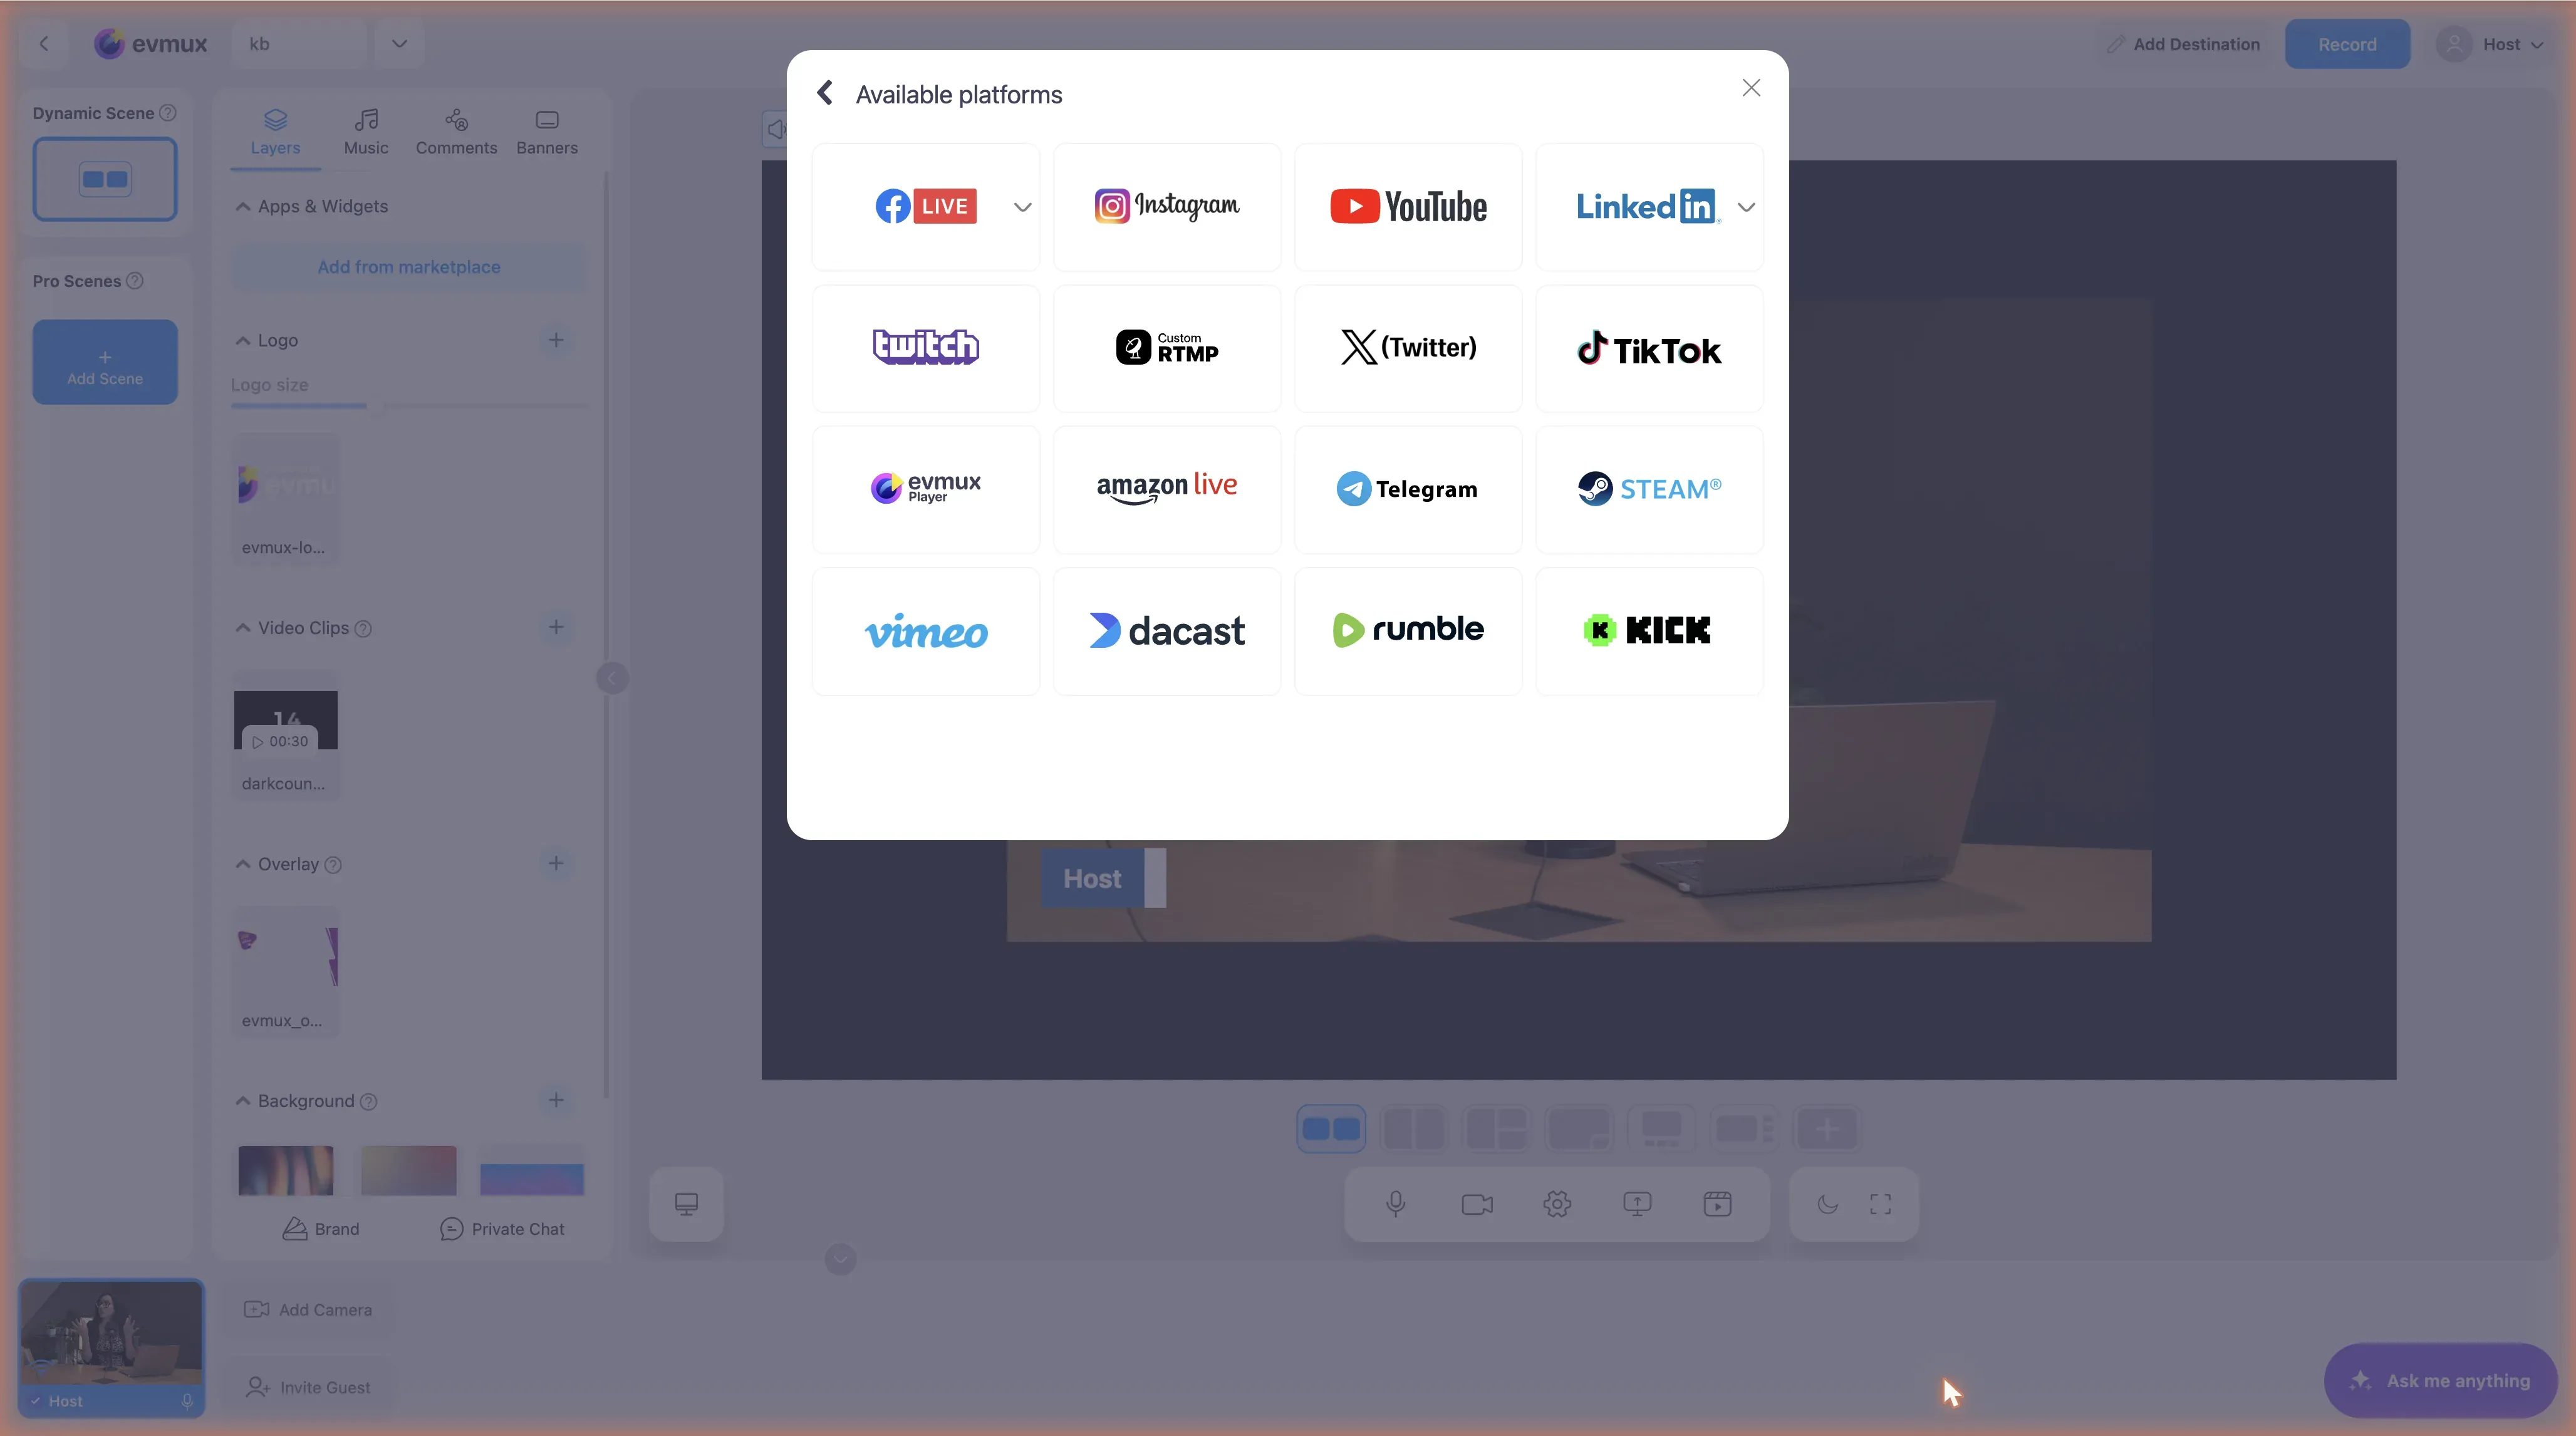
Step 6: Select Channel/Page (if needed)
If you have multiple channels or pages:
- A dropdown appears to select which one to use
- Choose the channel/page you want to stream to
- Click Save or Done
Step 7: Destination Ready
Your destination now appears in the destinations list with a toggle to enable/disable it.
Going Live After Setup
Once your destination is configured:
- Click the Go Live button in the header
- Make sure your destination is enabled (toggle ON)
- Select your starting scene
- Click Start to begin broadcasting
What you can set on each destination
Opening a connected destination shows the fields that platform accepts. They are filled in before going live and are sent to the platform with the broadcast:
| Destination | Fields it offers |
|---|---|
| YouTube | Title, Description, Privacy (Public / Unlisted / Private), Category |
| Title, Description, Privacy (Public / Private), Thumbnail image | |
| Title, Description, Thumbnail image | |
| Twitch | Title |
| Custom RTMP | Server URL, Stream Key, Resolution (1920x1080 or 1280x720) |
Two things worth knowing: Custom RTMP is the only destination with a resolution choice — everywhere else the output is a fixed 1920x1080 — and the privacy setting here is the one that decides whether Facebook viewers can comment (see facebook-privacy-settings).
Platform-Specific Notes
YouTube
- Your YouTube channel must have live streaming enabled
- New channels may need to wait 24 hours after enabling live streaming
- You’ll select which YouTube channel if you have multiple
- You can stream to your Profile, a Page, or a Group
- Select the appropriate option during setup
- Make sure you have admin rights for Pages/Groups
Twitch
- Your Twitch stream key is configured automatically
- Make sure your Twitch account is in good standing
Custom RTMP
For platforms not listed, use Custom RTMP:
- Select “Custom RTMP” from the platform list
- Get the RTMP URL and Stream Key from your platform
- Enter both values in Evmux
- Save the destination
The stream key is issued by the platform, not by evmux — it is effectively a password for your broadcast, so it should never be shared publicly. Where to find it:
| Platform | Where the key lives |
|---|---|
| YouTube | YouTube Studio → Go Live → Stream key |
| Creator Studio → Live producer | |
| Twitch | Creator Dashboard → Settings → Stream |
Nothing verifies an RTMP URL or stream key before you go live — a wrong one only shows up as a failure when the broadcast starts, so it is worth checking the values carefully.
That is not the same as testing the connection itself: evmux does have a Test Internet Stability check — see test-internet-stability. Use it when the question is “is my connection good enough to stream?”, and re-check the key when the question is “why did this one destination fail?”.
Changing Destinations While You Are Live
The Edit Destinations / Add Destination button in the header disappears once the session goes live — unless the account has mid-live destination editing enabled. This is the single most common surprise here: on most accounts the button is simply gone while streaming, which reads as “I lost access to my destinations”.
What is true regardless of that setting:
- Between clicking Start and the session reaching LIVE the button is hidden for everyone. It comes back if the account is allowed to edit mid-live.
- You can always stop ONE destination while live without touching that panel: each connected destination has an avatar in the header, and its drop carries a red Stop (confirm with Terminate). The other platforms keep streaming. That stream cannot be restarted inside the same session.
- Every destination’s status is readable while live from the same avatar drop — whether that platform is really receiving the stream, any error, and the link to watch it.
So: to add, remove or reconnect a destination on an account without mid-live editing, end the broadcast first. To drop one platform mid-show, use the header avatar’s Stop.
Removing a Destination
There is no delete button, no three-dot menu and no X on a destination. You remove a destination by clicking its platform tile again in the row of platform icons at the top of the Destinations popup — the same tile you clicked to add it:
- Open Destinations.
- In the platform row at the top, click the icon of the platform you want to remove (a connected one is shown as selected).
- A confirmation appears: “Remove this destination from list?” with Delete and Cancel.
- Click Delete — the destination is deleted from the account, not just switched off.
Notes:
- Removing is not the same as switching off. The toggle on a destination’s row only stops streaming to it for this session and keeps the connection; deleting removes it entirely and it has to be connected again from scratch.
- Guests cannot remove destinations they are not allowed to change — they get a “not allowed to modify destinations” warning instead.
- Deleting a destination while it is mid-broadcast stops that stream first.
Troubleshooting
Can’t find Destinations?
- In the Studio on desktop, look for the Destinations button at the top-right
- On mobile, open the main menu (burger icon) and choose Destinations
- You can also open Destinations from the Dashboard
Authorization popup didn’t open?
- Check if popups are blocked in your browser
- Allow popups from evmux.com
- Try clicking Connect again
YouTube says “Live streaming not enabled”?
- Go to YouTube Studio → Settings → Channel → Feature eligibility
- Enable live streaming
- Wait 24 hours before trying again
Destination not showing when going live?
- Check the destination toggle is ON (enabled)
- Try removing and re-adding the destination
- Re-authorize if the connection expired