

How to Switch Between Scenes
This guide shows you how to switch between different scenes during your broadcast for dynamic, professional productions.
Quick Steps
- Look at the Scenes panel (thumbnails at bottom or side)
- Click on the scene you want to switch to
- The scene changes (with transition if configured)
Understanding Scenes
Scenes are pre-configured layouts. The system includes:
Dynamic Scene
The Dynamic Scene (first item in scenes panel) automatically adjusts layout based on active participants. Great for:
- Auto-arranging multiple speakers
- Automatic grid layouts
- Quick setup without manual positioning
Pro Scenes
Custom scenes you create with specific layouts:
- Scene 1: Host only
- Scene 2: Host + Guest side-by-side
- Scene 3: Full-screen presentation
- Scene 4: Discussion panel (multiple guests)
- Scene 5: Outro/End screen
Method 1: Click to Switch
From the scenes column
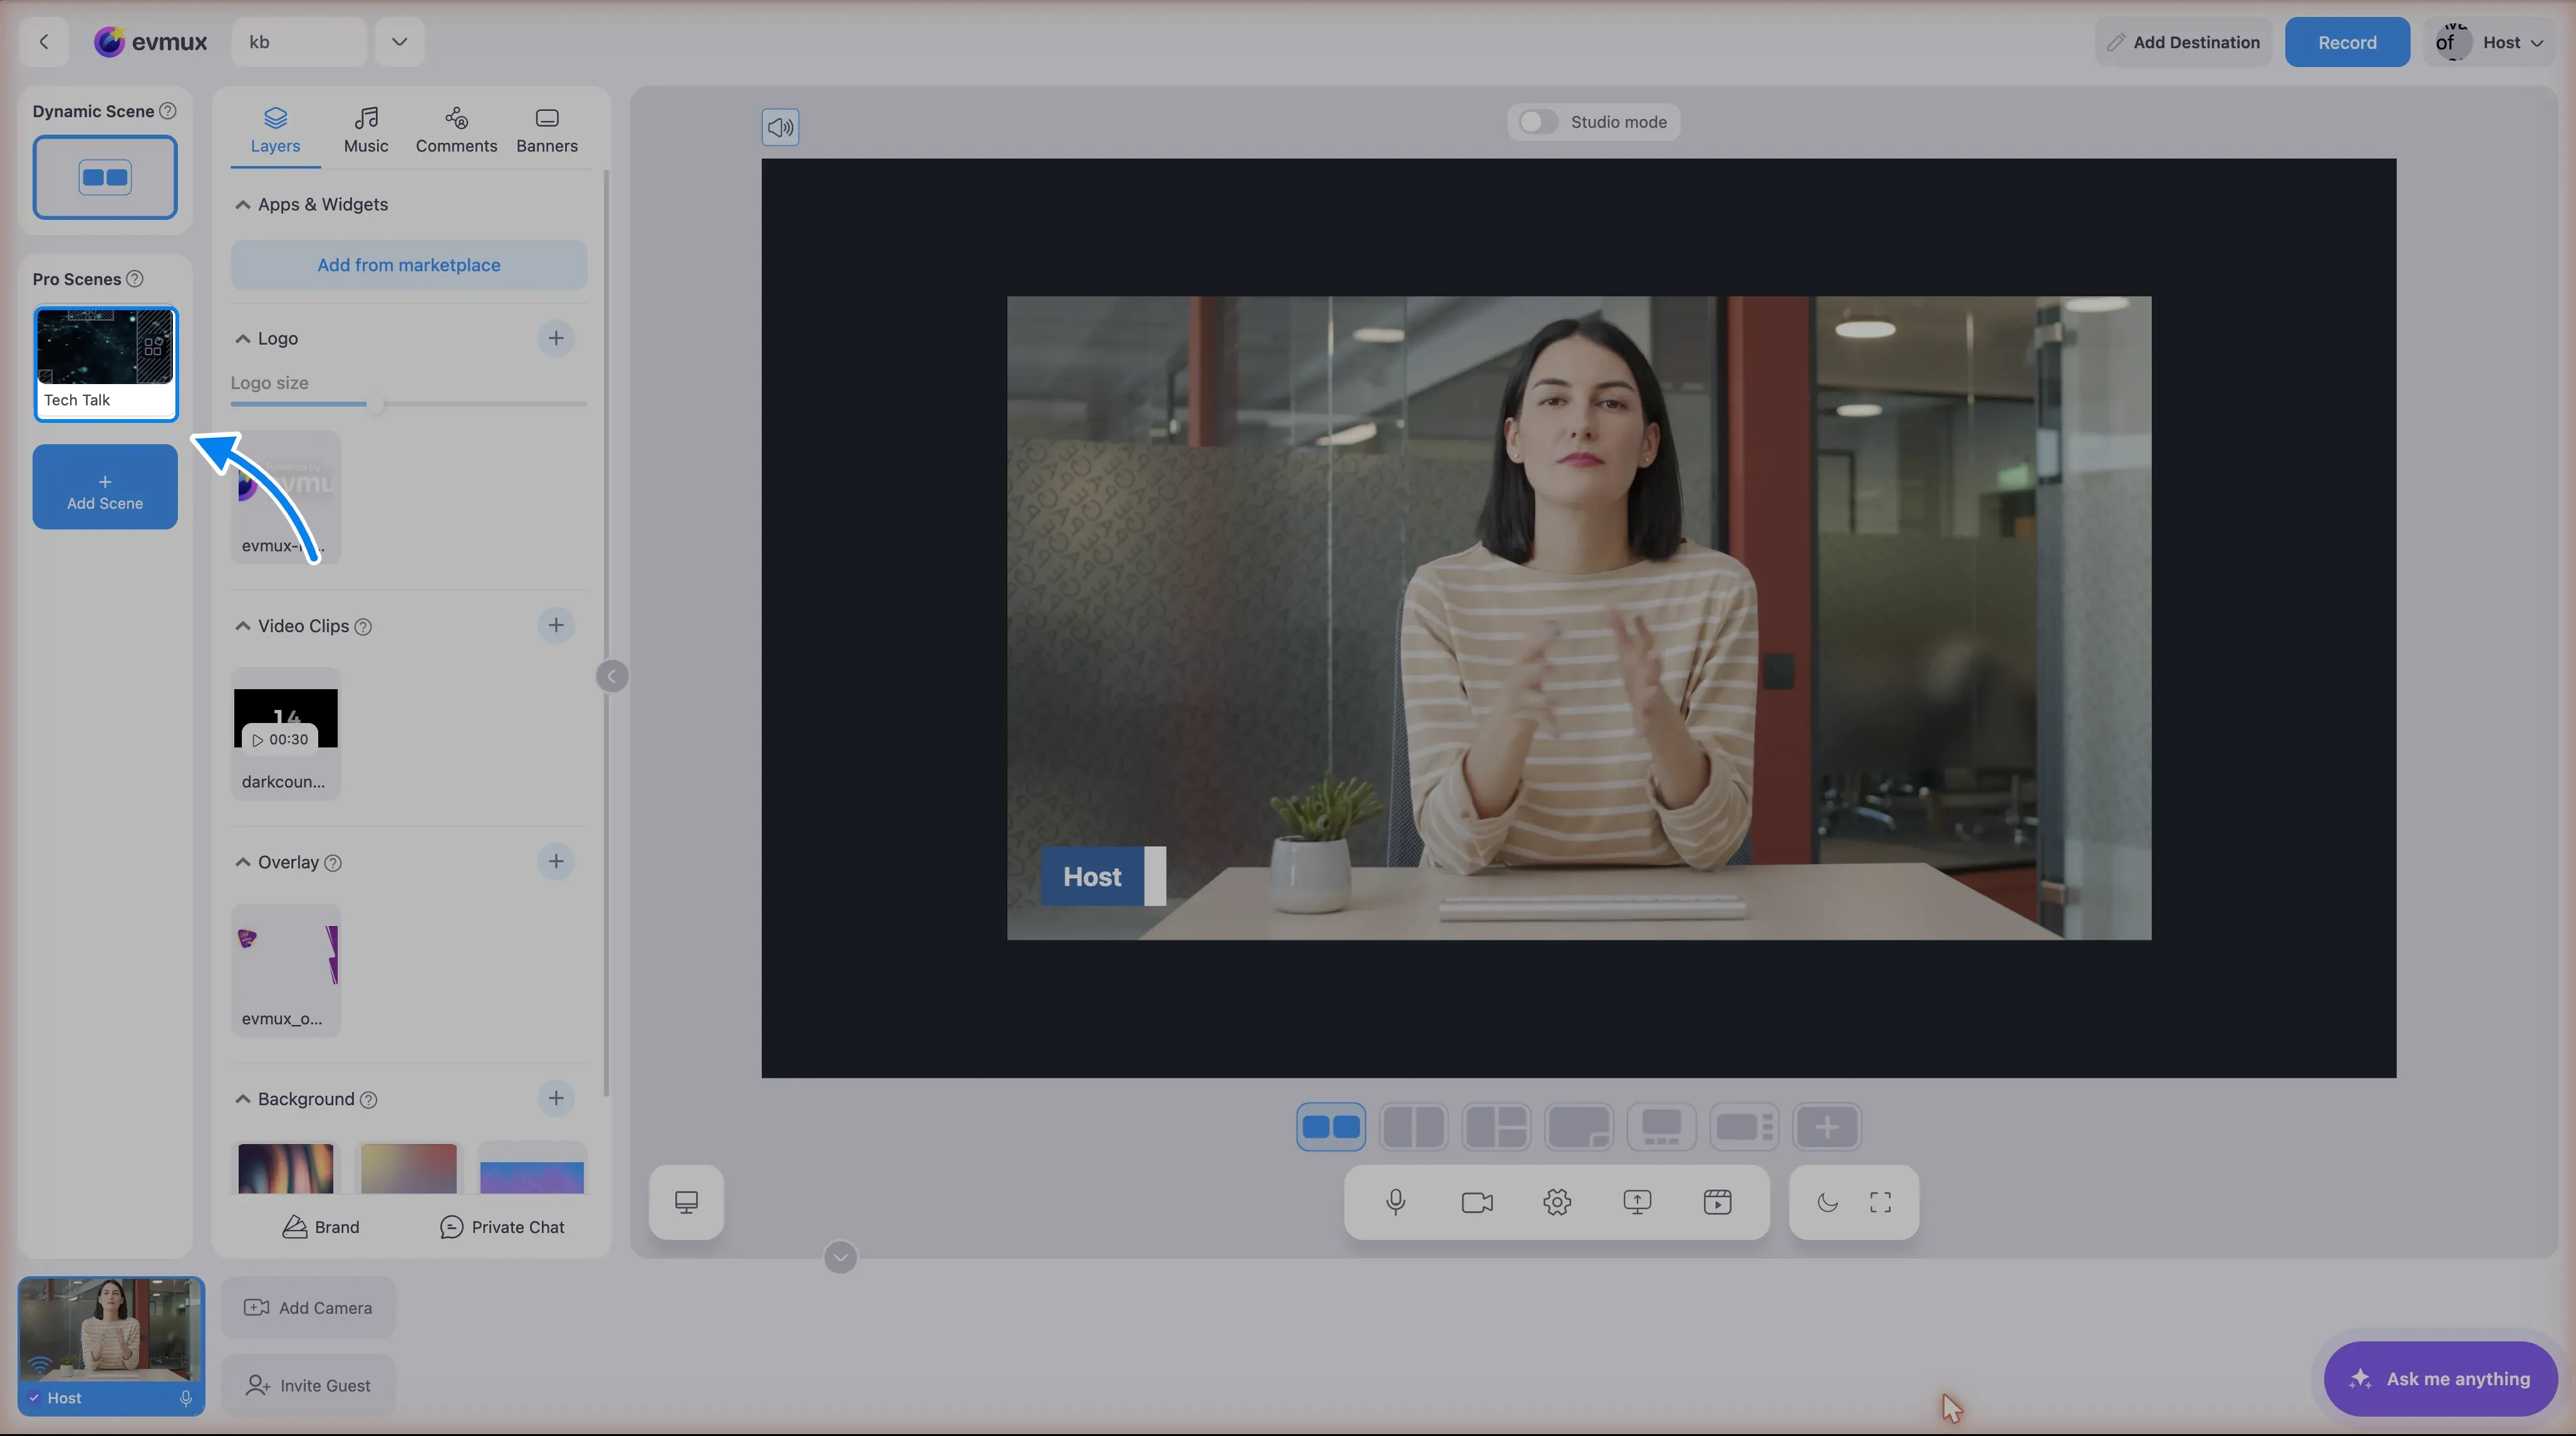
- Find the scenes column on the left of the editor: the Dynamic Scene on top, your Pro Scenes below it
- Each scene is a tile with a thumbnail of its content
- Click any tile
- That scene becomes active
Visual Indicators
- Current scene in editor has a highlighted border
- “Playing” label appears on the scene that’s currently live/broadcasting
- Scene thumbnails show preview of scene content
- During transition, a circular progress indicator shows transition progress
Method 2: Keyboard Shortcuts
Fast switching with hotkeys:
| Default Keys (Mac / Windows) | Action |
|---|---|
| Option + 1 / Alt + 1 | Play scene 1 (the Dynamic Scene) |
| Option + 2 to Option + 9 | Play scenes 2 to 9 |
| Option + N | Play next scene |
| Option + P | Play previous scene |
| Option + L | Transition from Edit to Live (Studio mode) |
Configure custom shortcuts: Settings > Hotkeys
Scene Transitions
When switching scenes, a transition animation can play. Transitions are configured per scene - each scene can have its own transition.
Transition Types
| Type | Description |
|---|---|
| Default (Fade in) | The standard fade |
| Cut | Instant switch, no visible animation |
| Fade Down / Fade Up | Fades while sliding down or up |
| Roll In/Out | Rolls the scene out |
| Zoom In/Out | Zooms the scene out |
| Slide Down / Slide Up | Slides the scene away |
| Flip In/Out | Flips the scene |
| Video stinger | A short video that plays over the switch. Eight system stingers are built in, or upload your own WEBM |
How to Disable / Change Scene Transition
To disable the transition animation on a scene (or change it to a different one):
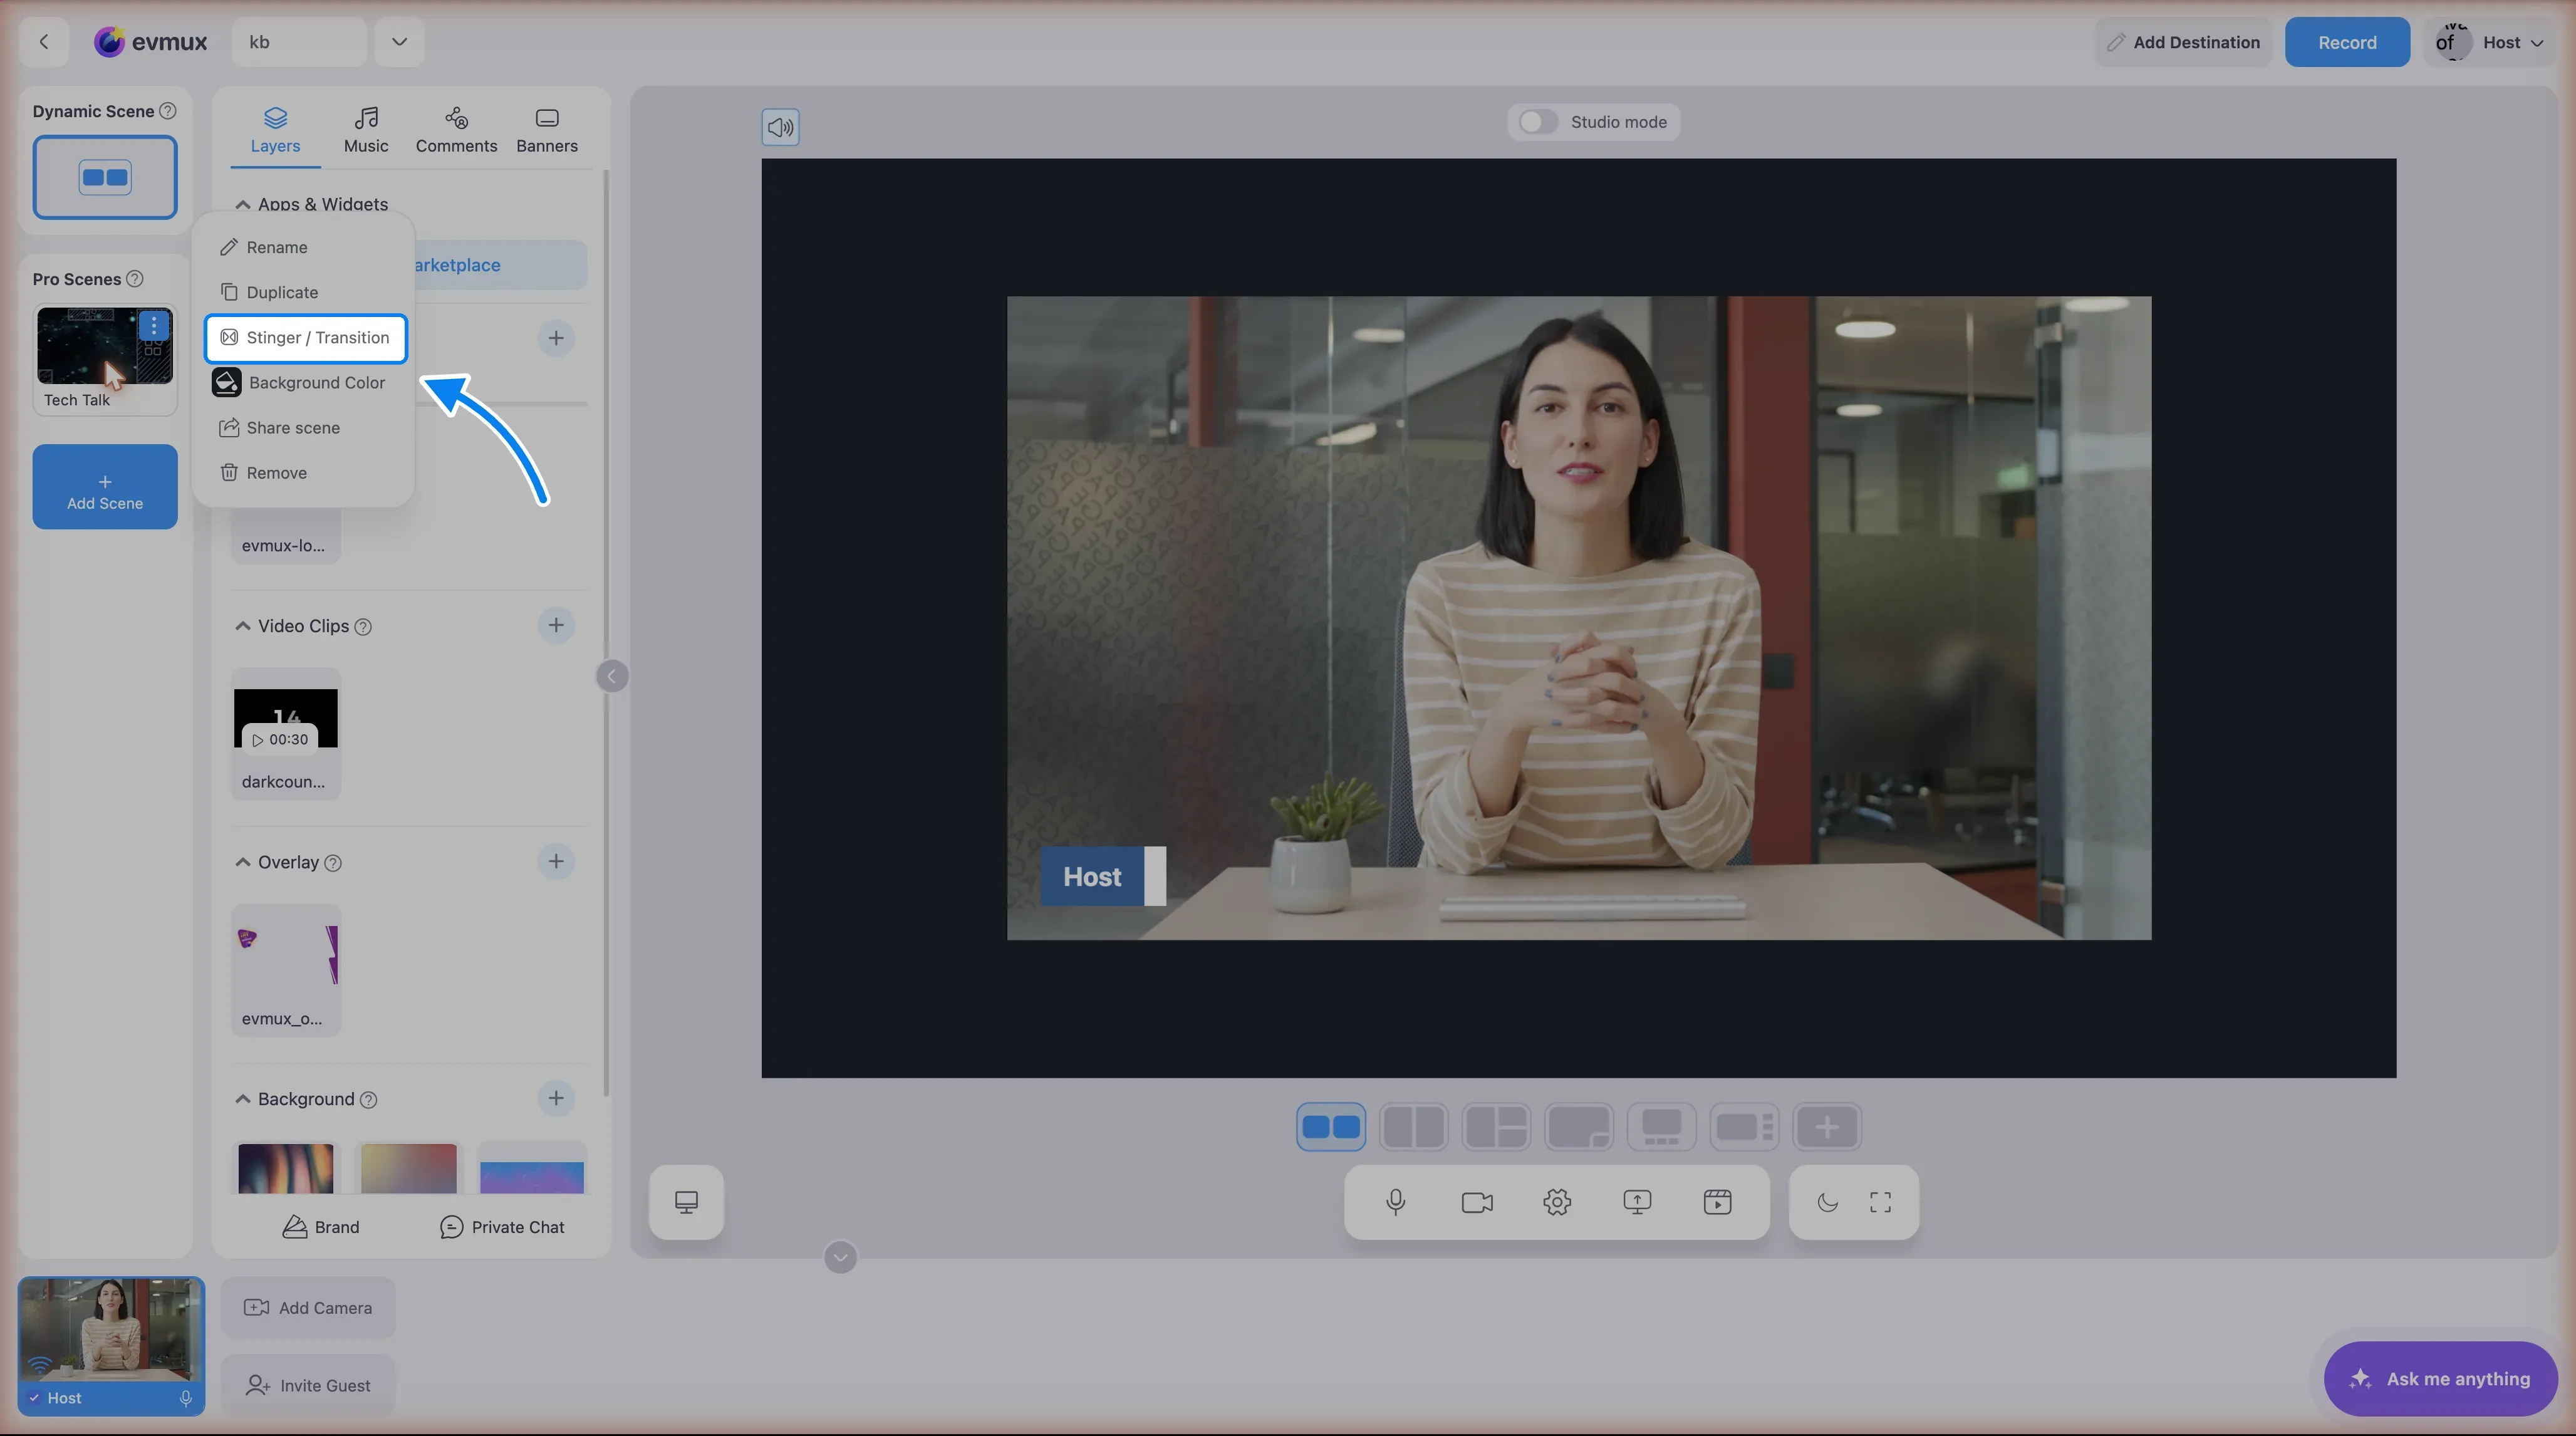
- Right-click the scene tile in the scenes column
- Select “Stinger / Transition” from the menu
- The picker opens: system stingers on top, the plain transitions below them, and an Add button for your own WEBM video
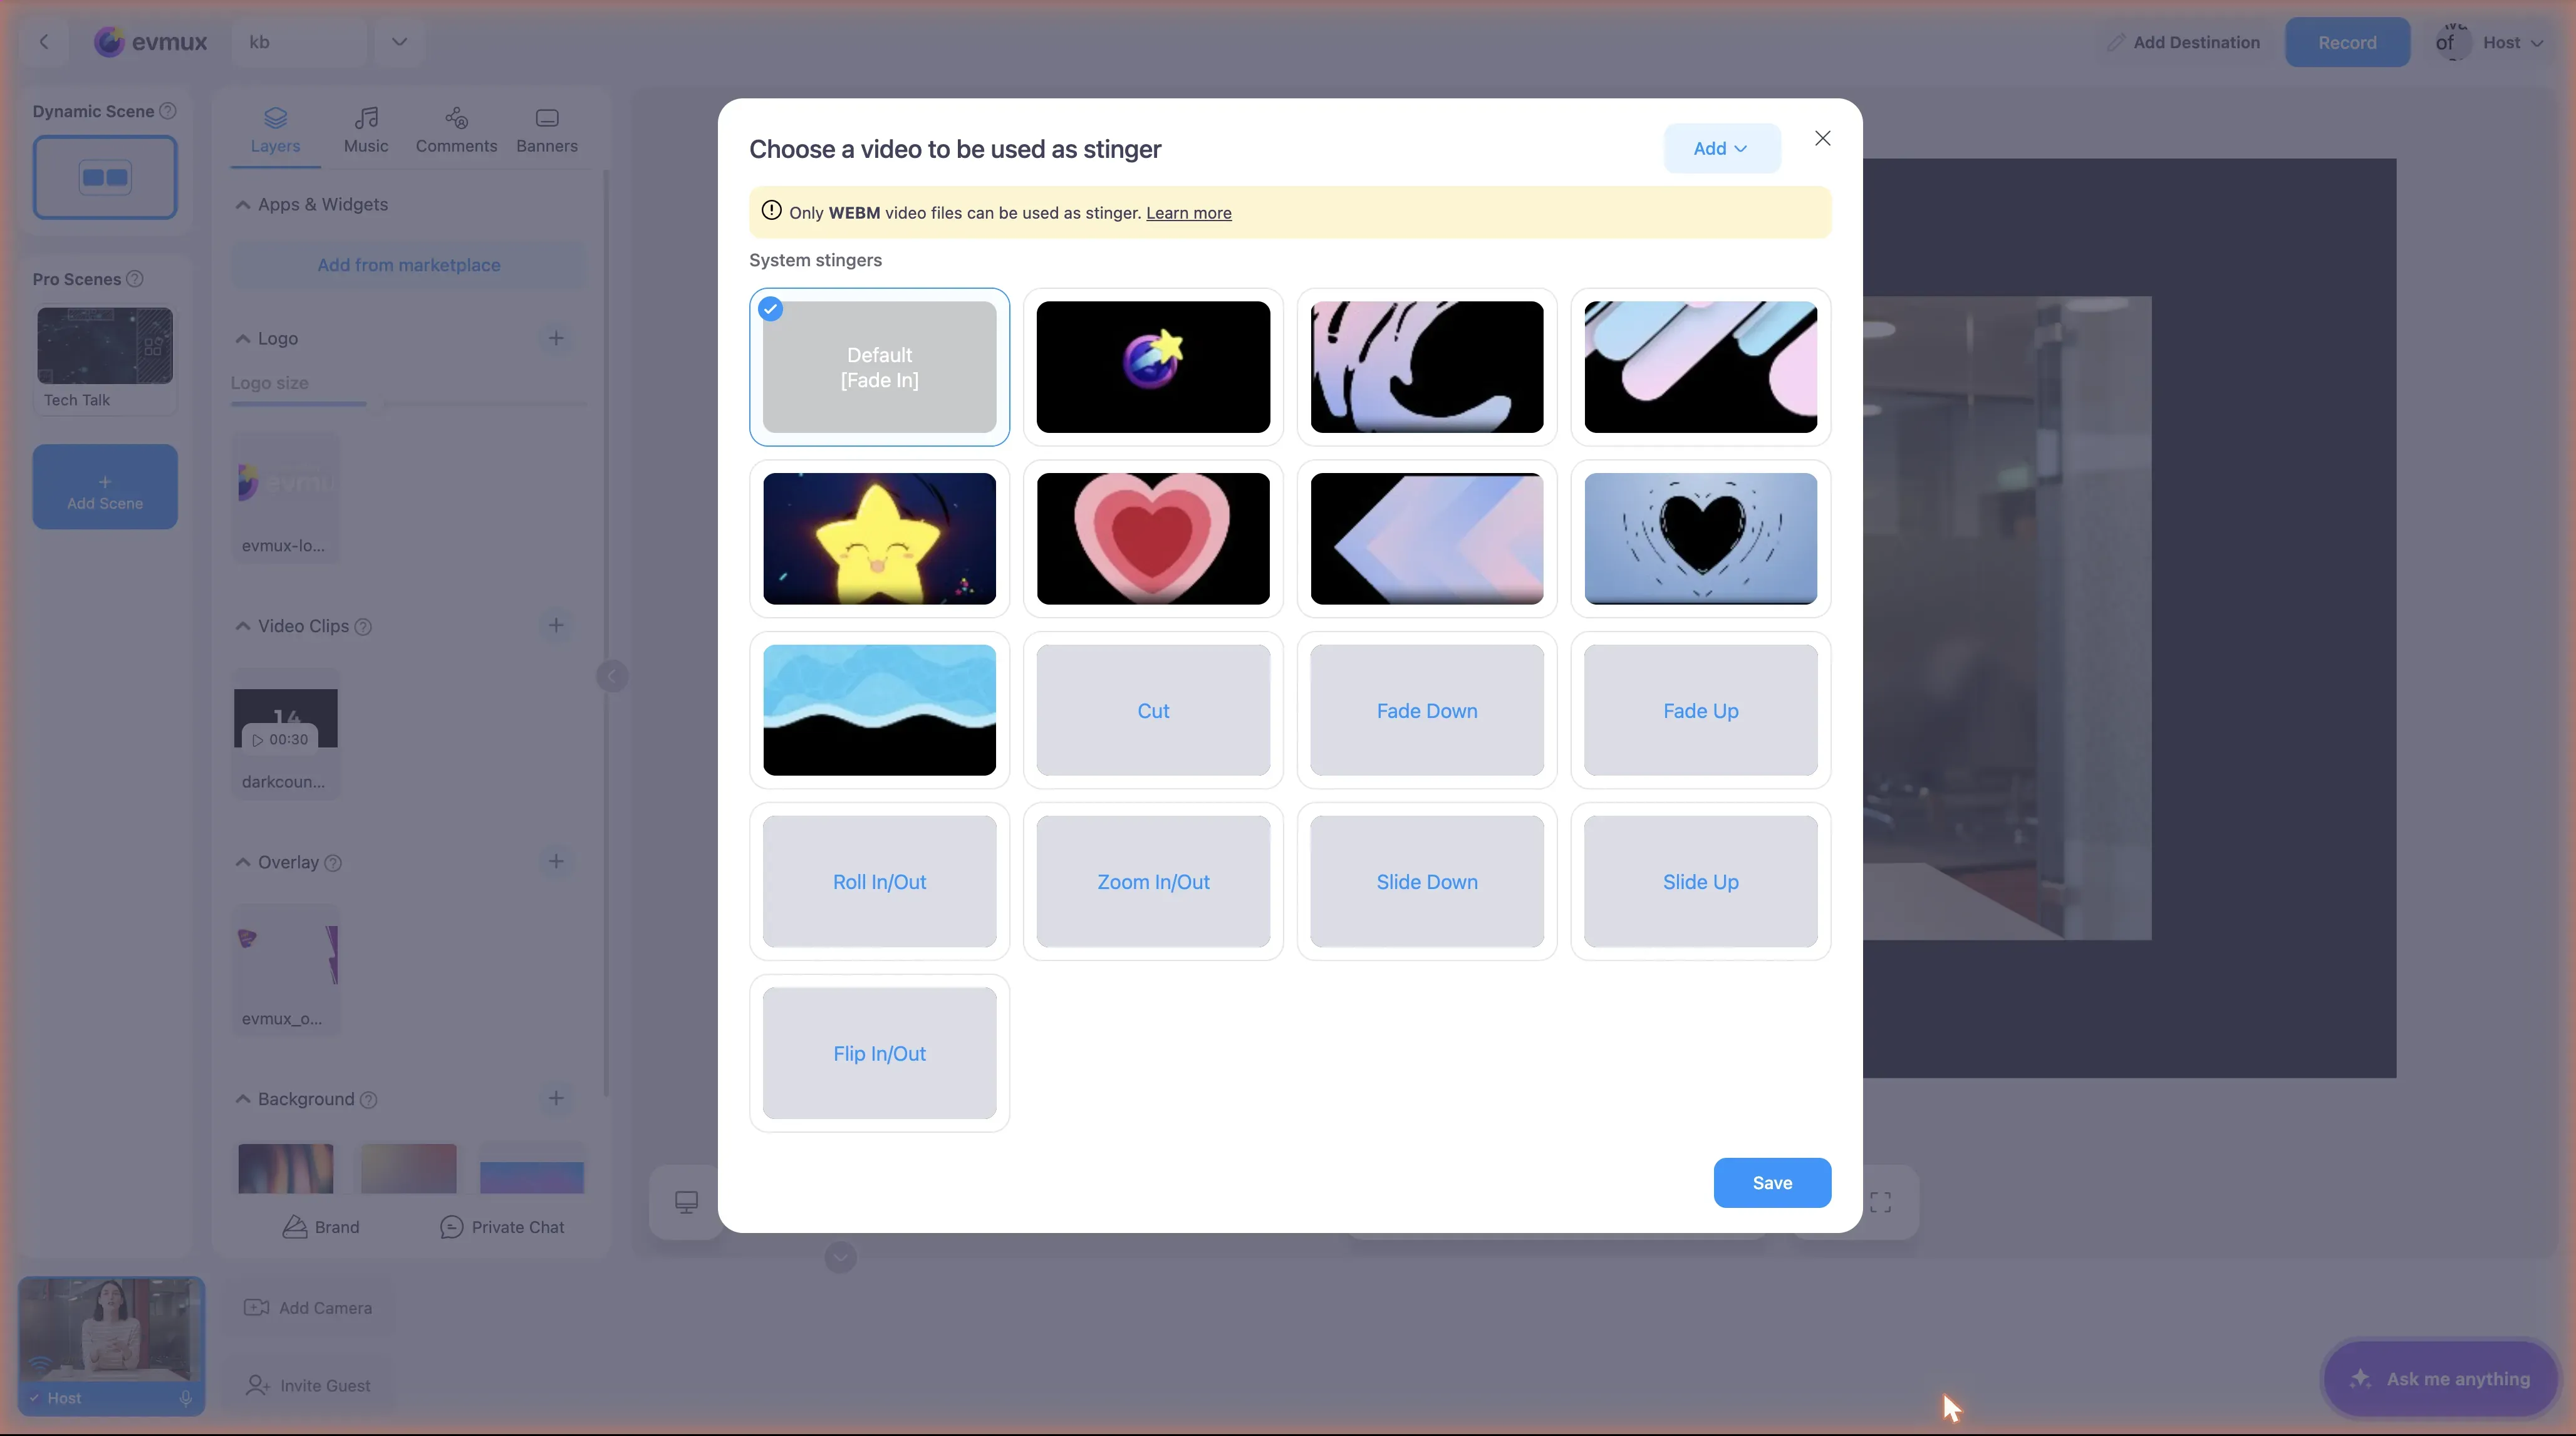 4. Choose your option:
- Cut - Instant switch with no visible animation
- Default - Remove any custom transition (uses default fade)
- Any other transition - Select it from the list
- Click Save
Important: Transitions are per-scene, not global. You need to set the transition for each scene individually. To disable animations on ALL scenes, repeat the steps above for each scene and select Cut on each one.
Video Stinger Transitions
Stingers are custom video overlays that play during scene switches:
- Right-click on a scene → “Stinger / Transition”
- In the picker, select a built-in stinger or upload your own
- Set the cue point (the moment in the video when the scene should switch)
- Adjust volume and mute settings
- Save
Scene Preview Mode
Preview scenes before switching live:
- Enable Preview Mode if available
- Click a scene to load it in preview
- Review the layout
- Click Take or Go Live to switch
Auto-Scene Switching
Some setups support automatic switching:
Timer-Based
- Set a scene to auto-switch after X seconds
- Good for rotating content
Trigger-Based
- Switch when someone starts talking
- Switch when screen share starts
Best Practices
Before Going Live
- Test all scene switches
- Verify transitions look good
- Check keyboard shortcuts work
- Have scenes in logical order
During Broadcast
- Plan your scene switches
- Don’t switch too frequently (jarring)
- Use transitions for smoothness
- Have a “safe” scene to fall back to
Scene Organization
- Number scenes logically (1, 2, 3…)
- Name scenes descriptively
- Keep frequently-used scenes accessible
- Group similar scenes together
Multi-Scene Workflow
For Interviews
- Scene 1: Intro/Welcome
- Scene 2: Host introduction
- Scene 3: Guest introduction
- Scene 4: Both on screen (main interview)
- Scene 5: Full-screen for key moments
- Scene 6: Outro/Goodbye
For Presentations
- Scene 1: Title slide
- Scene 2: Presenter + slides
- Scene 3: Full-screen slides
- Scene 4: Q&A layout
- Scene 5: End screen
Troubleshooting
Scene won’t switch?
- Check if you’re clicking the right thumbnail
- Verify you’re not in edit mode
- Try keyboard shortcut instead
Transition not playing?
- Check transition settings
- Verify transition duration isn’t 0
- Try a different transition type
Wrong scene shows?
- Verify scene order matches expectations
- Check keyboard shortcut assignments
- Rename scenes to avoid confusion
Scene looks different than expected?
- Preview the scene before going live
- Check if layers are configured correctly
- Verify participant feeds are connected