

How to Add an App or Widget
Apps and widgets add extra functionality to your broadcast - like interactive overlays, social media integrations, and custom graphics. This guide shows you how to add them from the App Market.
Apps work on BOTH scene types
Apps can be added to the Dynamic Scene and to Pro scenes. The two routes differ only in how you reach the App Market; both open the same market and add the app as a layer.
Quick Steps
On the Dynamic Scene: Layers tab -> expand Apps & Widgets -> Add from marketplace
In a Pro scene: Layers tab -> Add New Layer -> Apps & Widgets
Then, in either case: search for the app, click it to open its page, and click Add.
Step-by-Step Guide
Step 1: Open the App Market
From the Dynamic Scene: open the Layers tab, expand the Apps & Widgets accordion and click Add from marketplace.
From a Pro scene: select the scene, open the Layers tab and click Add New Layer, then choose Apps & Widgets.
Step 2: The layer-type menu (Pro scenes)
In a Pro scene the Add New Layer button opens a menu of layer types; Apps & Widgets is one of them. The Dynamic Scene has no such menu - its Apps & Widgets accordion goes straight to the market.
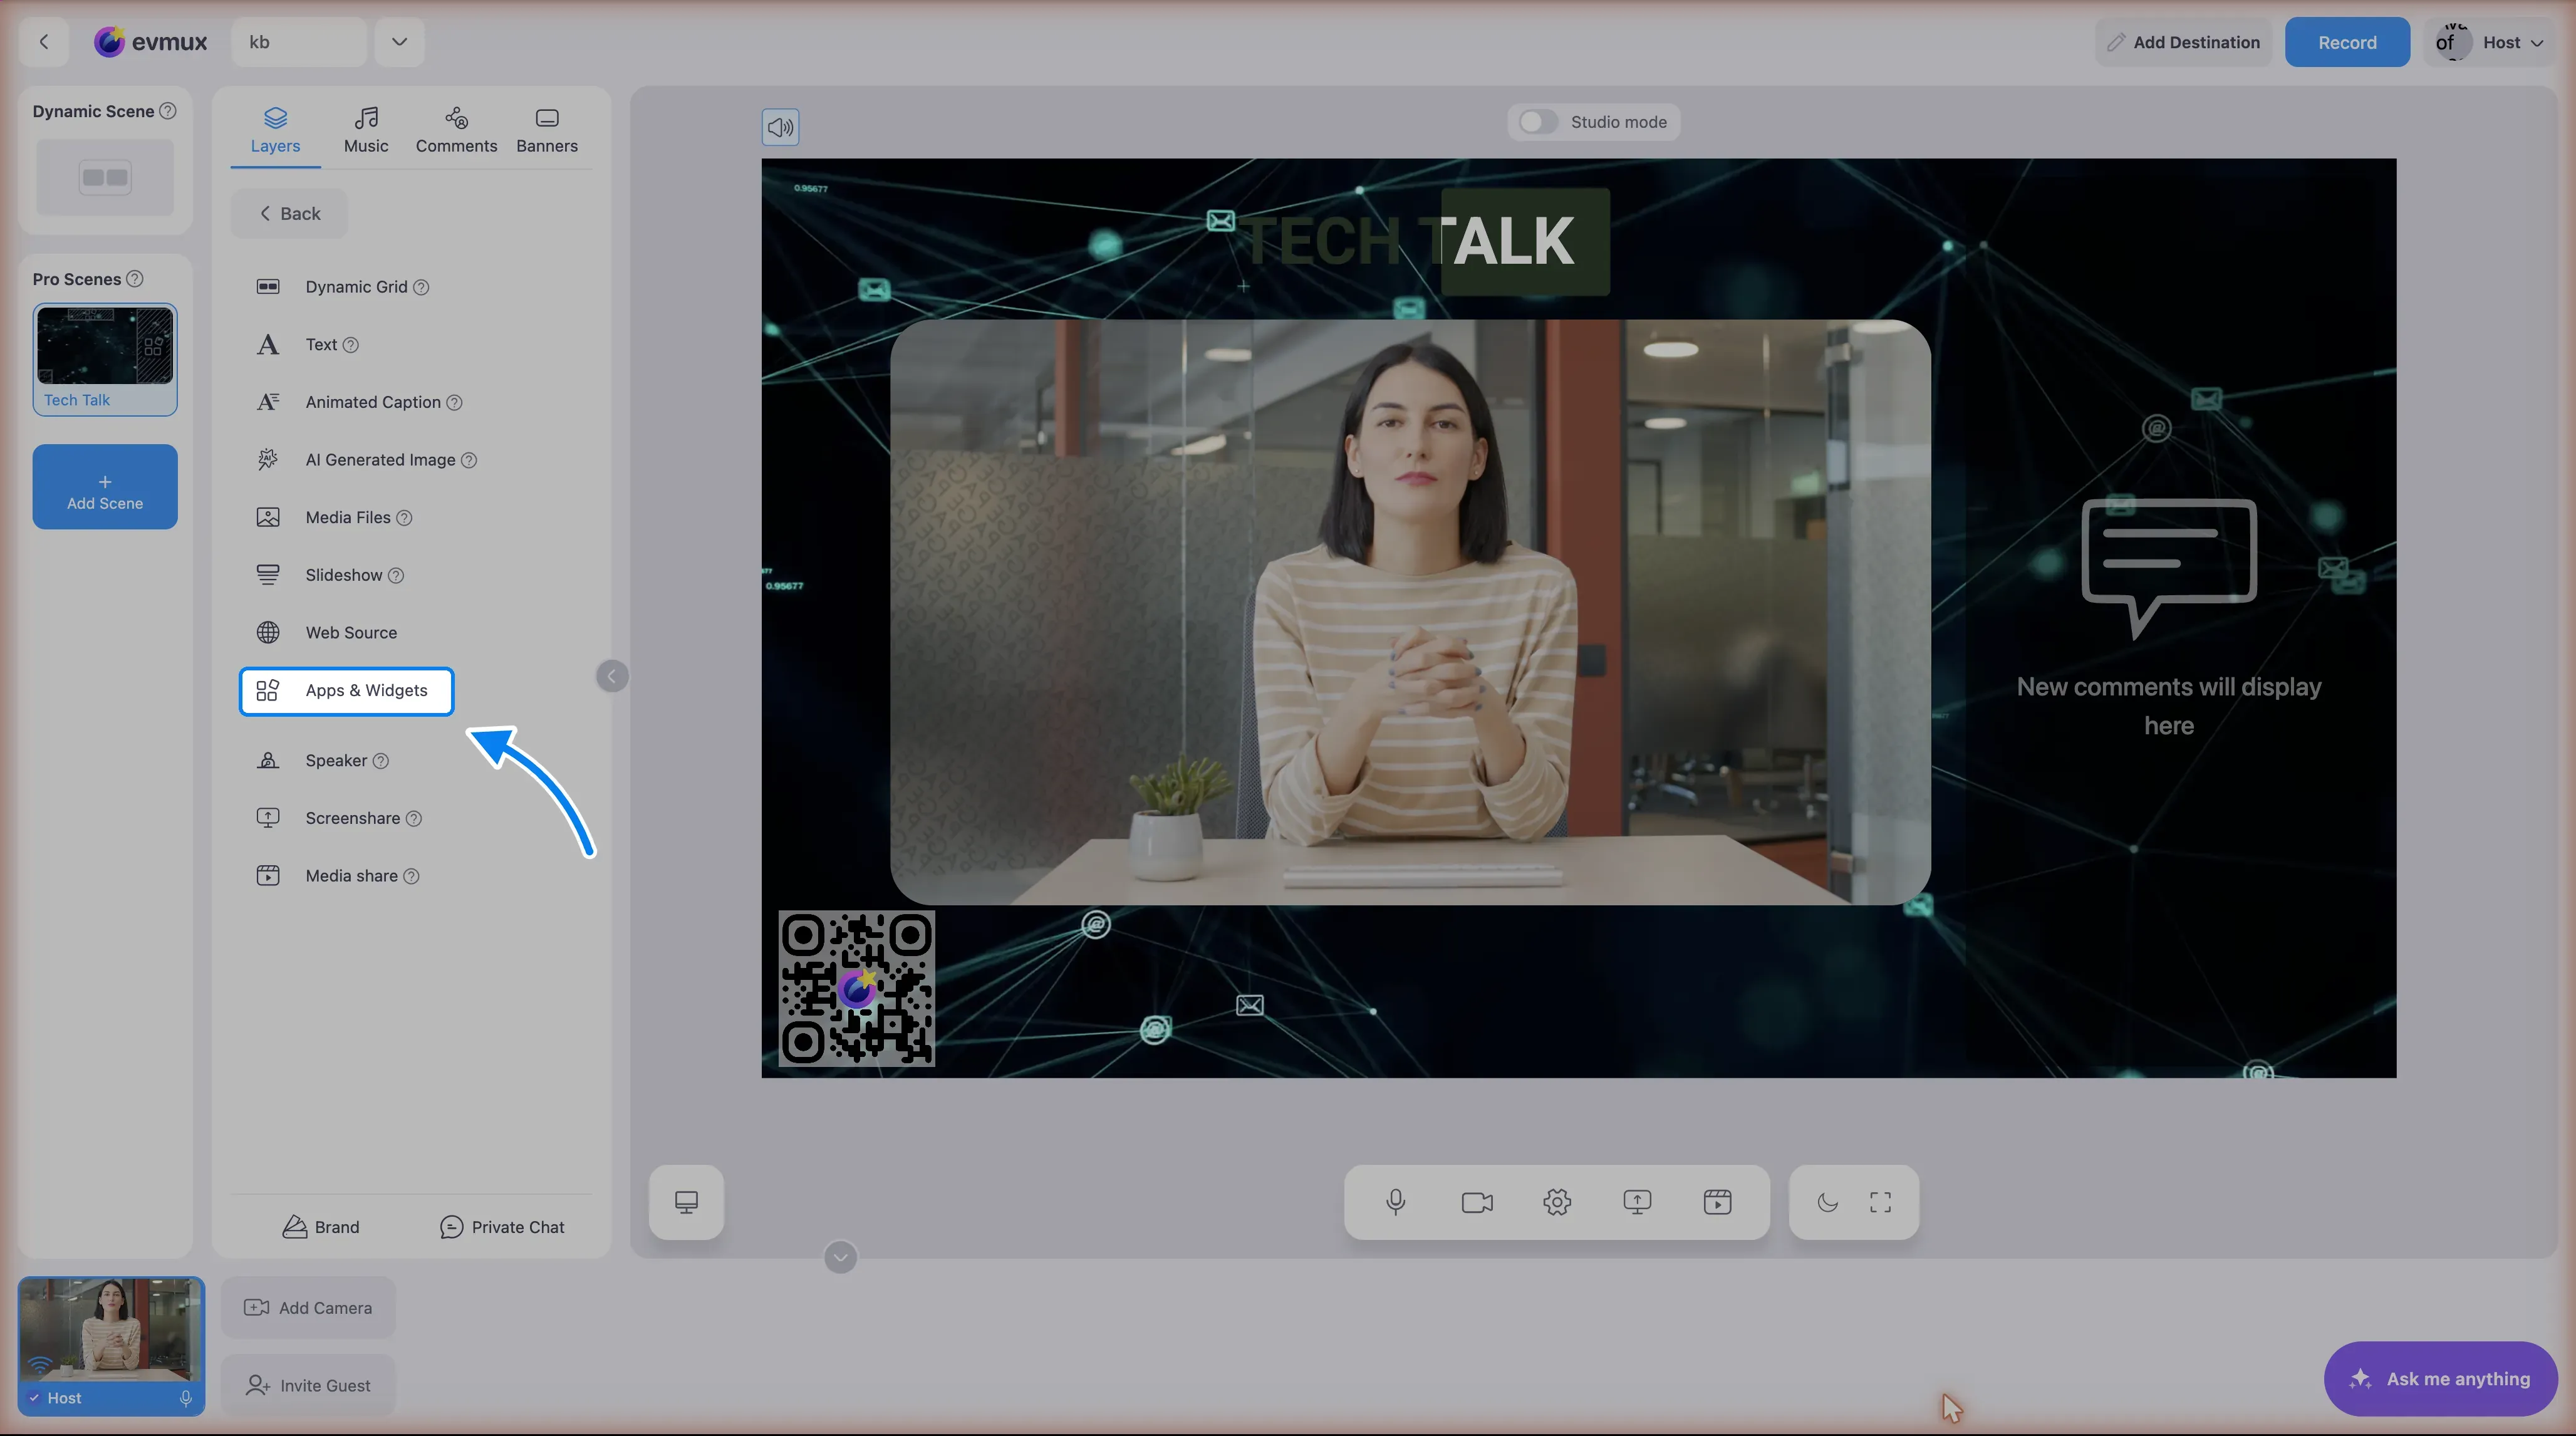
Step 3: Select Apps & Widgets
- In the Add Layer menu, find and click Apps & Widgets
- This opens the evmux App Market dialog
Step 4: Browse or Search for Apps
In the App Market dialog:
- Browse the available apps in the list
- Search by typing the app name or description in the search bar
- Apps are shown with their icon and name
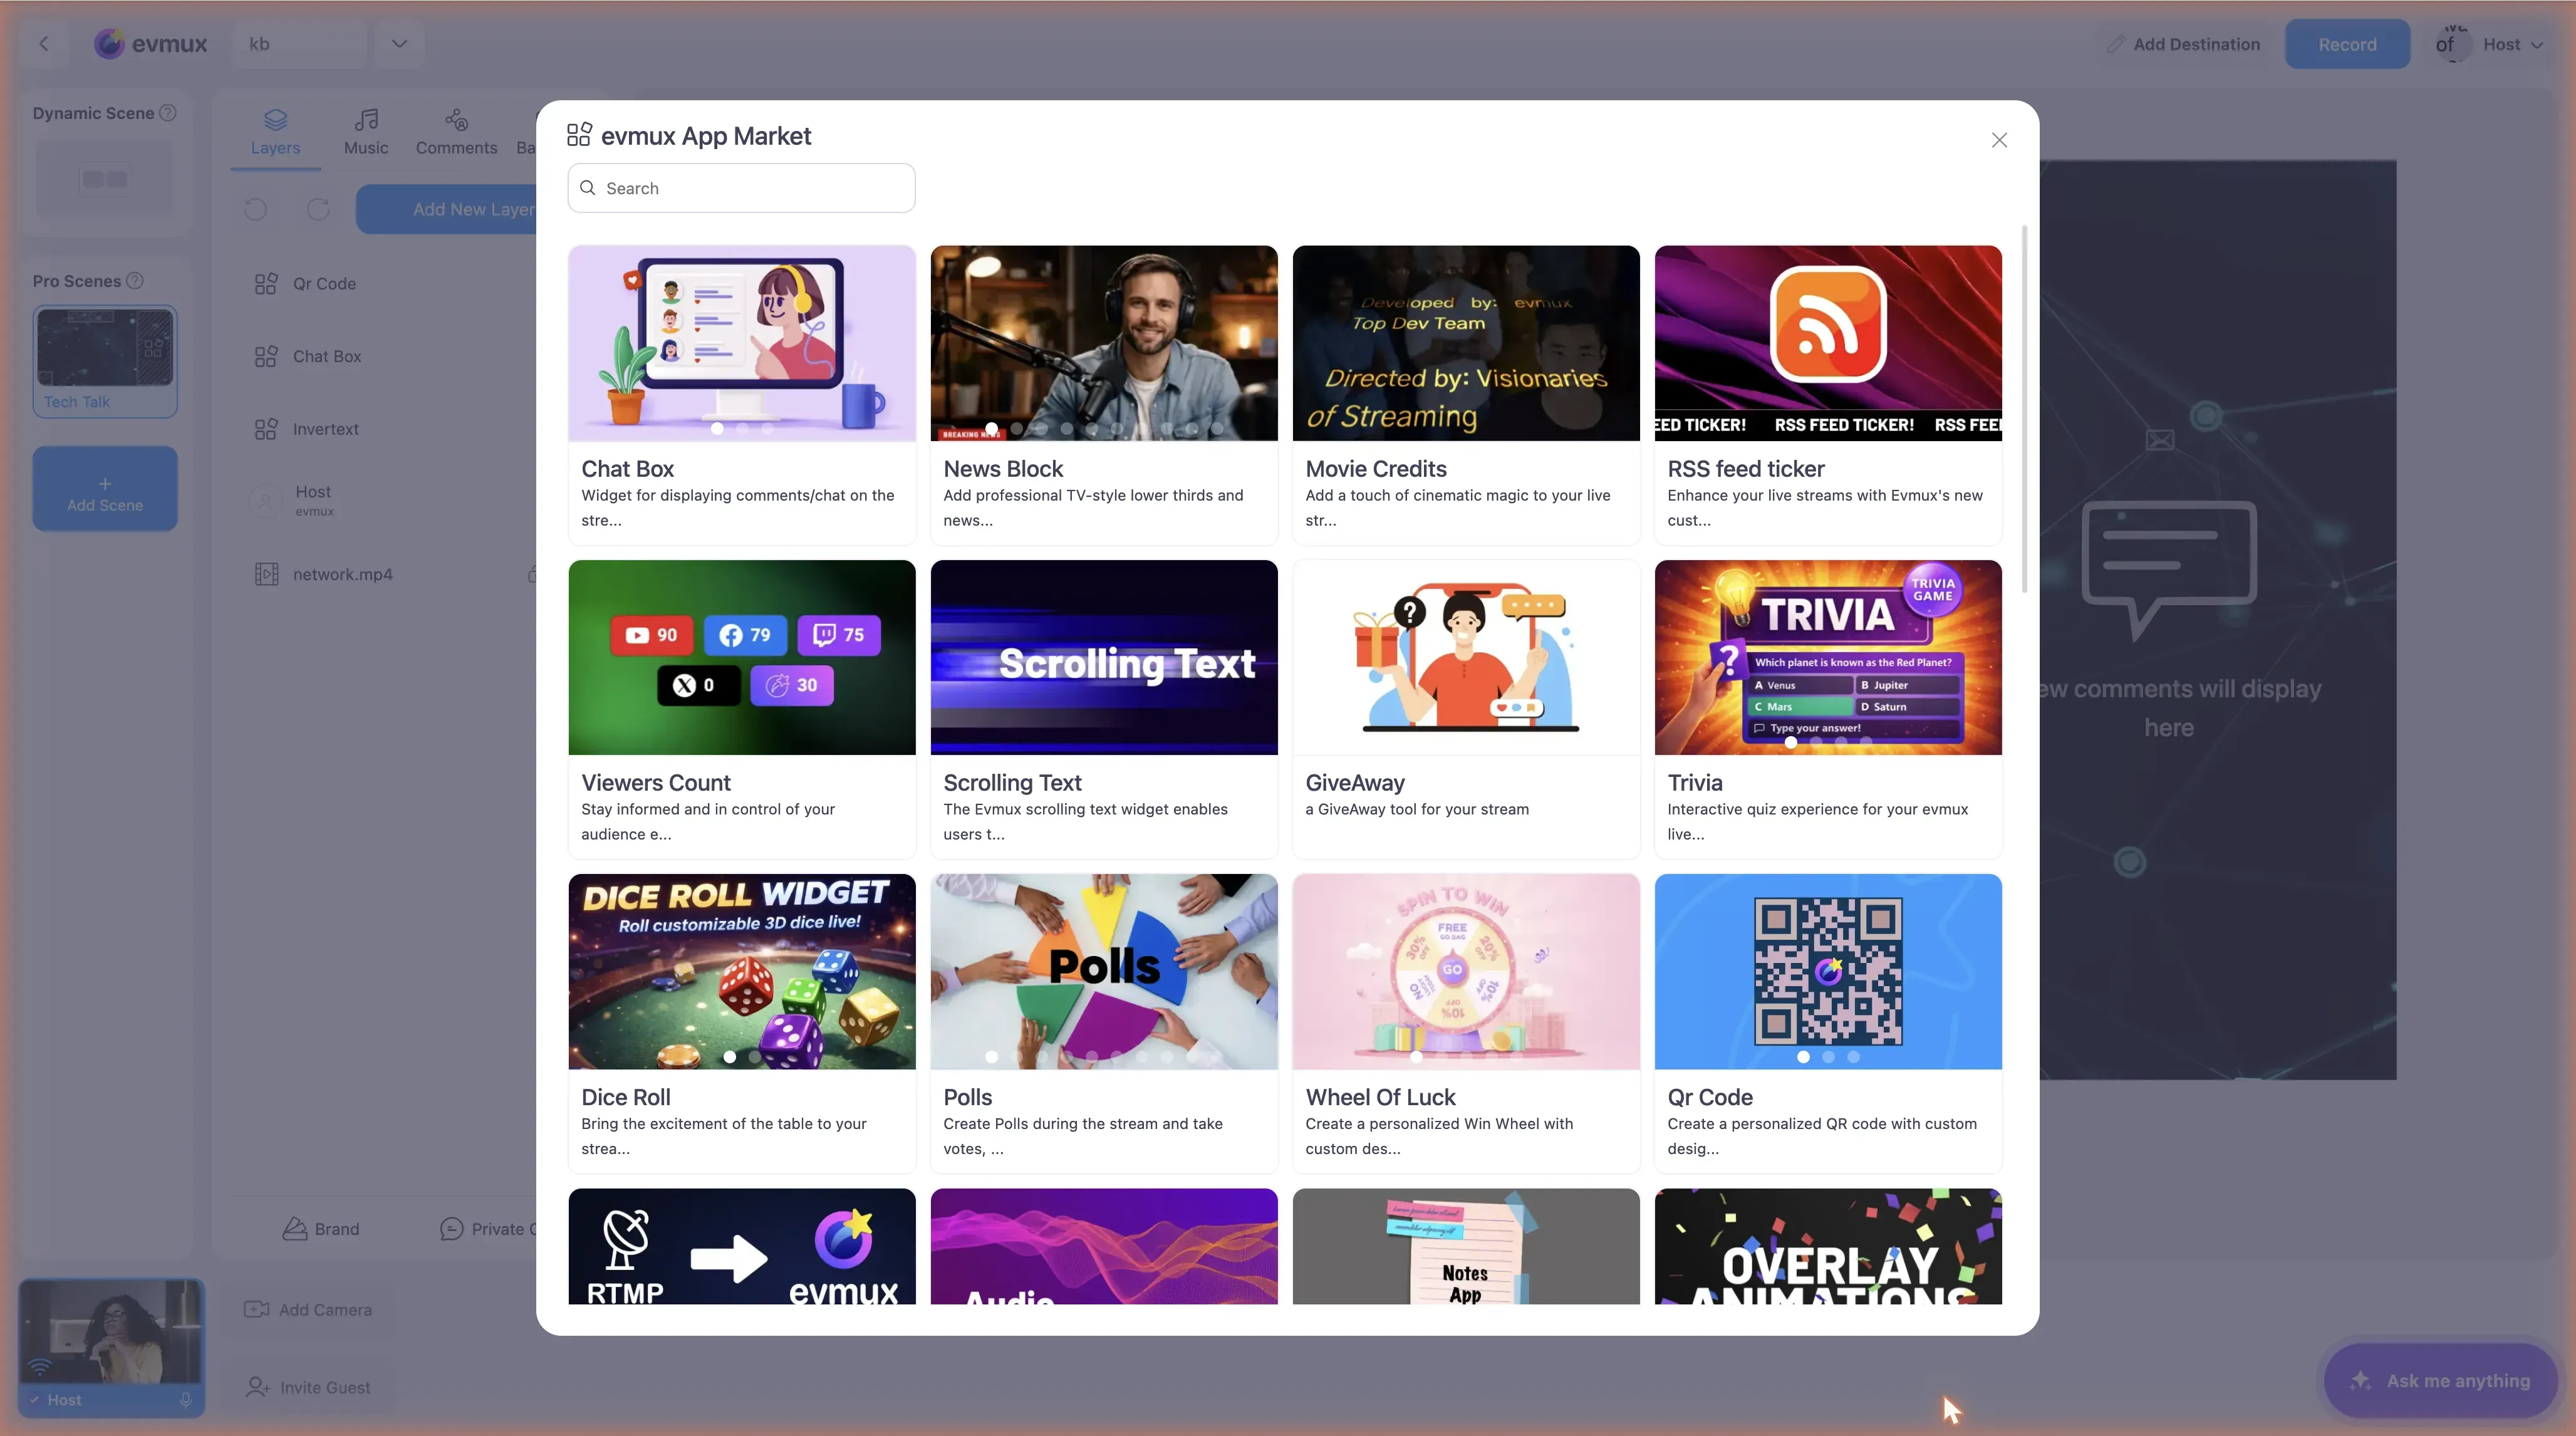
Step 5: View App Details
- Click on any app to see its details
- You’ll see:
- App name and description
- Developer information
- Screenshots or preview video
- Support contact
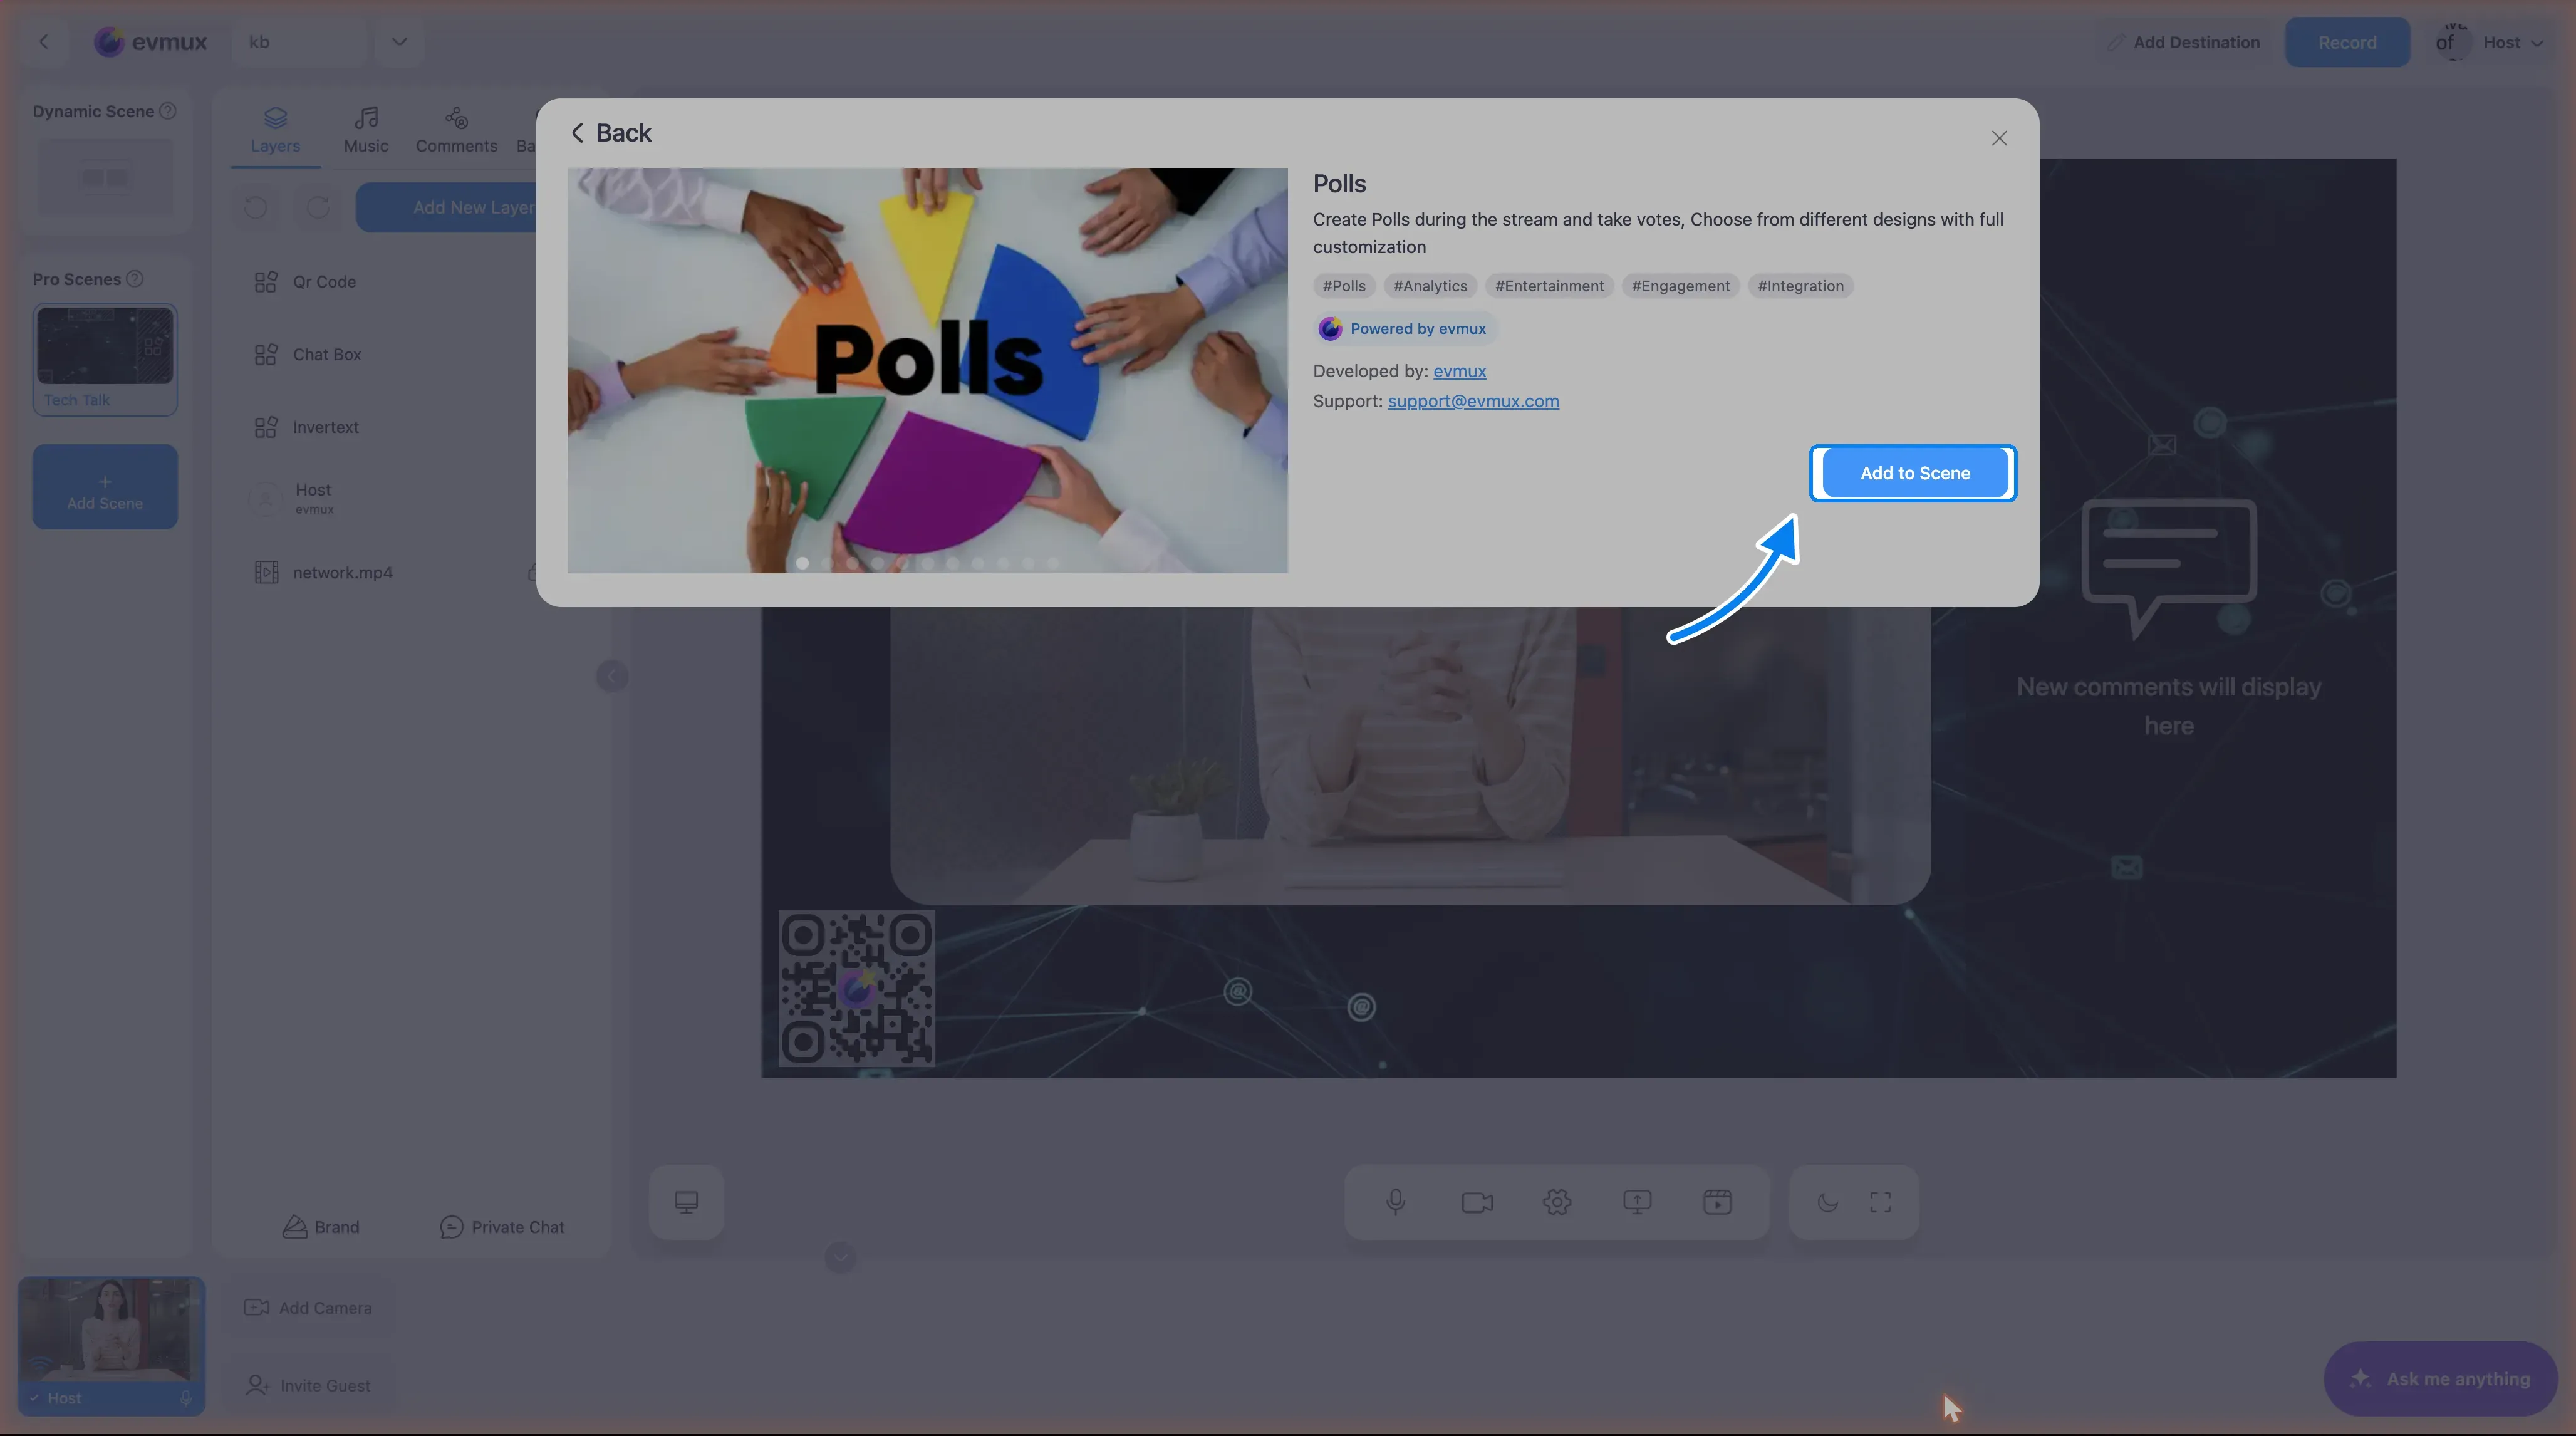
Step 6: Add the App to Your Scene
- Click the Add to Scene button
- The app is added as a new layer in your current scene
- The App Market dialog closes
- The app’s settings panel opens automatically
Step 7: Configure the App (Optional)
After adding:
- The Settings panel opens on the right side
- Configure any app-specific settings
- Position and resize the app layer as needed
On the Dynamic Scene
- Open the Layers tab
- Expand the Apps & Widgets accordion
- Click Add from marketplace - the App Market opens directly
- Search, pick the app, click Add; it lands on the Dynamic Scene as a layer
Positioning Your App
After adding an app, you can:
- Drag it to reposition on the scene
- Resize using the corner handles
- Adjust settings in the app settings panel that opens in the left-side tabs column
Troubleshooting
Don’t see “Apps & Widgets”?
- In a Pro scene it is an entry in the Add New Layer menu
- On the Dynamic Scene it is an accordion in the Layers tab, opened with Add from marketplace
- It is not tied to the scene type: both routes exist
App not appearing after adding?
- Check the Layers panel - the app should be listed
- Make sure the layer is visible (eye icon)
- Try refreshing if needed
App looks broken or blank?
- Some apps need configuration in the Settings panel
- Check the app’s settings on the right side
- Make sure you have internet connection (apps load externally)