

How to Add a Banner
This guide shows you how to create and display banners (lower thirds) for names, titles, and announcements.
Quick Steps
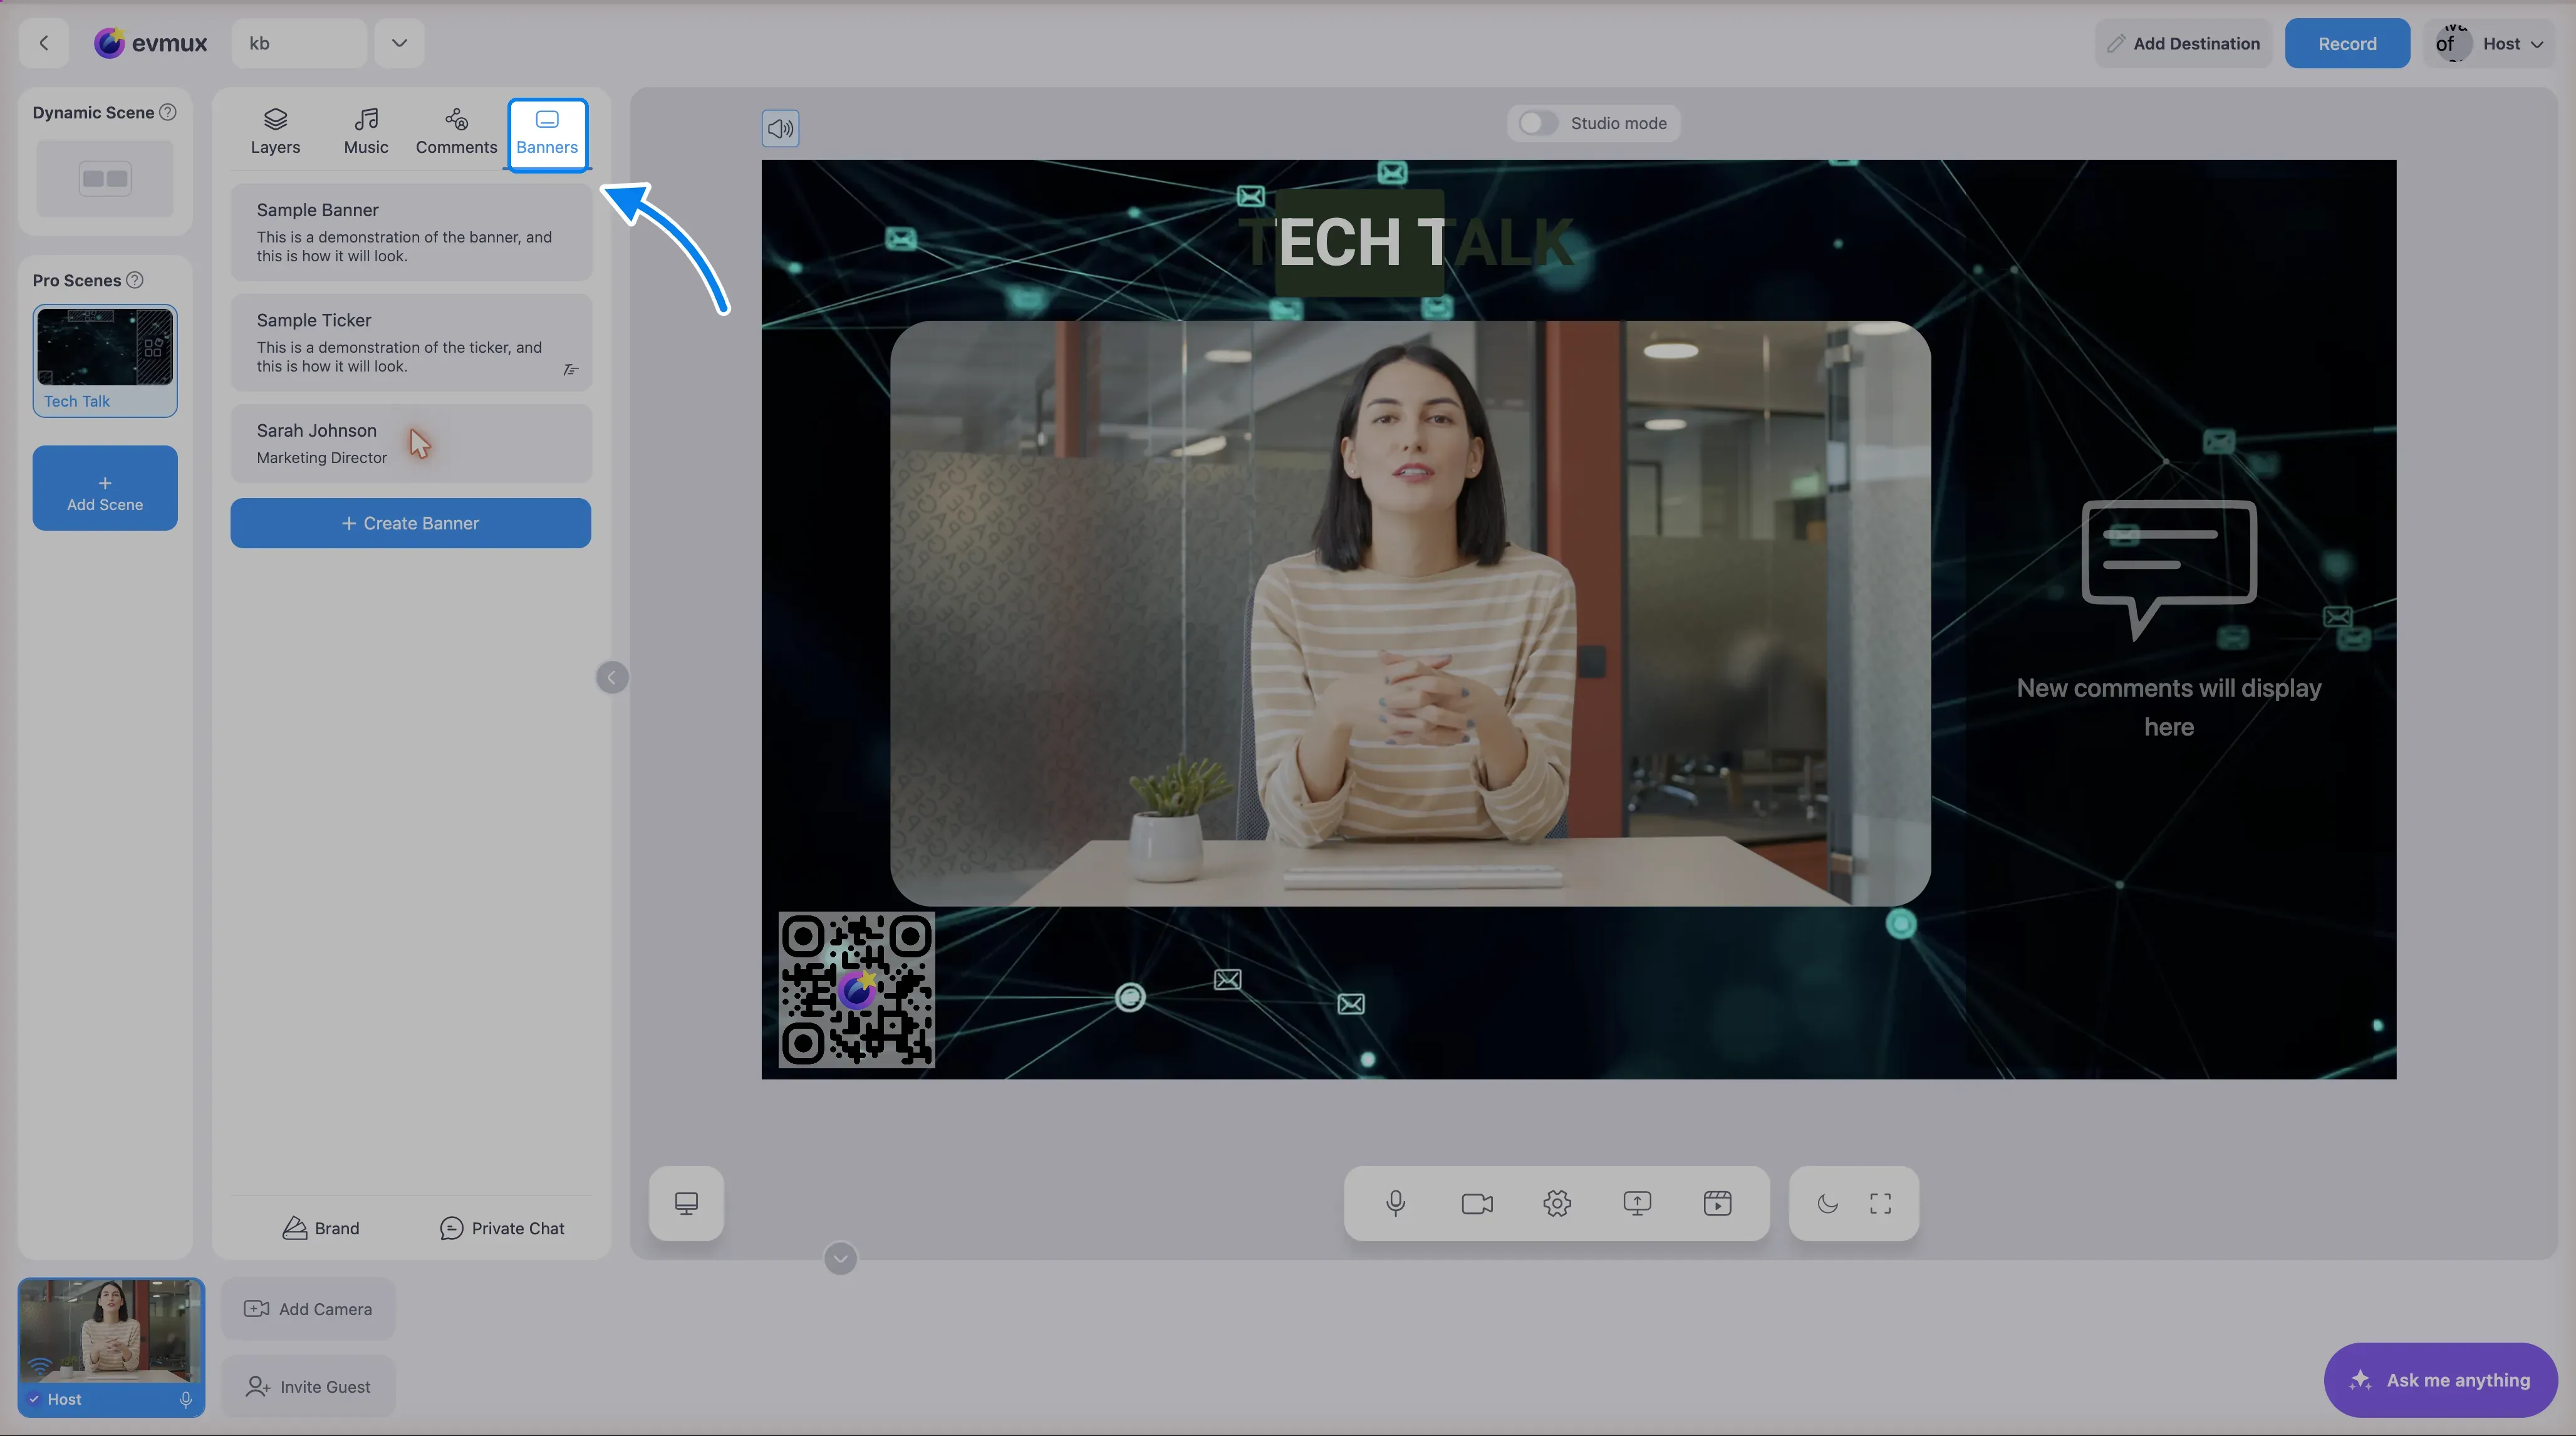
- Click the Banners tab in the left-side tabs panel
- Click Create Banner button
- Enter Primary and Secondary text
- Click Create to save
- Click on the banner in the list to show it on screen
Detailed Steps
Step 1: Open the Banners Tab
- In the left-side tabs panel, click the Banners tab
- The Banners panel shows your banner list. A new studio comes with a sample banner and a sample ticker to try
Step 2: Open the Create Form
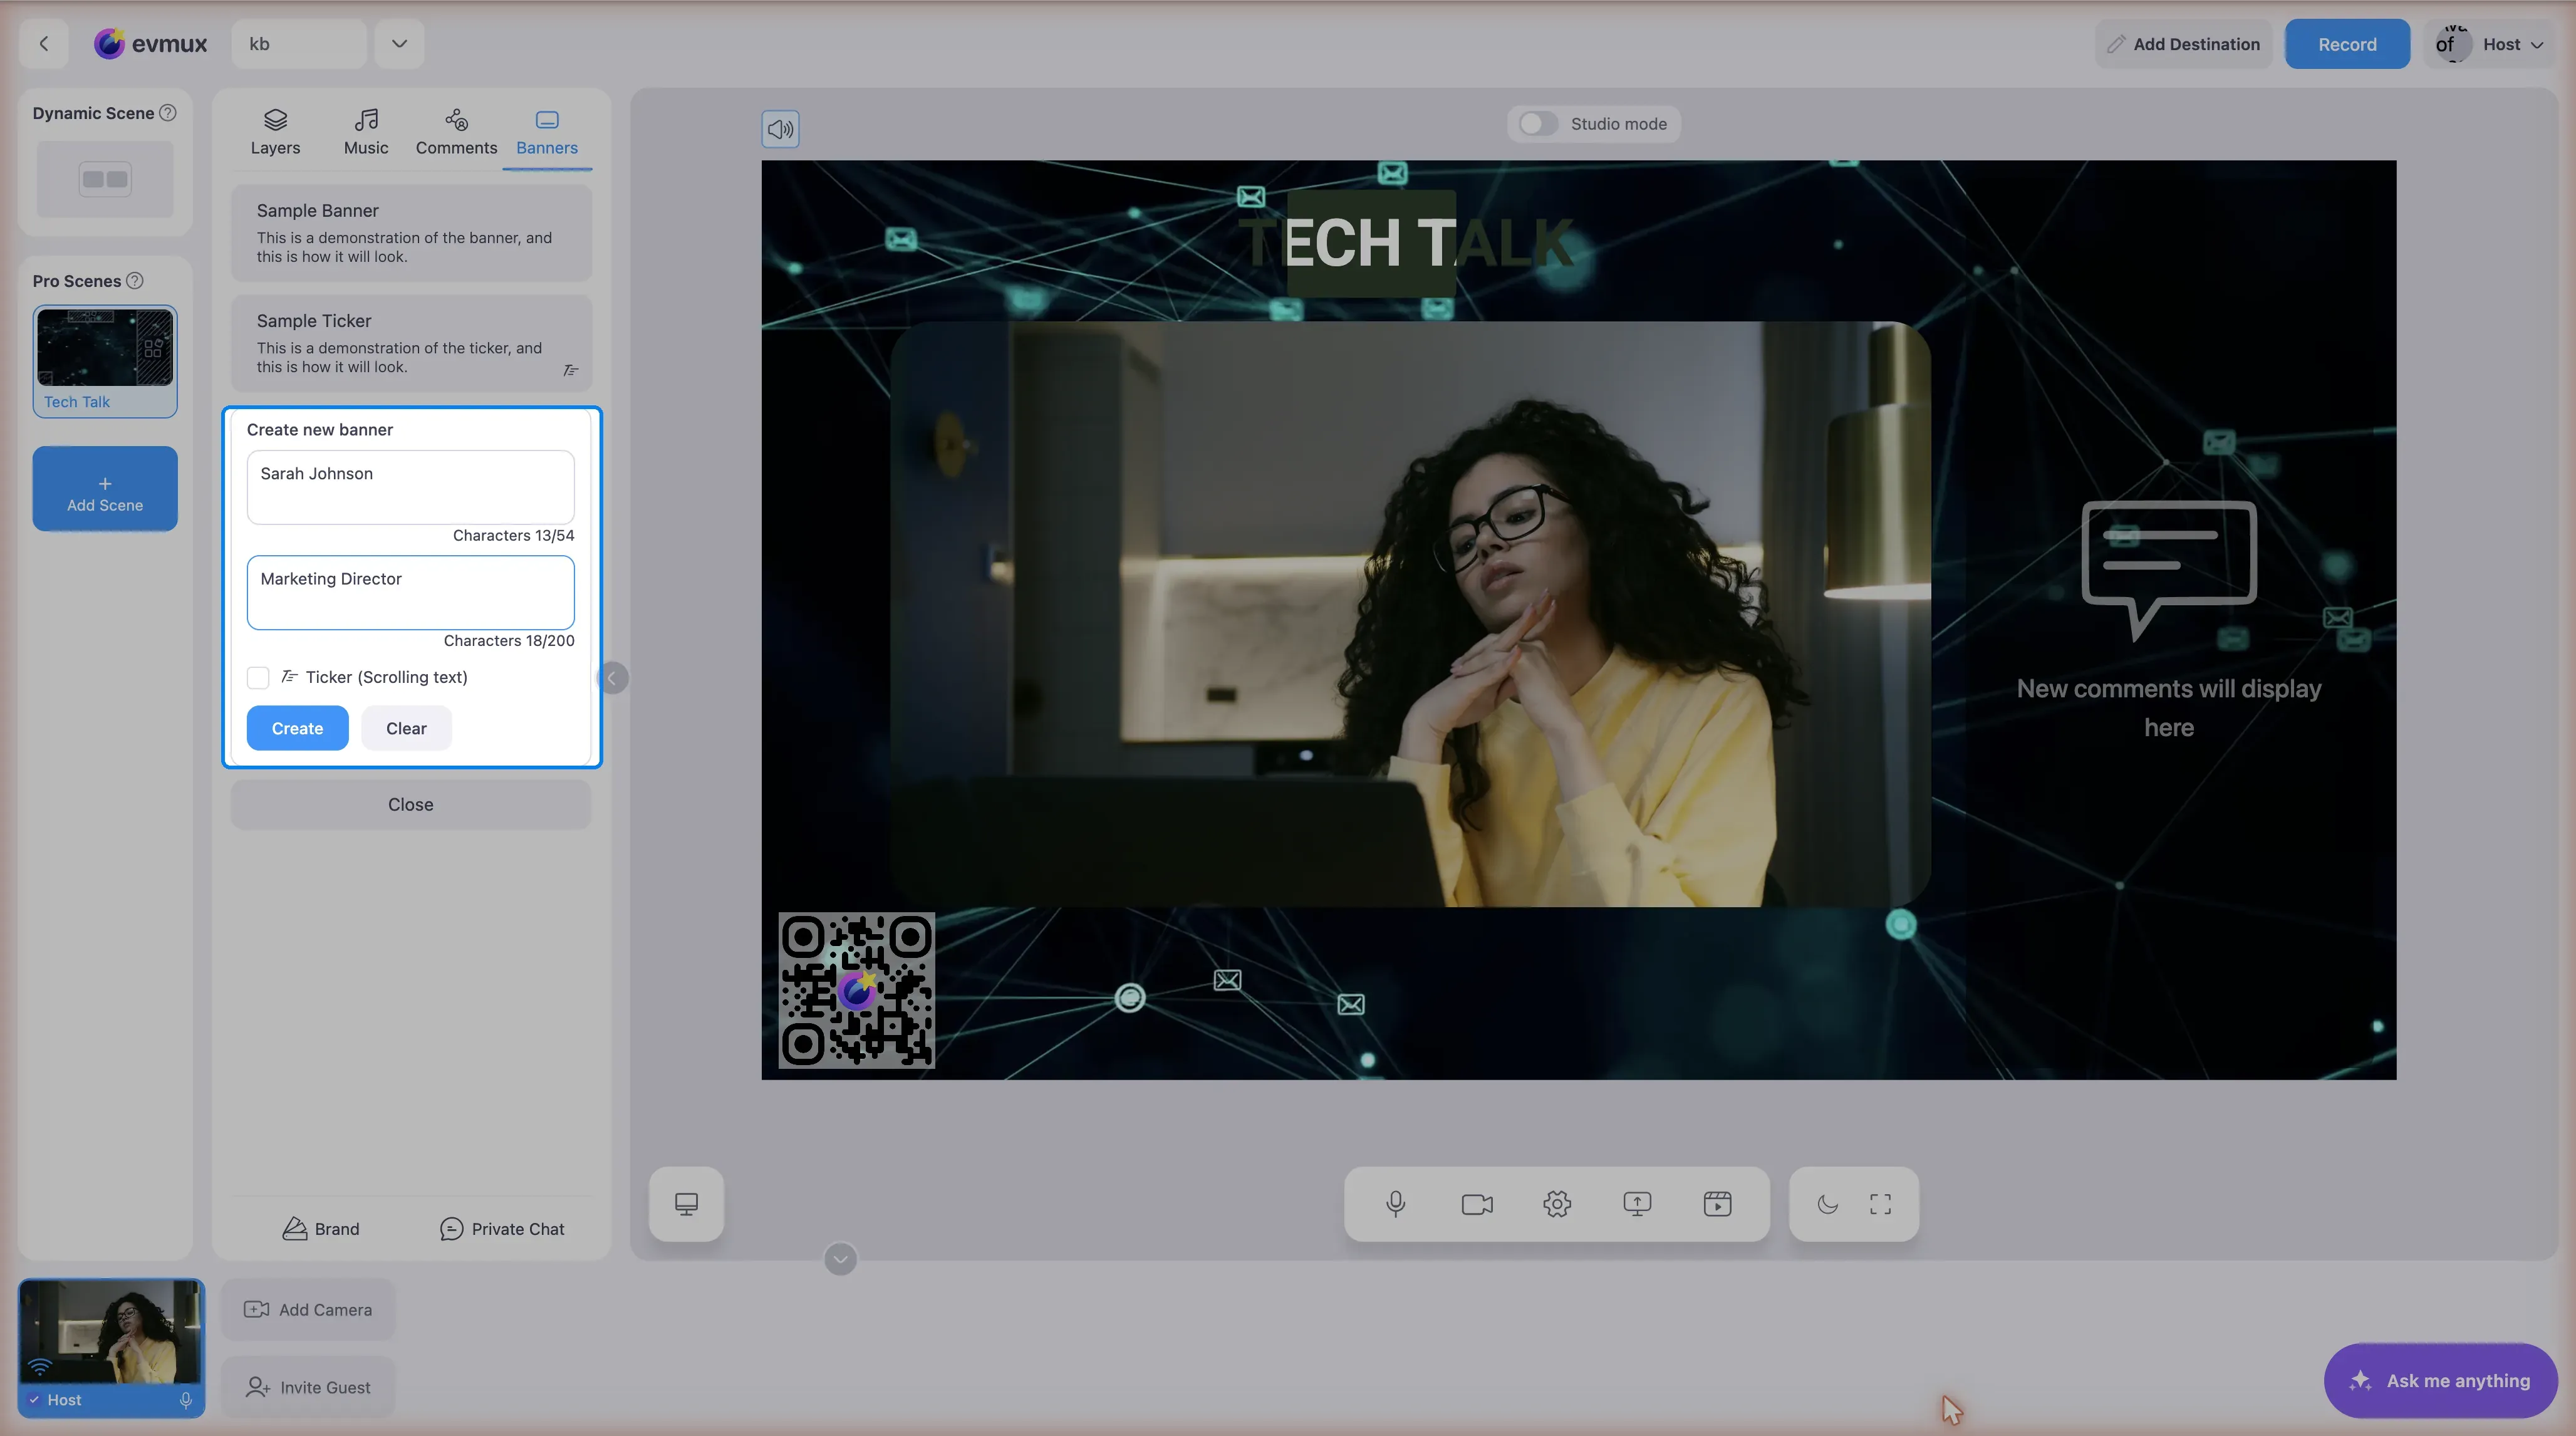
- Click the Create Banner button at the bottom of the panel
- The button shows a + icon and text “Create Banner”
- The create form expands above the button
- Button text changes to Close while form is open
Step 3: Enter Banner Text
Primary Text field:
- Enter the main text (name, title)
- Maximum 54 characters
- Character counter shows: “Characters X/54”
- Text turns red if over limit
Secondary Text field:
- Enter subtitle or description
- Maximum 200 characters (or 1000 for tickers)
- Character counter shows: “Characters X/200”
Step 4: Enable Ticker (Optional)
For scrolling text banners:
- Click the Ticker (Scrolling text) checkbox
- Secondary text limit increases to 1000 characters
- Animation direction dropdown appears:
- “Right to Left” (default)
- “Left to Right”
Step 5: Create the Banner
- Click the Create button (blue)
- Loading spinner shows while saving
- Banner appears in the list above
- Form clears automatically
Alternative: Click Clear to reset the form without creating.
Step 6: Show the Banner
- Find your banner in the list
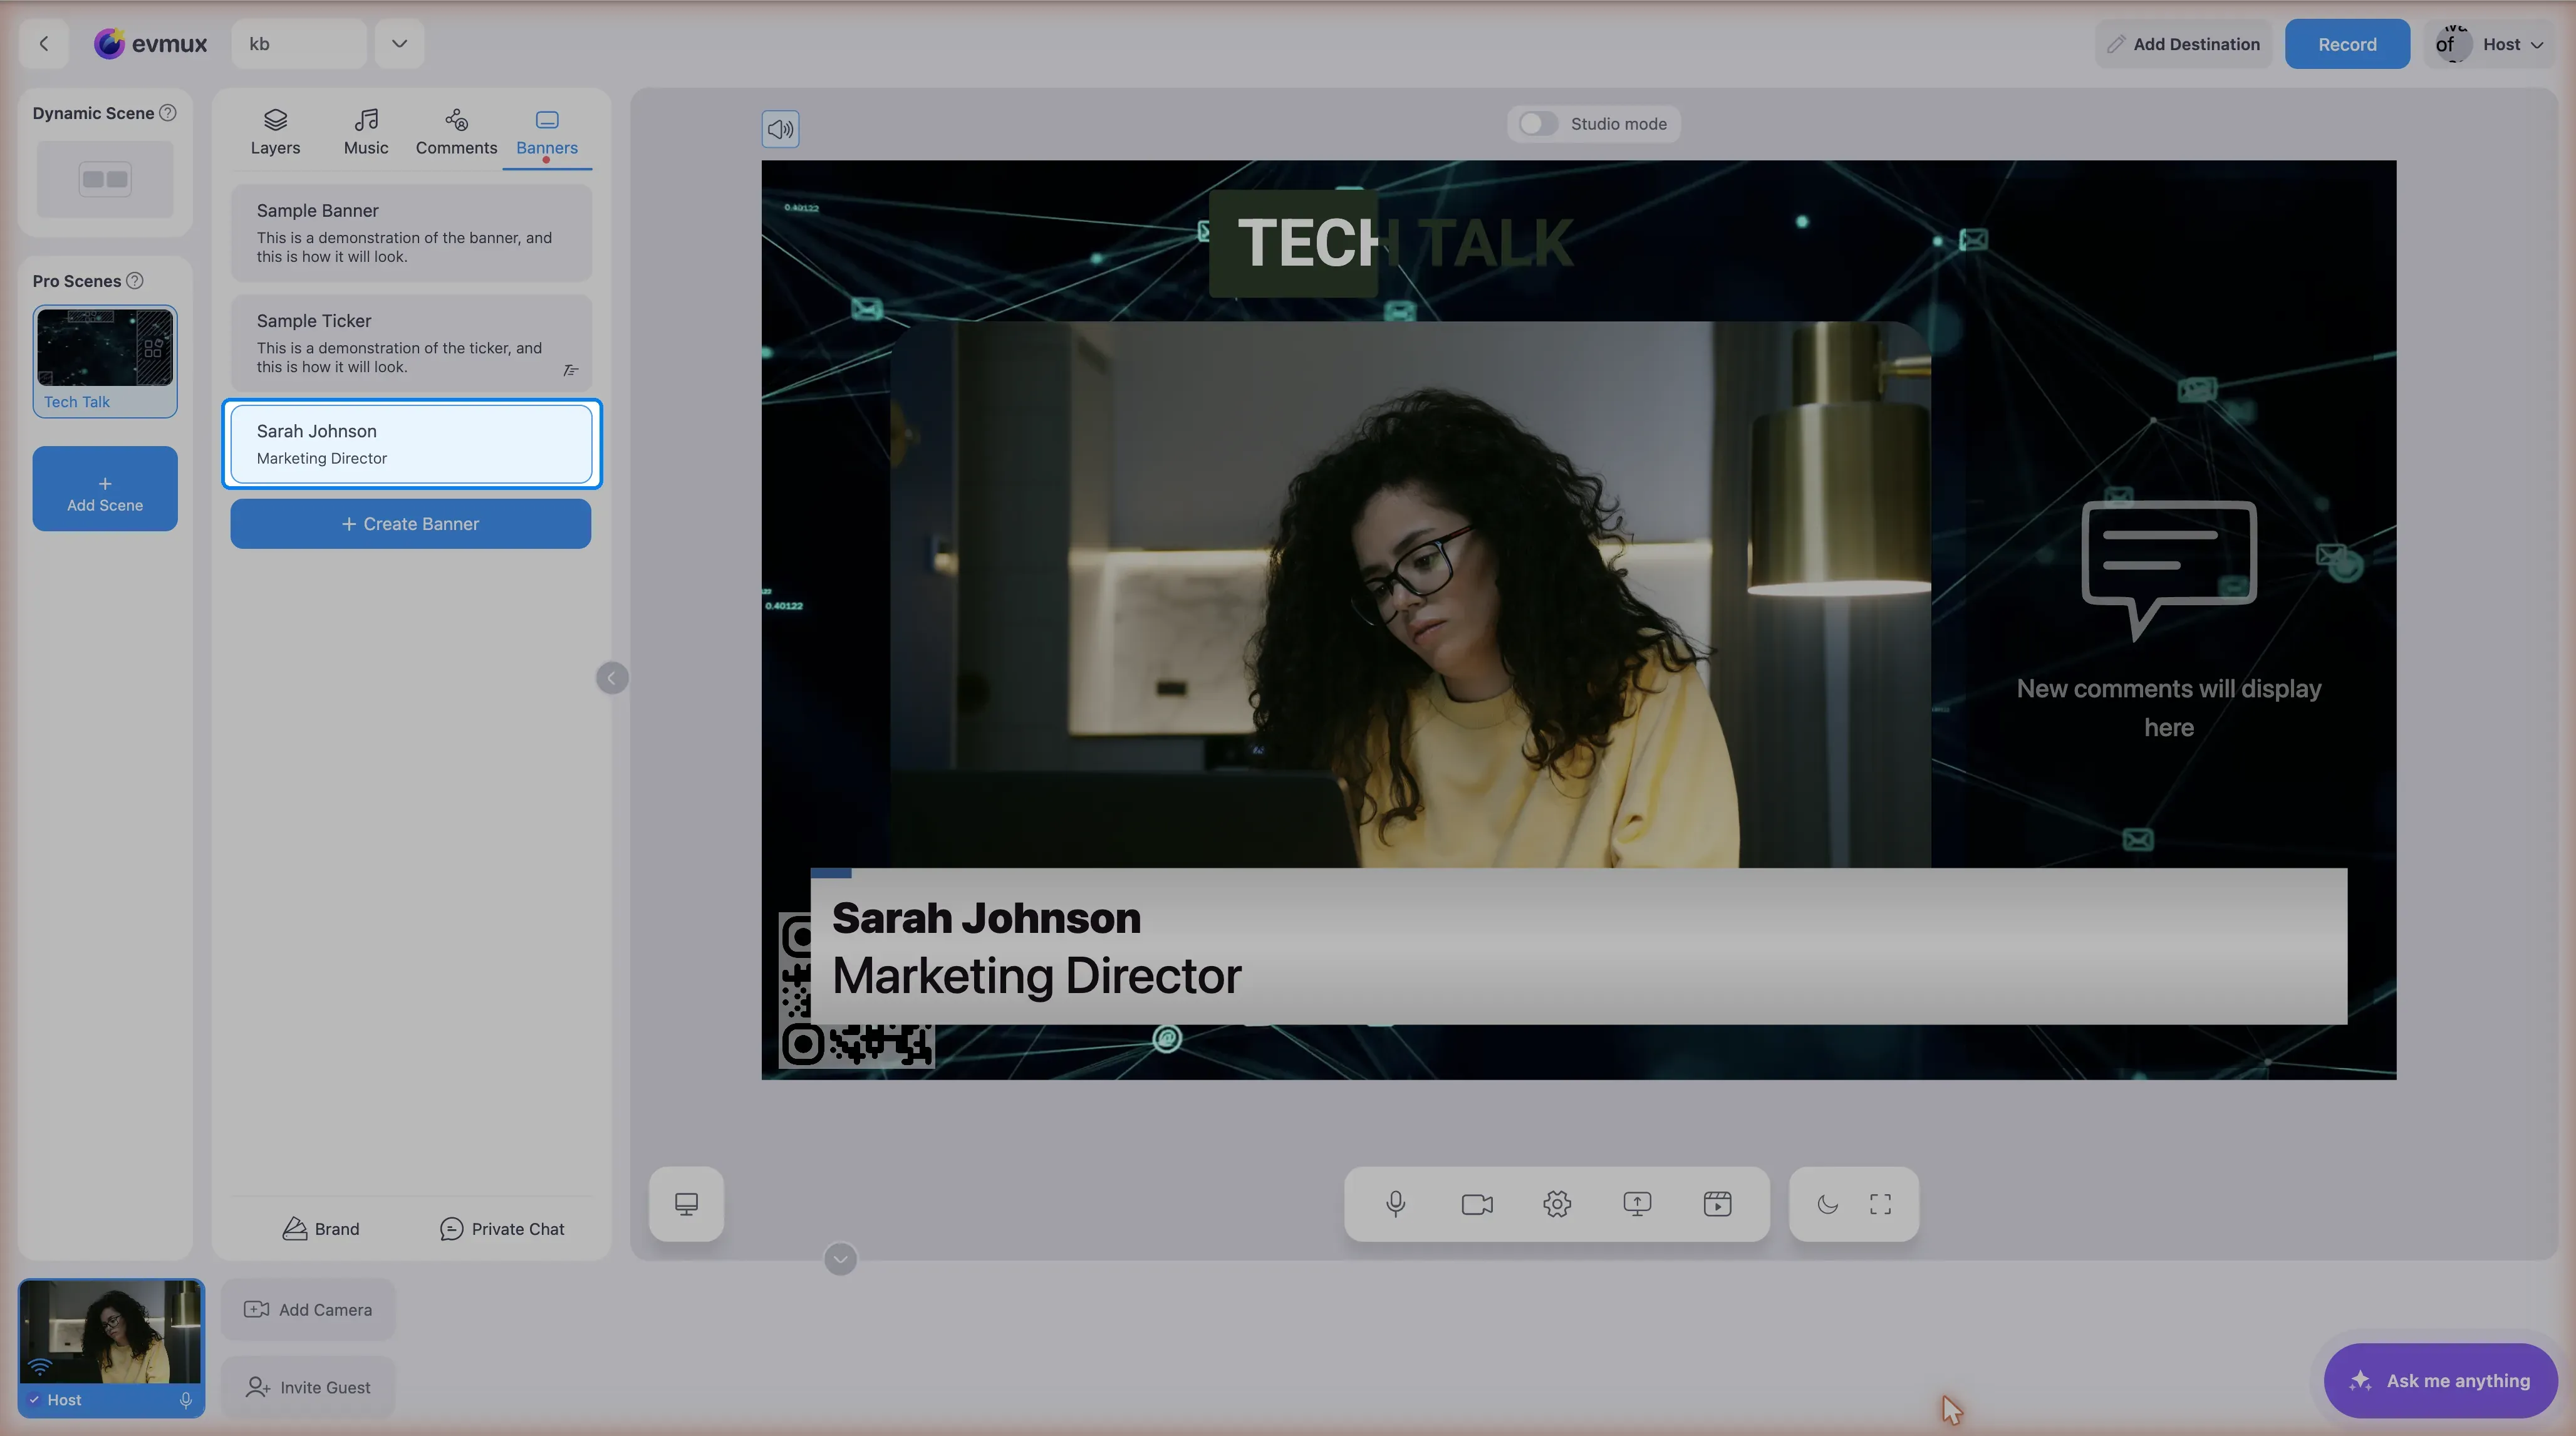
- Click on the banner to display it on screen
- A Show indicator appears on hover (blue, with eye icon)
- When active, banner has blue border and Hide indicator
Step 7: Hide the Banner
- Click the active banner again
- Hide indicator shows on hover (gray, with closed eye icon)
- Banner animates out of the scene
Banner List Item Features
| Element | Description |
|---|---|
| Drag handle | Left side - reorder banners |
| Title | Primary text (bold) |
| Description | Secondary text |
| Ticker icon | Bottom-right if ticker enabled |
| Options menu | Three dots - Edit, Remove |
| Show/Hide indicator | Center on hover |
Editing a Banner
- Click the three dots icon on the banner
- Select Edit from the menu
- Modify text in the edit form
- Click Save to apply changes
- Click Cancel to discard
Deleting a Banner
- Click the three dots icon
- Select Remove
- Confirm in the dialog: “Are you sure you want to delete this banner?”
- Click Yes to delete
Banner States
| State | Appearance |
|---|---|
| Inactive | Normal background, “Show” on hover |
| Active (shown) | Blue border, light blue background, “Hide” on hover |
| Editing | White background with border, form expanded |
Tips
Before Going Live
- Create banners for all speakers in advance
- Test that text fits properly
- Check spelling and formatting
During Broadcast
- Click to show/hide as needed
- Only one banner and one ticker can be active at a time
- Banners animate smoothly in/out
Text Guidelines
- Keep primary text short (names work best)
- Use secondary text for titles/roles
- Avoid very long text that may be hard to read
Troubleshooting
Banner not showing?
- Make sure you clicked on the banner in the list
- Check that another banner isn’t already active
- Verify the banner was created successfully
Text cut off?
- Reduce character count
- Primary text should be under 54 characters
- Consider using shorter descriptions
Can’t delete banner?
- Cannot delete while banner is showing
- Hide the banner first, then remove