

Invite a Guest to Your Broadcast
A guest joins your broadcast through a link. They open it in their browser, allow their camera and microphone, and appear in your studio ready to be put on screen. No account and no install needed on their side.
Before you start
- Your studio is open in the editor.
- You have a way to send the link to your guest: email, chat, or a calendar invite.
Step 1: Open Invite Guest
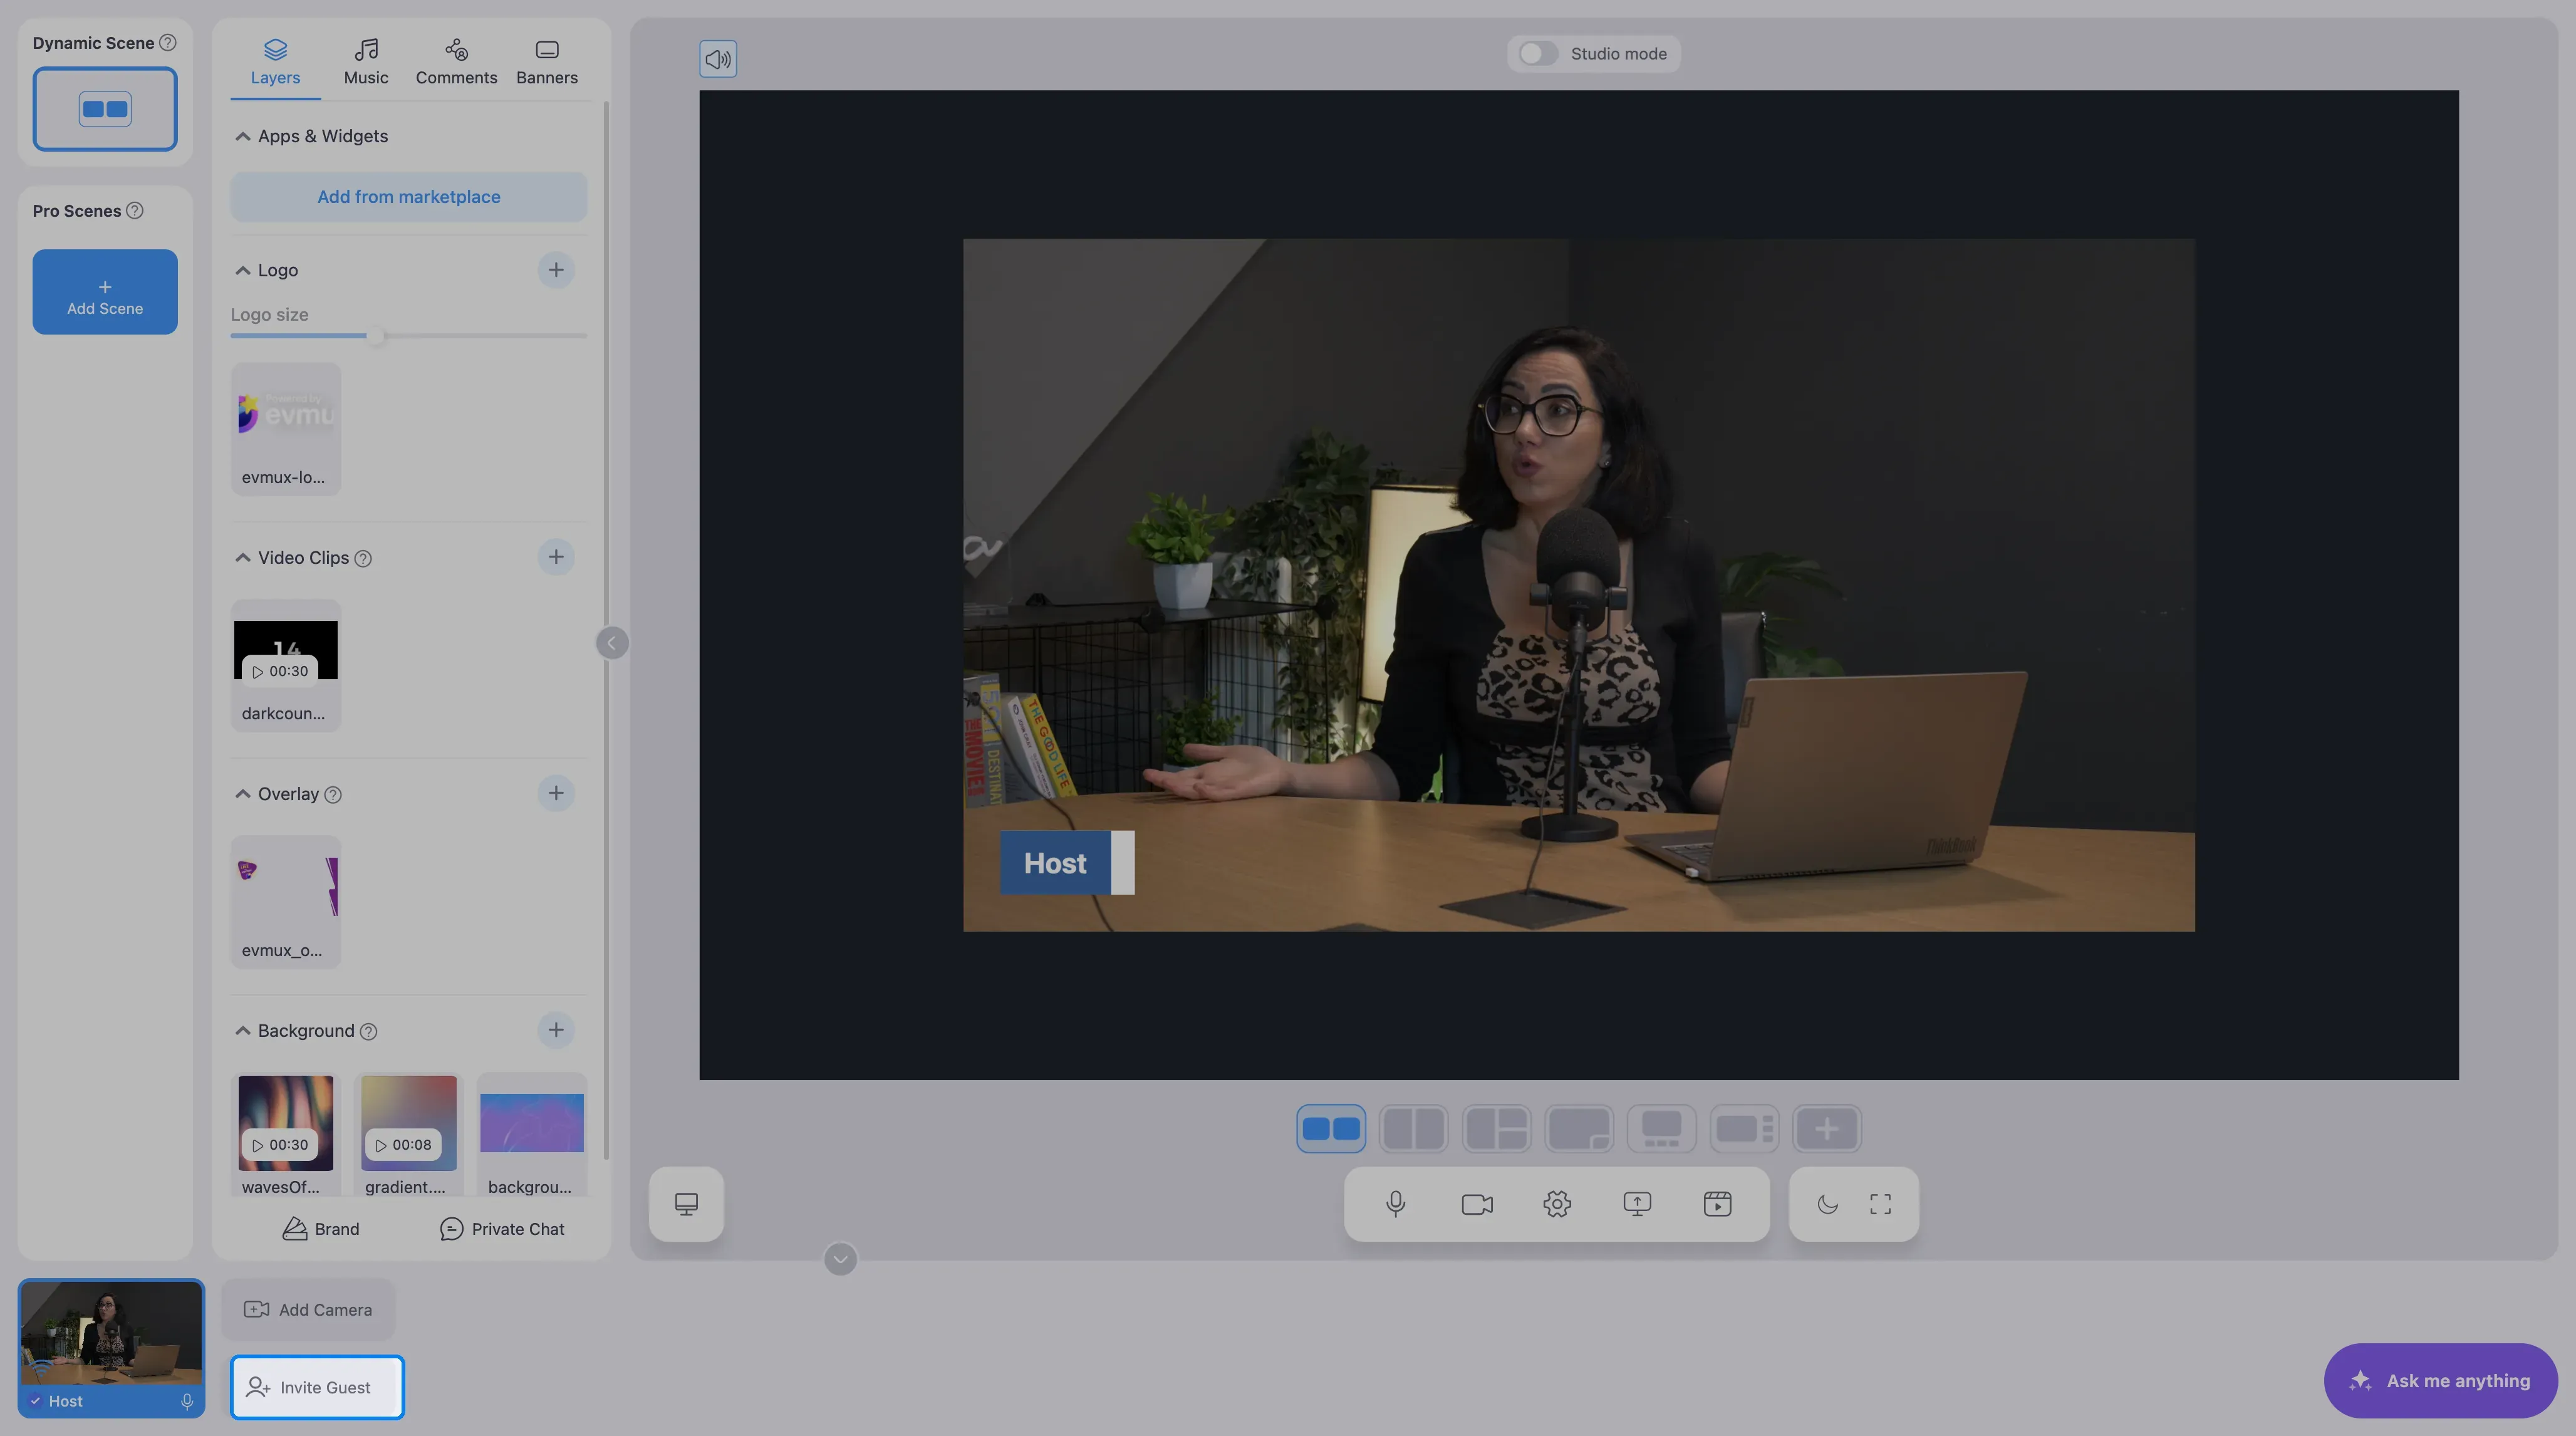
Click Invite Guest at the bottom left of the studio, next to your own tile.
Step 2: Copy or send the link
The Invite Guests dialog opens with the studio’s guest link.
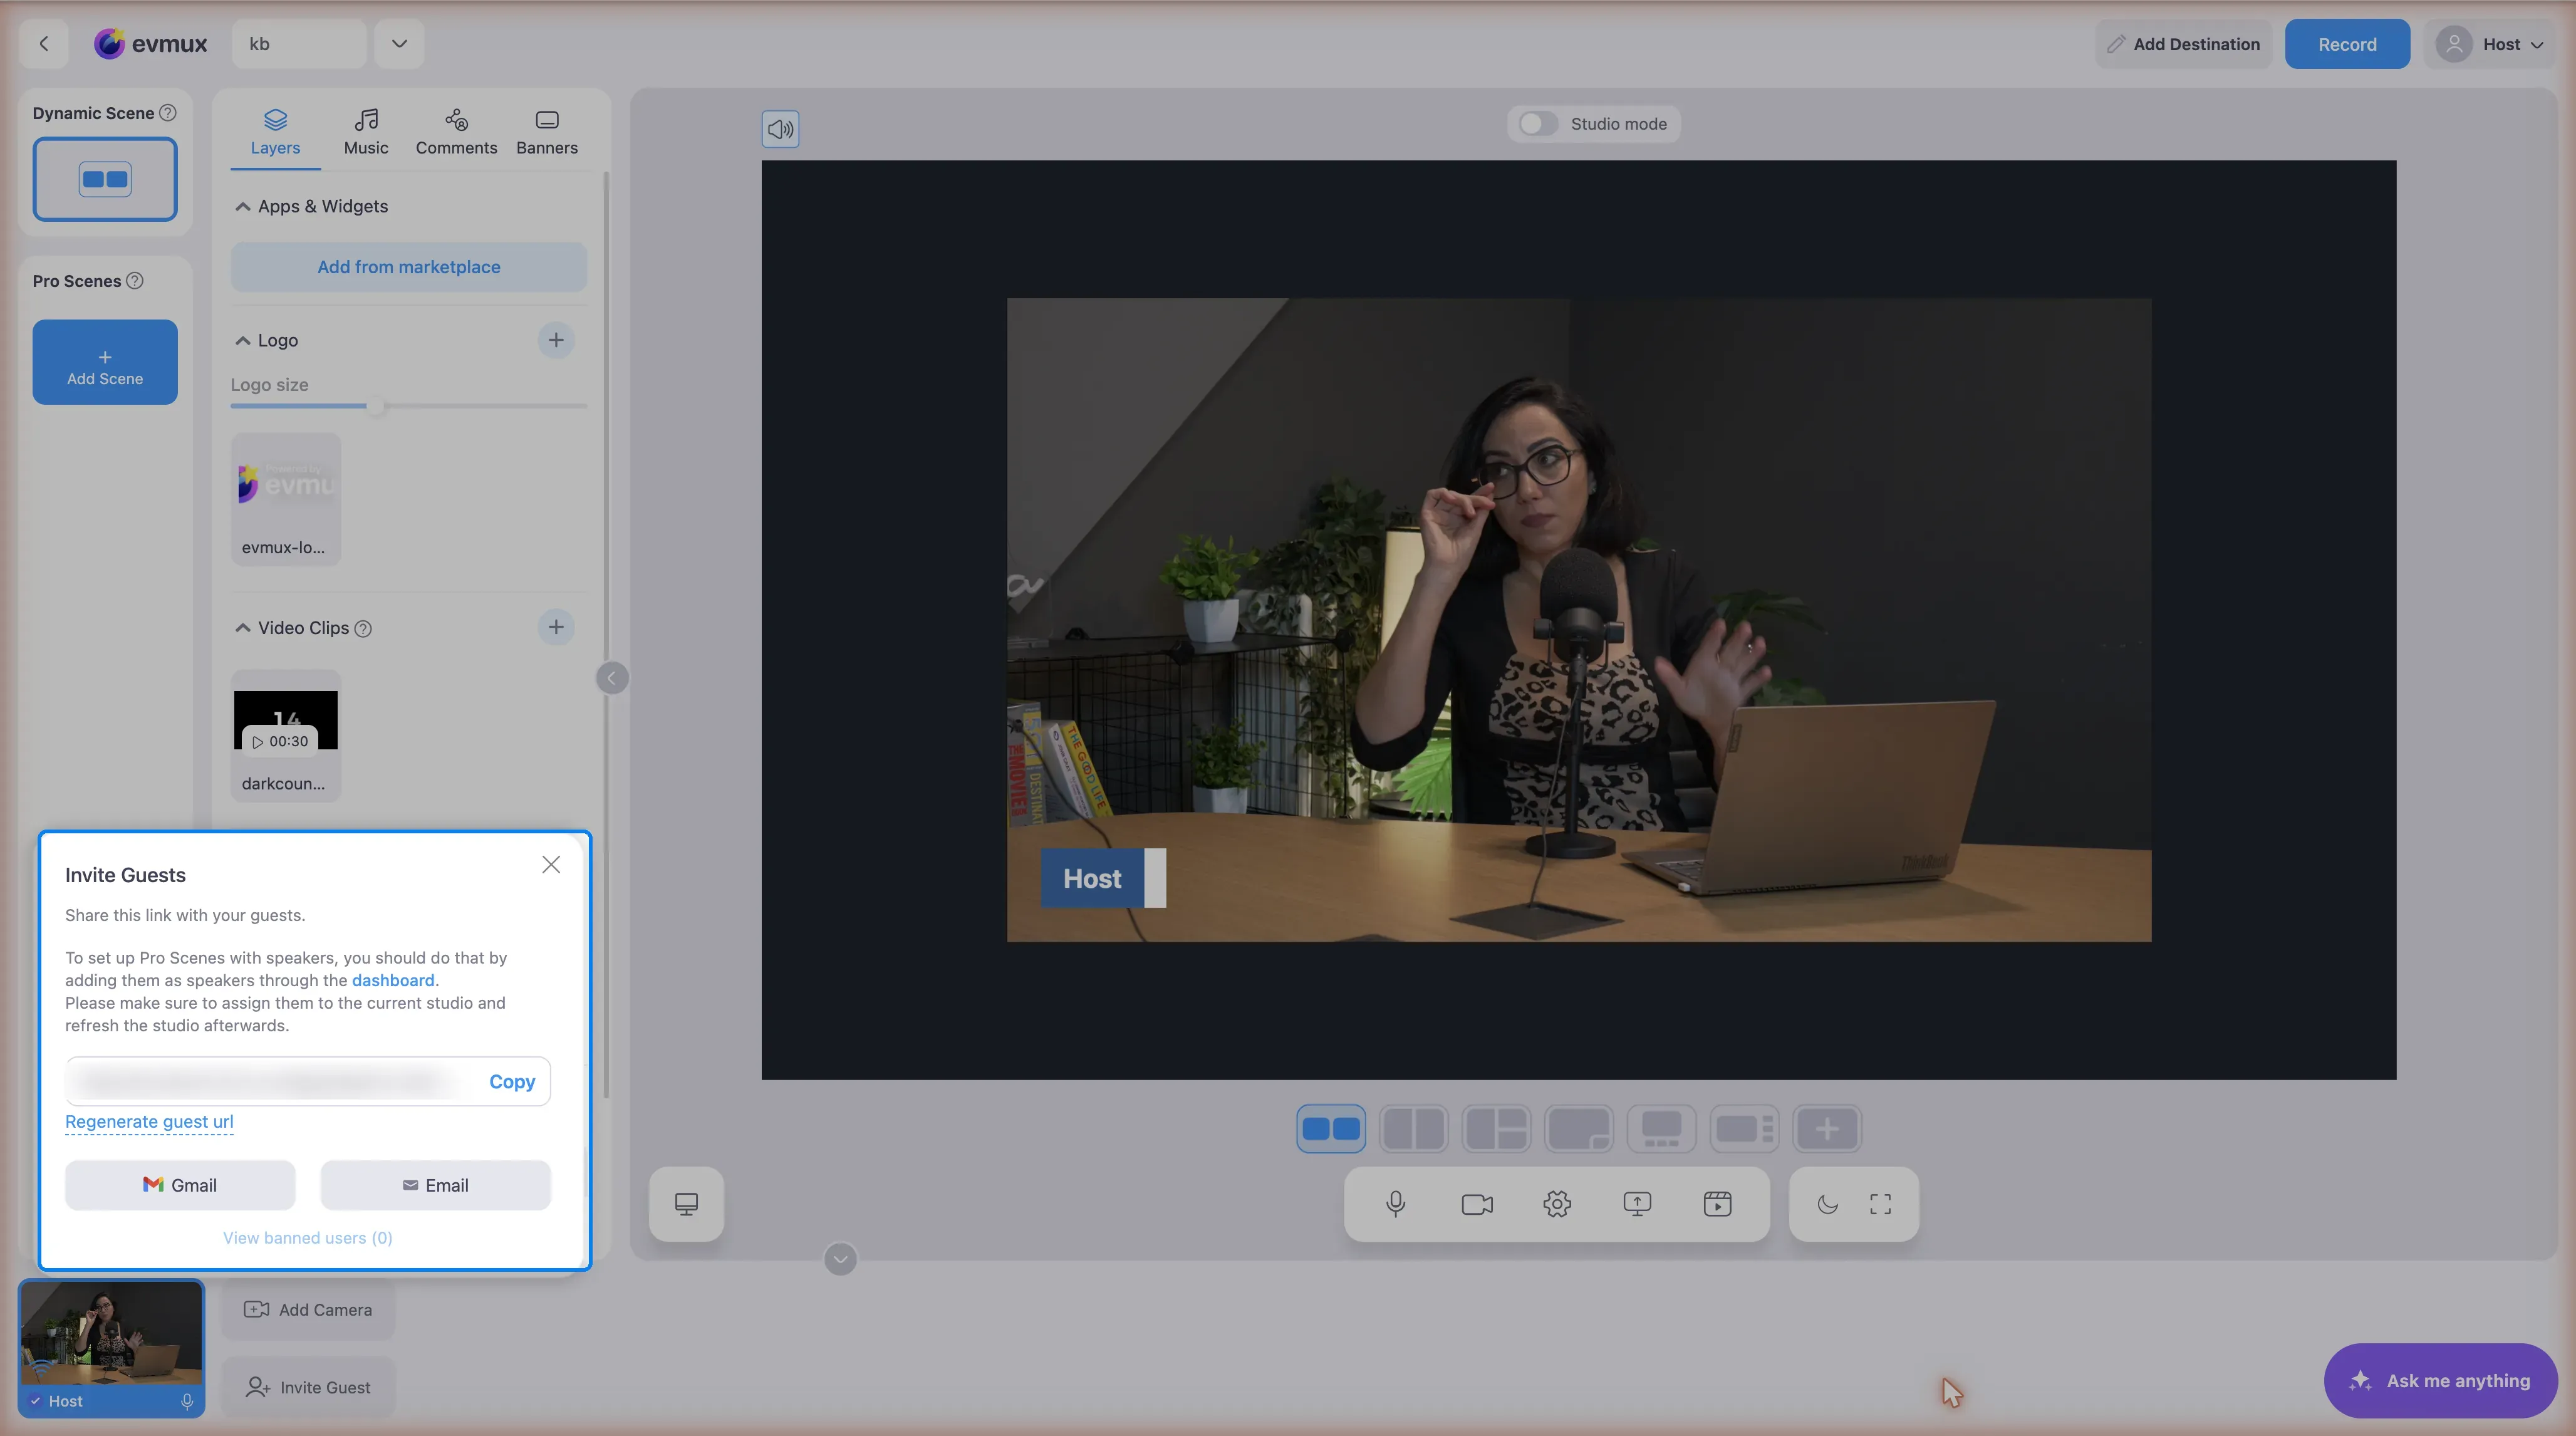
- Copy puts the link on your clipboard. The button reads Copied for a moment.
- Gmail opens a Gmail compose window with the link already in the message.
- Email does the same in your default mail app.
- Regenerate guest url creates a new link and makes the old one stop working. Use it if a link leaked or a past guest should not be able to come back.
- View banned users lists people you have blocked from this studio.
The same link works for every guest of this studio, and it stays valid until you regenerate it. Anyone with the link can join, so share it only with the people you want on the show.
Step 3: The guest joins
When your guest opens the link they see a check screen for their camera and microphone, type the name that should appear on stream, and click Enter the Studio. A new tile with their video appears in the participants bar at the bottom of your studio.
Guests start off-stage: you and the other participants can see and hear them, but your viewers cannot. That is the place to say hello and check their sound before they go on.
Step 4: Put the guest on screen
Hover the guest’s tile and click Add to Scene. On the Dynamic Scene the layout adjusts automatically to fit everyone on screen. To take them off screen again, hover the tile and click the same control.
For a Pro Scene, the guest is placed wherever you put a participant layer for them, so build that layer ahead of time. See Layers.
Managing a guest
- Mute or unmute a guest from the microphone icon on their tile, or ask them to unmute. See Mute or unmute a participant.
- Spotlight shows one participant alone on screen for a moment. See Spotlight.
- Talk without the audience hearing with push to talk or the private chat, both in the participants bar.
- Remove or ban a disruptive guest from the tile’s options menu. See Block or ban a troll.
Recurring guests: add them as speakers instead
The guest link is for one-off participants: a guest types their name every time they join, and nothing about them is saved.
Someone who is on the show regularly, like a co-host or a panelist, should be added as a speaker from the dashboard. A speaker gets a personal link with their name, title, company and avatar filled in, and their lower third is ready without any typing. See How to Add a Speaker from the Dashboard.
Tips
- Send the link a day ahead so guests can test their camera and microphone.
- Ask guests to wear headphones. It prevents echo for everyone.
- Keep a backup channel open with the guest, like a phone number, in case of connection trouble.