

How to Record a Session
Recording is switched on before you start, in the same panel you go live from. There is no separate record button elsewhere in the studio.
- Click Go Live (or Record, if no destination is switched on)
- Tick Recording
- Optionally tick Local Recording (ISO) as well
- Press Start
- Press End Broadcast / End Recording when you are done, and confirm
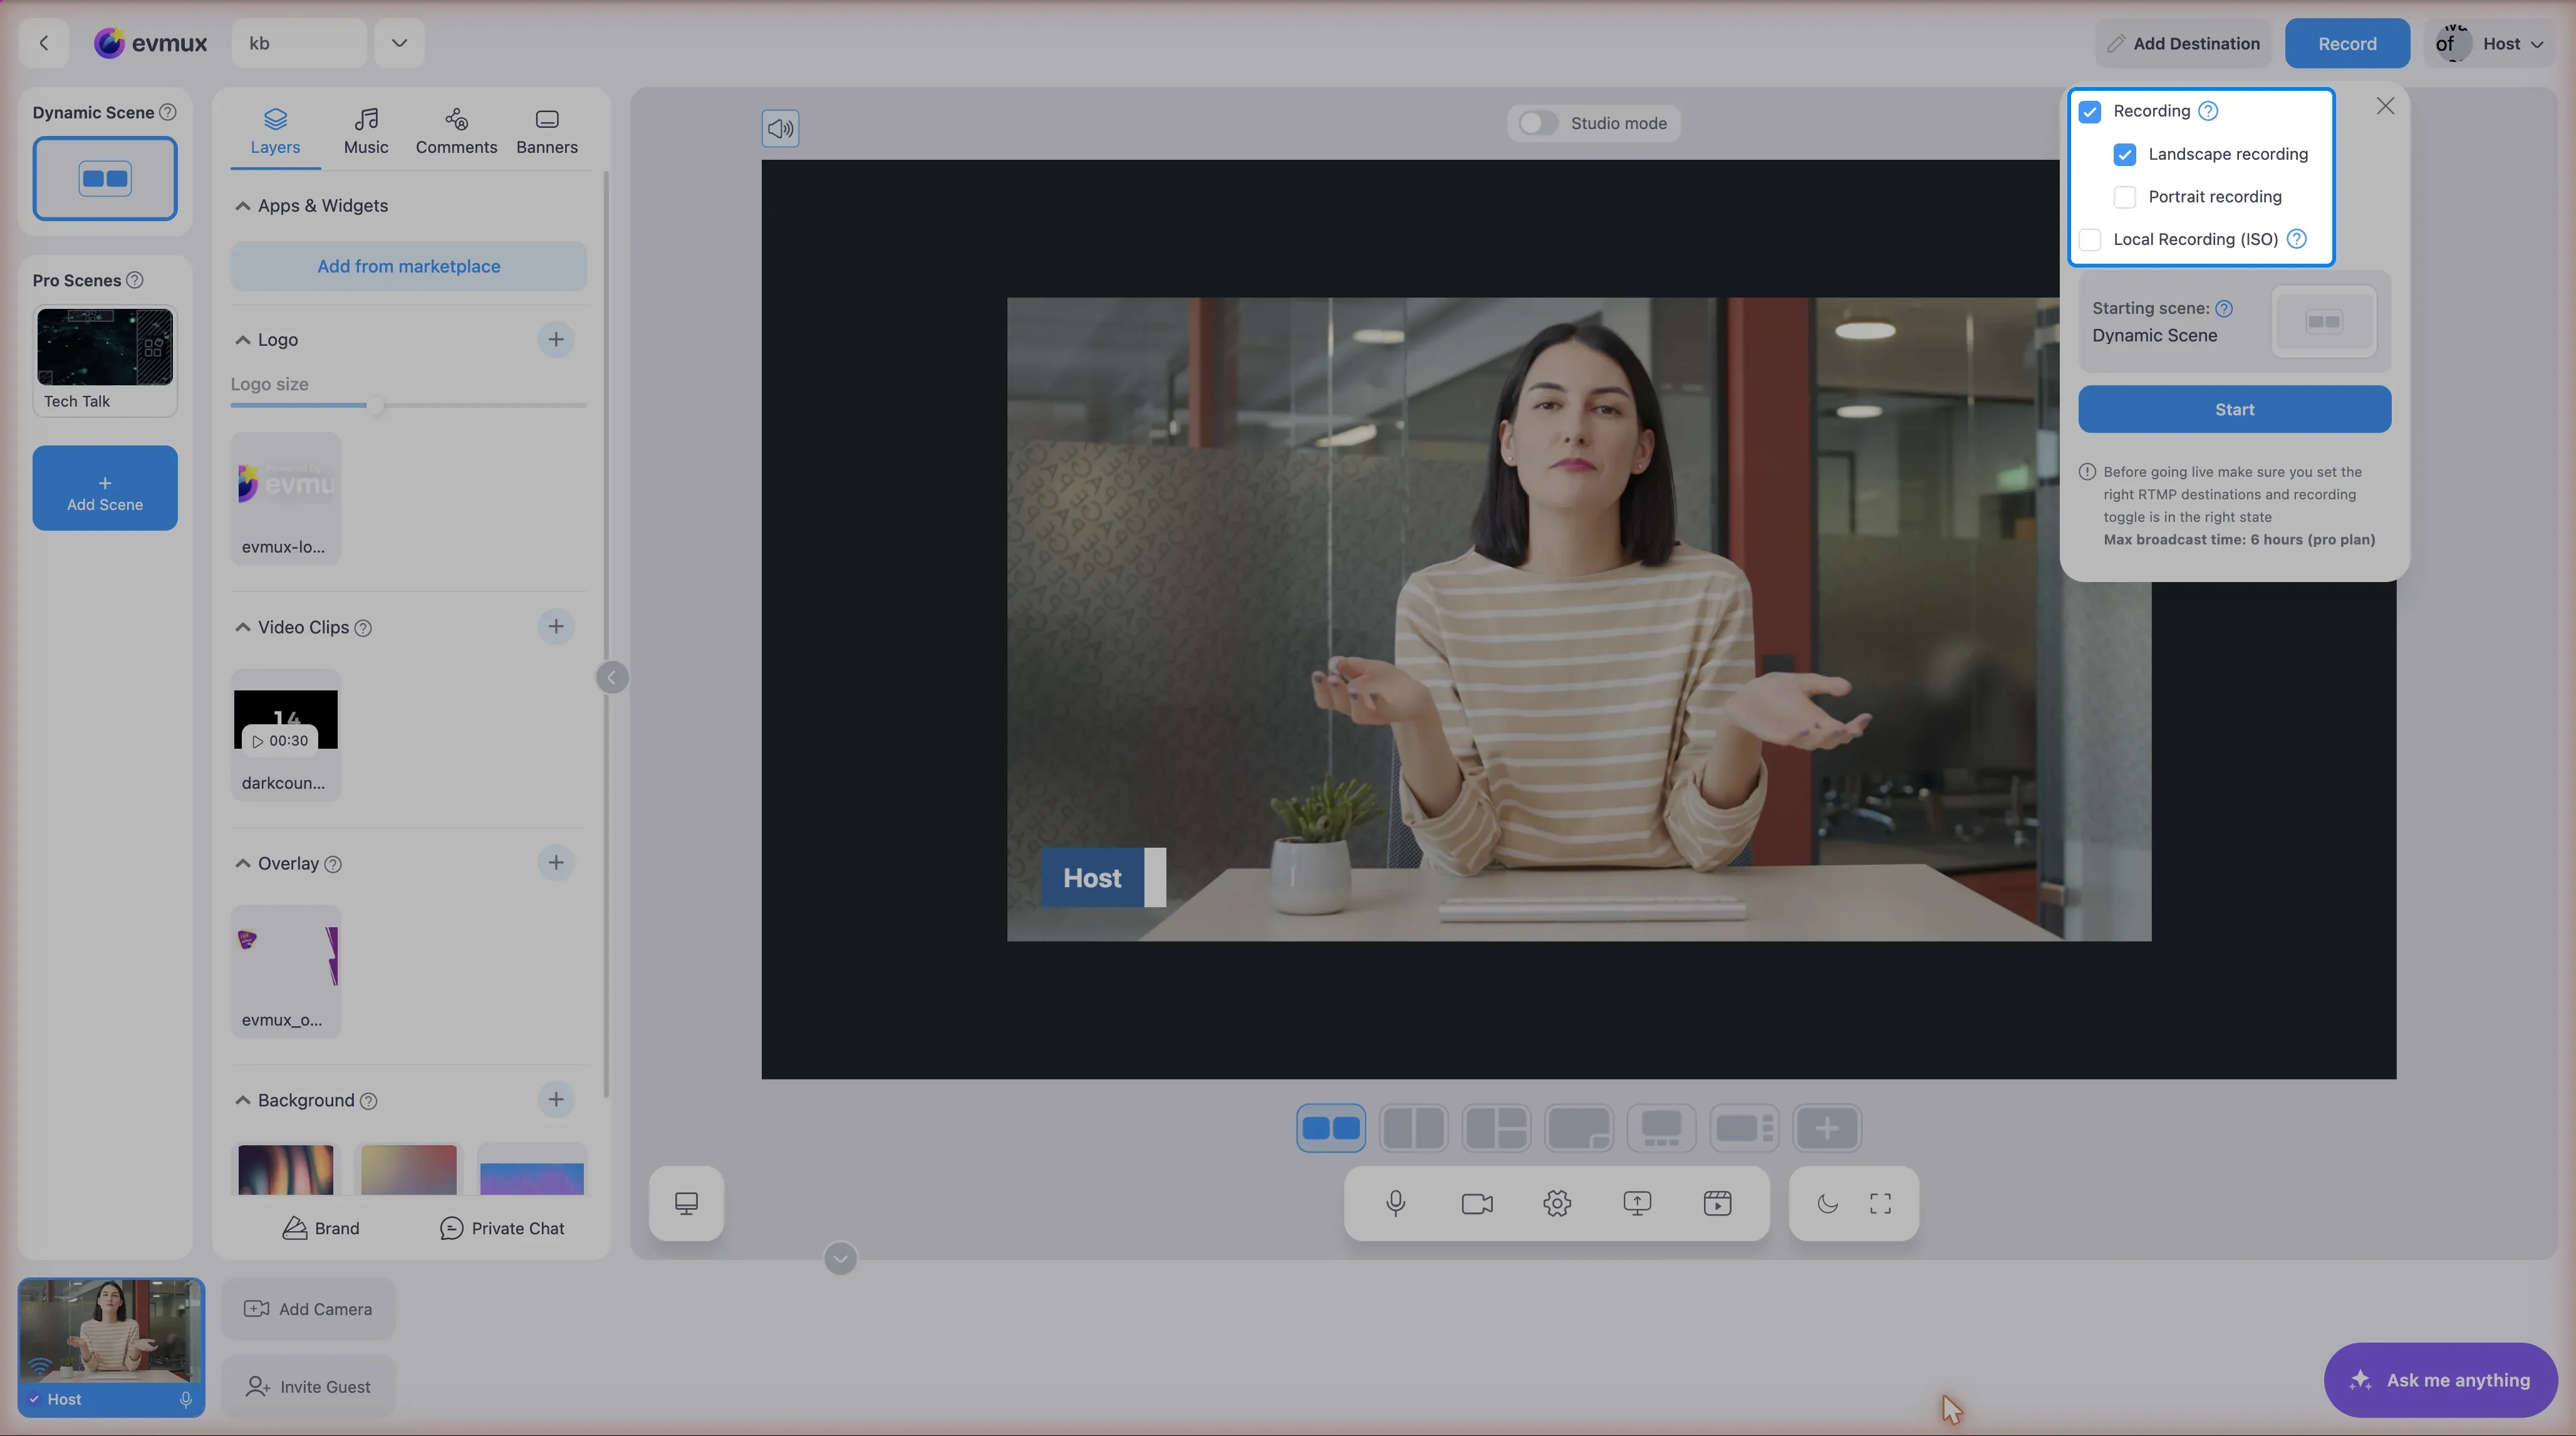
Two kinds of recording, and they are not alternatives
Recording is the ordinary one: evmux records the finished picture — the scene your viewers see, with everything mixed together — and the file appears in your dashboard afterwards. This is what most people want.
Local Recording (ISO) is different: each participant’s own camera and microphone are recorded separately, on their own computer, in up to 4K, and it does not depend on anyone’s internet quality. It is for editing afterwards, when you want each person on their own track. It requires Pro or higher.
They can be used together — the mixed recording and everyone’s individual files — and ISO recording is not a fallback for the ordinary one.
With ISO on you can also choose Video + Audio or Audio only for those local files. That choice belongs to ISO recording, not to the ordinary Recording checkbox.
Recording without streaming
Switch every destination off. The header button then reads Record instead of Go Live, and starting gives you a recording-only session with nothing going out to any platform. That is the intended way to record on your own — there is no separate “local mode”.
On the Free plan
The recording stops after 7 minutes. The livestream itself keeps running — only the recording ends. The panel says so under the Recording checkbox.
While it runs, and afterwards
The elapsed time runs beside End Broadcast. With ISO recording on, the header shows a cloud indicator you can click for each participant’s state — rec while recording, then a percentage while their file uploads. See local-recording-status for what each status means.
Participants must keep their tab open until their upload finishes, because those files live on their machine until they are uploaded. Everything then appears in the dashboard under Recordings.
Quality
There is nothing to configure for a recording. No resolution picker, no quality preset, no bitrate: it records at a fixed 1920x1080 (1080x1920 in portrait) on every plan. Camera Resolution in Settings controls what your own camera captures, and a Custom RTMP destination has its own Resolution choice — but neither of those changes the recording.
Pausing
In a recording-only session, accounts with the feature see a pause button. It keeps the result as one continuous file, but paused time still counts toward the plan’s per-recording limit — the session timer does not stop.
Troubleshooting
Recording won’t start — check the plan allows it, and that the Recording checkbox is actually ticked before pressing Start. It cannot be switched on mid-broadcast.
It stopped by itself — on Free, at 7 minutes. Otherwise check whether the plan’s maximum broadcast length was reached, or the account ran out of storage.
ISO files are missing — open the cloud indicator and look at that participant’s row. They are most likely still uploading, or their browser was closed before the upload finished.
I can’t find my recordings — they are in the dashboard, under Recordings, not in the studio. Large sessions take a while to process after the broadcast ends.
Hotkey
Settings → Hotkeys has a shortcut that starts or ends the session — it starts the broadcast or recording when nothing is running, and ends it when something is. It is one shortcut, not a separate “record” one. See keyboard-shortcuts.