

How to Add a Text Overlay
This guide shows you how to add text overlays to your broadcast for titles, labels, captions, or any on-screen text.
Quick Steps
- Click Add New Layer in the Layers panel
- Select Text from the menu
- Type your text
- Style and position as needed
Detailed Steps
Step 1: Add a Text Layer
- In the Layers panel (left side), click Add New Layer
- Select Text from the available layer types
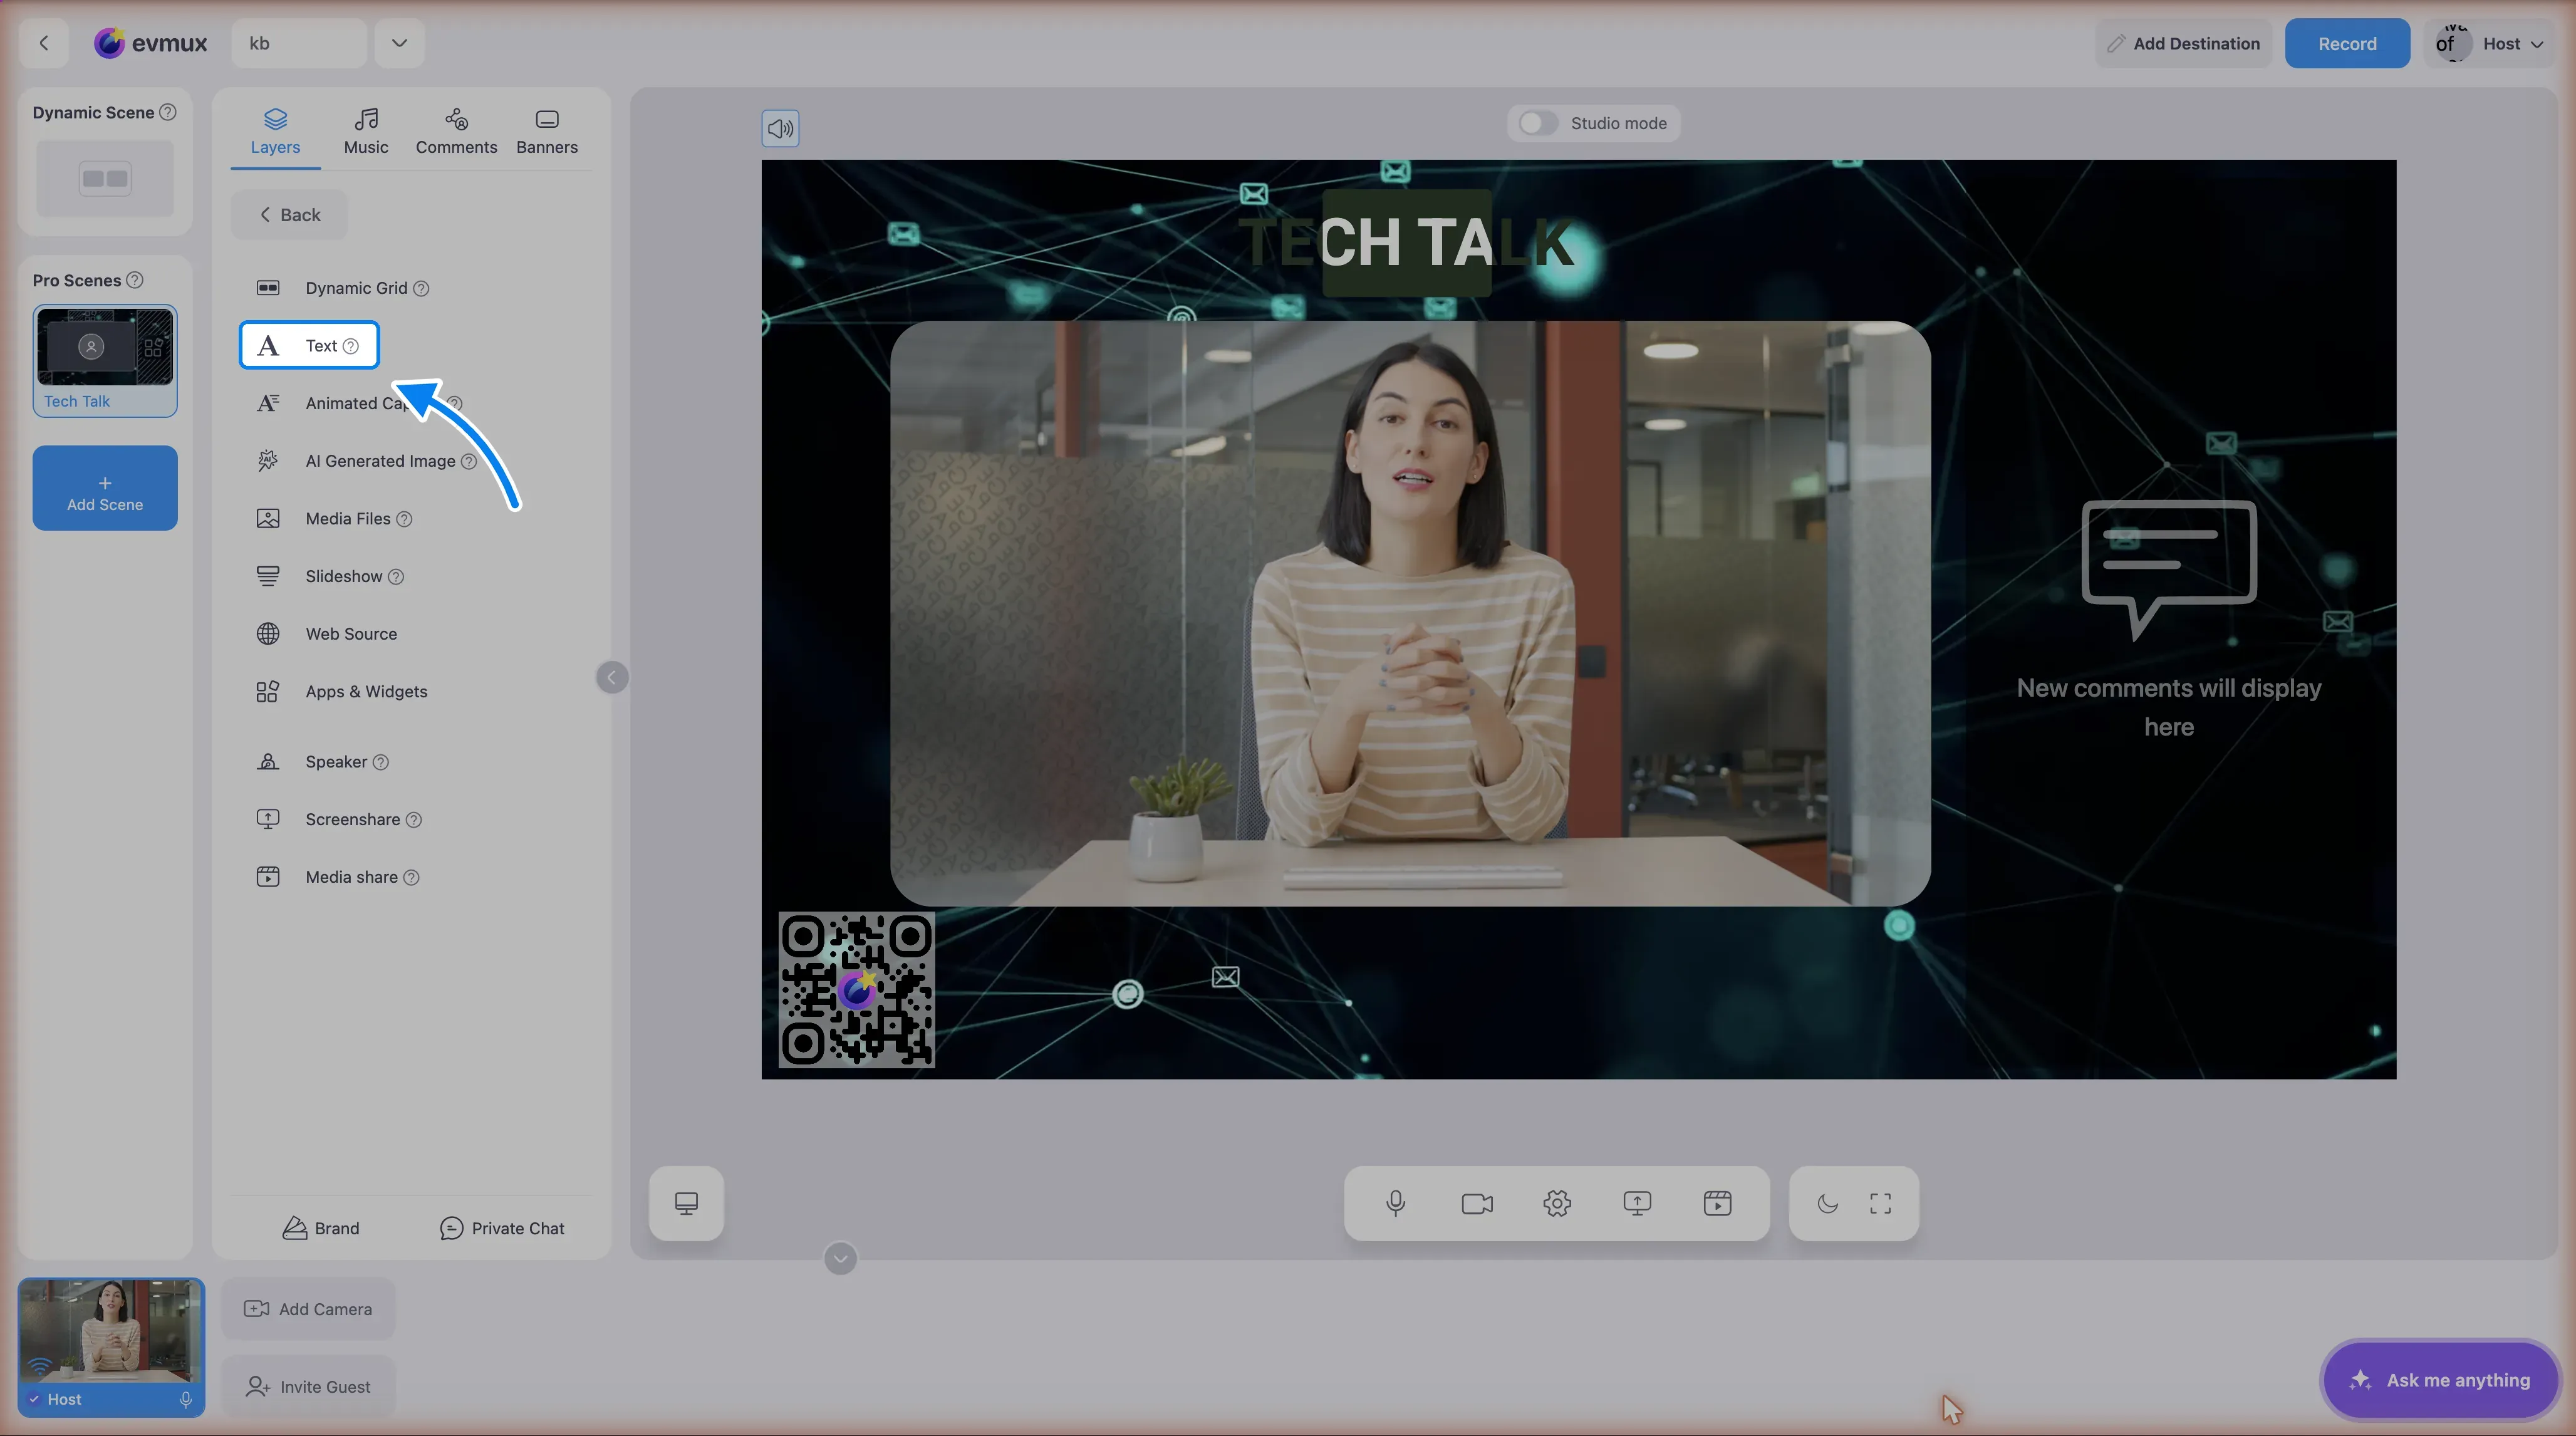
- A text layer appears on the scene, selected, with the layer toolbar above it
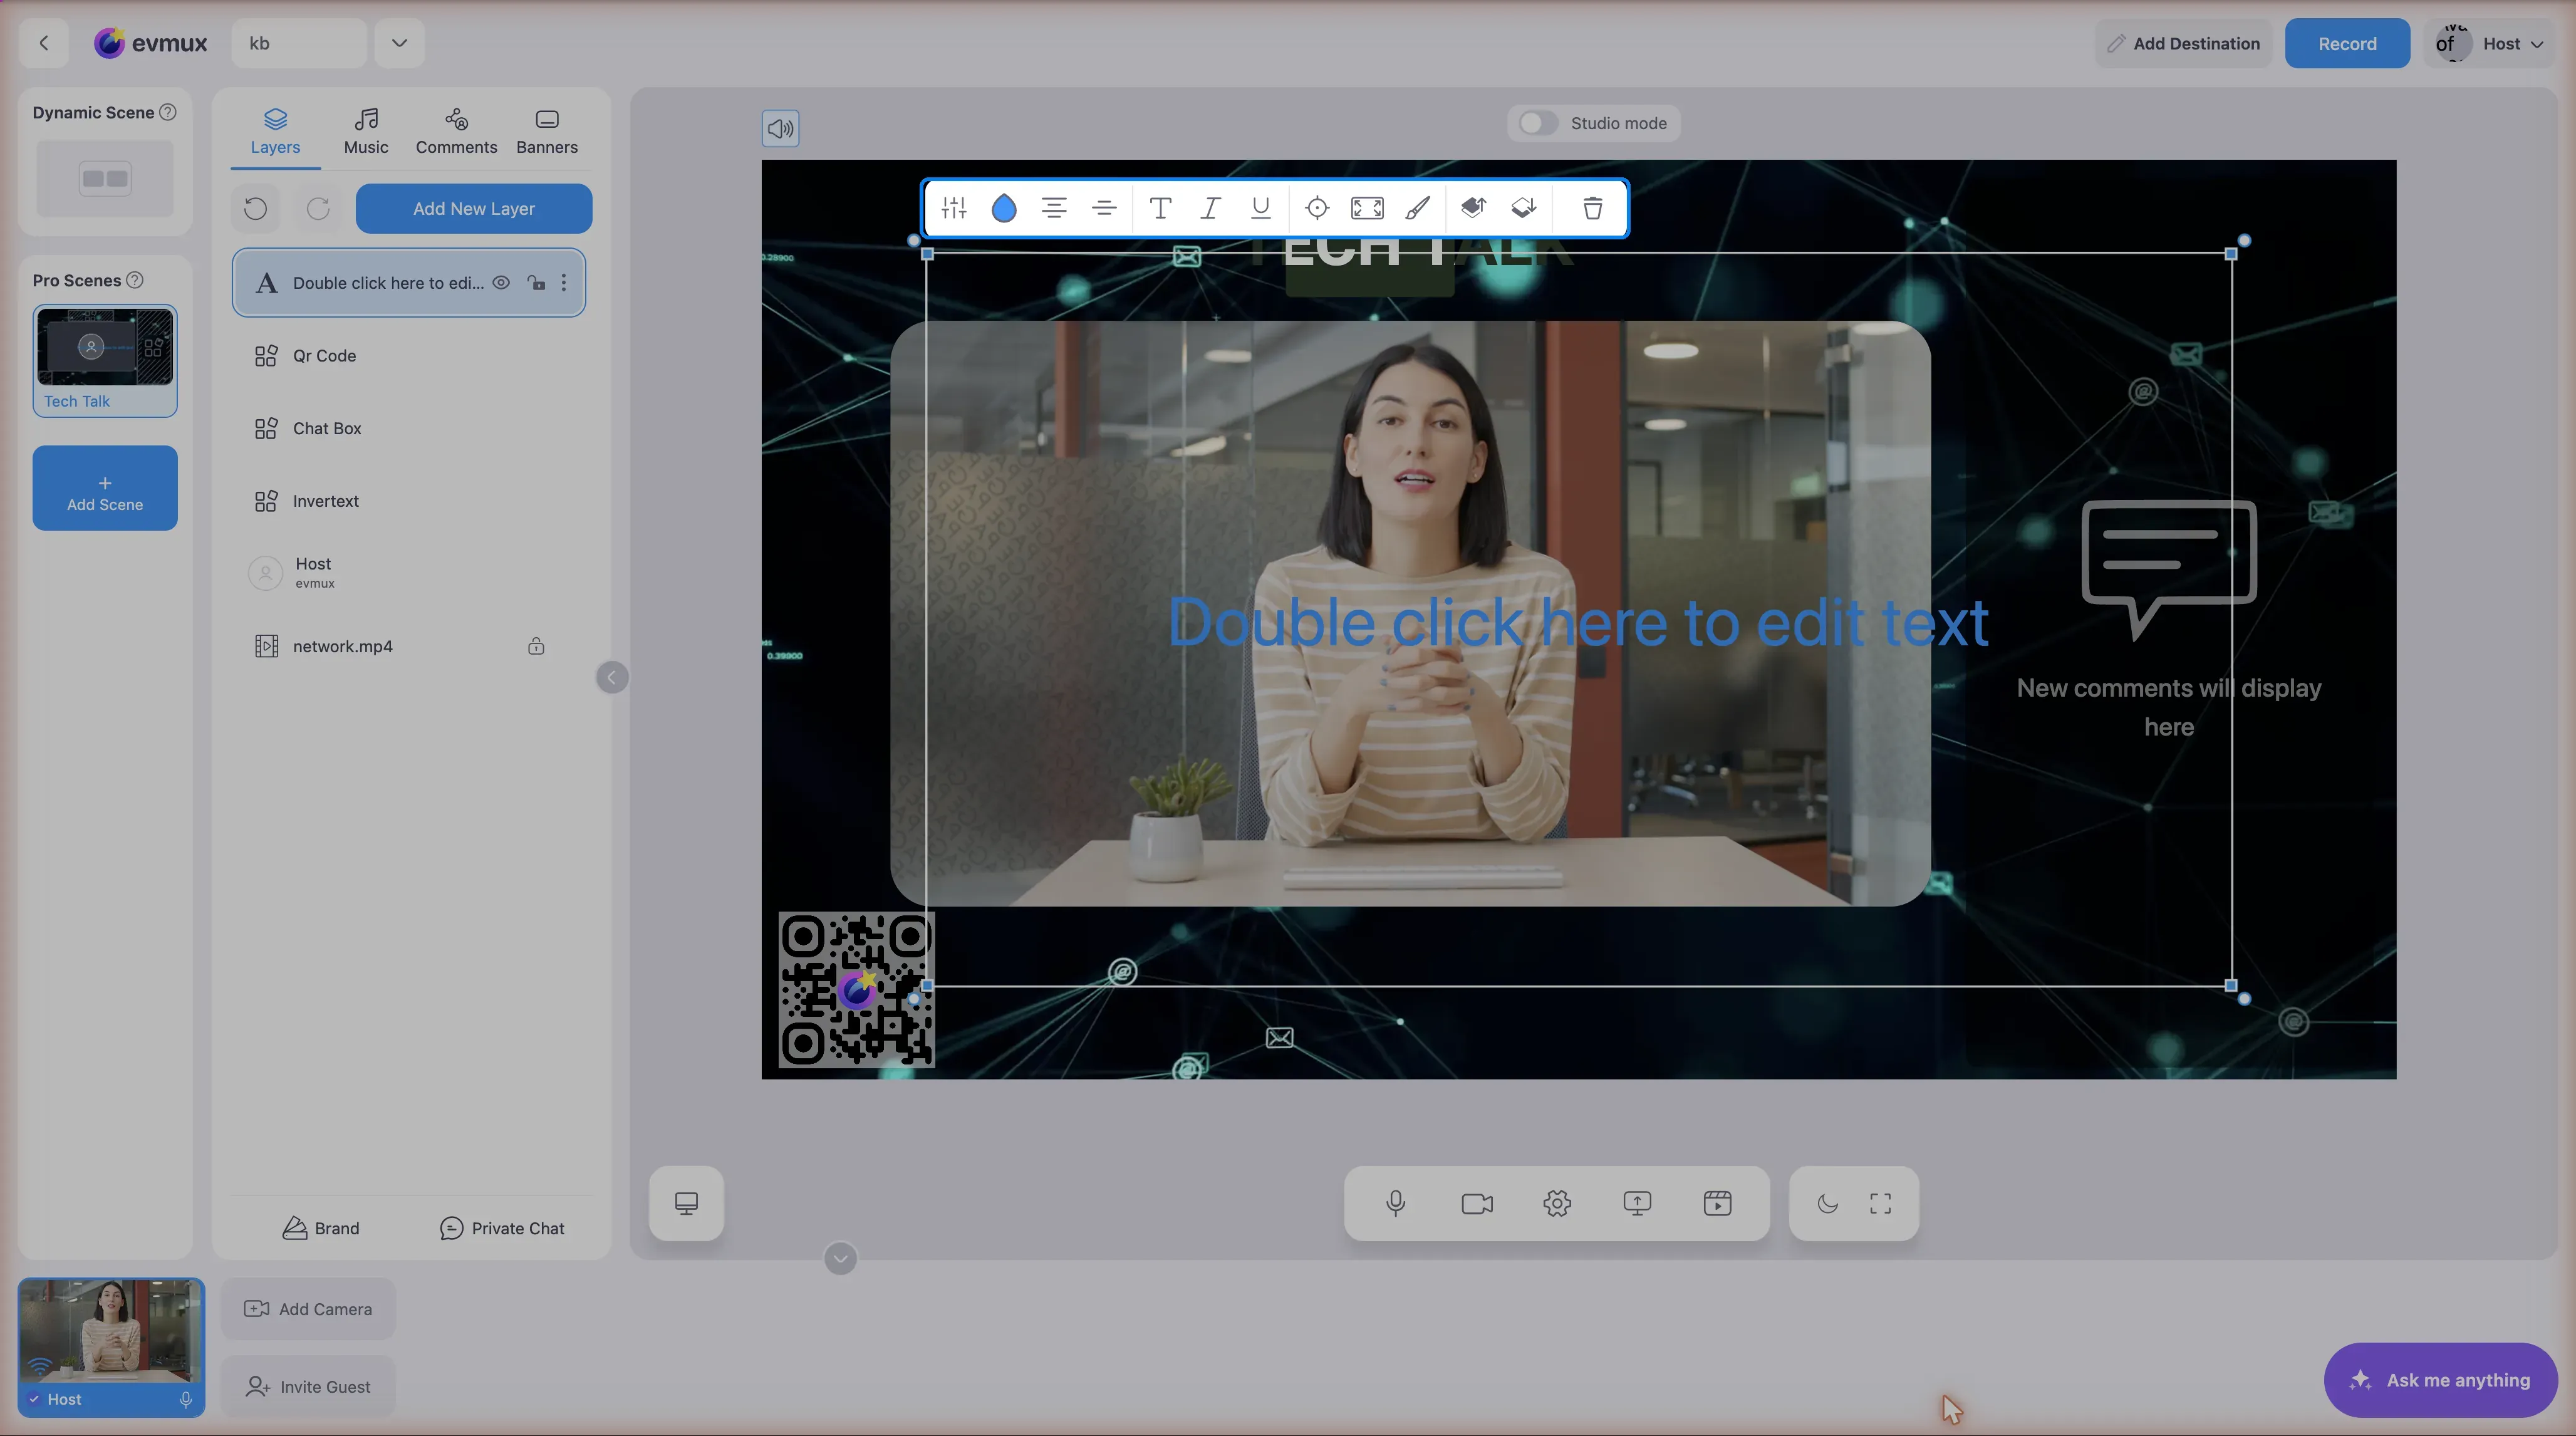
Step 2: Enter Your Text
- Double-click the text layer on the scene
- The text becomes editable
- Type your message
- Click outside to finish editing
Step 3: Style Your Text
Font Settings:
| Option | Description |
|---|---|
| Font Family | Choose typeface (Arial, Roboto, etc.) |
| Font Size | Size in pixels (common: 24-72px) |
| Font Weight | Bold, Regular, Light |
| Font Style | Italic, Normal |
| Color | Text color |
Background:
- Add background color behind text
- Set opacity for semi-transparent
- Rounded corners option
Alignment:
- Left, Center, Right
- Top, Middle, Bottom
Step 4: Position the Text
- Drag the text layer to position
- Or set exact X, Y coordinates in properties
- Common positions:
- Title: Top center
- Lower third: Bottom left/center
- Watermark: Corner
Step 5: Layer Order
- Bring text to front so it’s visible over video
- Right-click > Bring to Front
- Or drag to top of Layers panel
Text Overlay Examples
Title/Headline
Font: Bold, 64pxPosition: Top centerBackground: None or semi-transparentUse: Show topic, segment nameLower Third Name
Font: Regular, 36pxPosition: Bottom leftBackground: Branded colorUse: Identify speakersCall to Action
Font: Bold, 48pxPosition: Center or bottomBackground: Bright colorUse: Subscribe, visit websiteWatermark
Font: Light, 24pxPosition: Bottom rightOpacity: 50%Use: Branding, social handlesEditing Existing Text
- Double-click the text layer
- Text becomes editable
- Make changes
- Click outside to confirm
Or:
- Select the text layer
- Open properties panel
- Edit text in the text field
Rich Text Features
Some text layers support:
- Multiple colors in one text block
- Mixed fonts/sizes
- Inline styling
To use:
- Select specific text (highlight)
- Apply formatting to selection
- Different parts can have different styles
Text Animation
If supported:
- Select text layer
- Find Animation settings
- Options may include:
- Fade in/out
- Slide in
- Typewriter effect
- Pop in
Dynamic Text
For text that updates automatically:
- Timer countdown
- Current time
- Viewer count
- Custom data sources
Check if templates support dynamic text fields.
Best Practices
Readability
- Use high contrast colors
- Don’t use too-small fonts
- Sans-serif fonts are clearer on video
- Test at actual streaming resolution
Positioning
- Avoid covering faces
- Stay within “safe zones” (not too close to edges)
- Keep important text in center 80% of screen
Branding
- Use consistent fonts across scenes
- Match brand colors
- Create text templates for reuse
Less is More
- Keep text concise
- Don’t overcrowd with text
- Give viewers time to read
Troubleshooting
Text not showing?
- Check layer visibility (eye icon)
- Bring layer to front
- Verify position is on-screen
- Check opacity isn’t 0
Text looks blurry?
- Increase font size
- Use vector fonts if available
- Check scene resolution
Can’t edit text?
- Double-click to enter edit mode
- Check if layer is locked
- Try editing from properties panel
Text cut off?
- Make text layer larger
- Reduce font size
- Check crop settings on layer
Font not available?
- Use web-safe fonts
- Upload custom fonts if supported
- Fallback fonts apply automatically
Creating Text Templates
To reuse text styles:
- Create and style your text
- Save as template or preset
- Duplicate for similar text
- Just change the text content
Using AI to Create Text
With the AI assistant:
"Add text saying 'Welcome to the Show' in the top center""Create a title that says 'Episode 5' in white on red background"