

How to Use the Dynamic Scene
This guide shows you how to use the Dynamic Scene - an auto-arranging scene that automatically positions participants in a grid layout.
Quick Steps
- Select the Dynamic Scene (first scene in the list)
- Add participants via the Fast Access Bar
- Choose a layout template from the Fast Changes Bar
- Customize with logo, background, overlay via the Layers panel
What is the Dynamic Scene?
The Dynamic Scene is a special scene that:
- Always appears first in your scene list
- Auto-arranges participants based on how many are added
- Provides quick templates for common layouts
- Simplifies controls compared to Pro Scenes
Selecting the Dynamic Scene
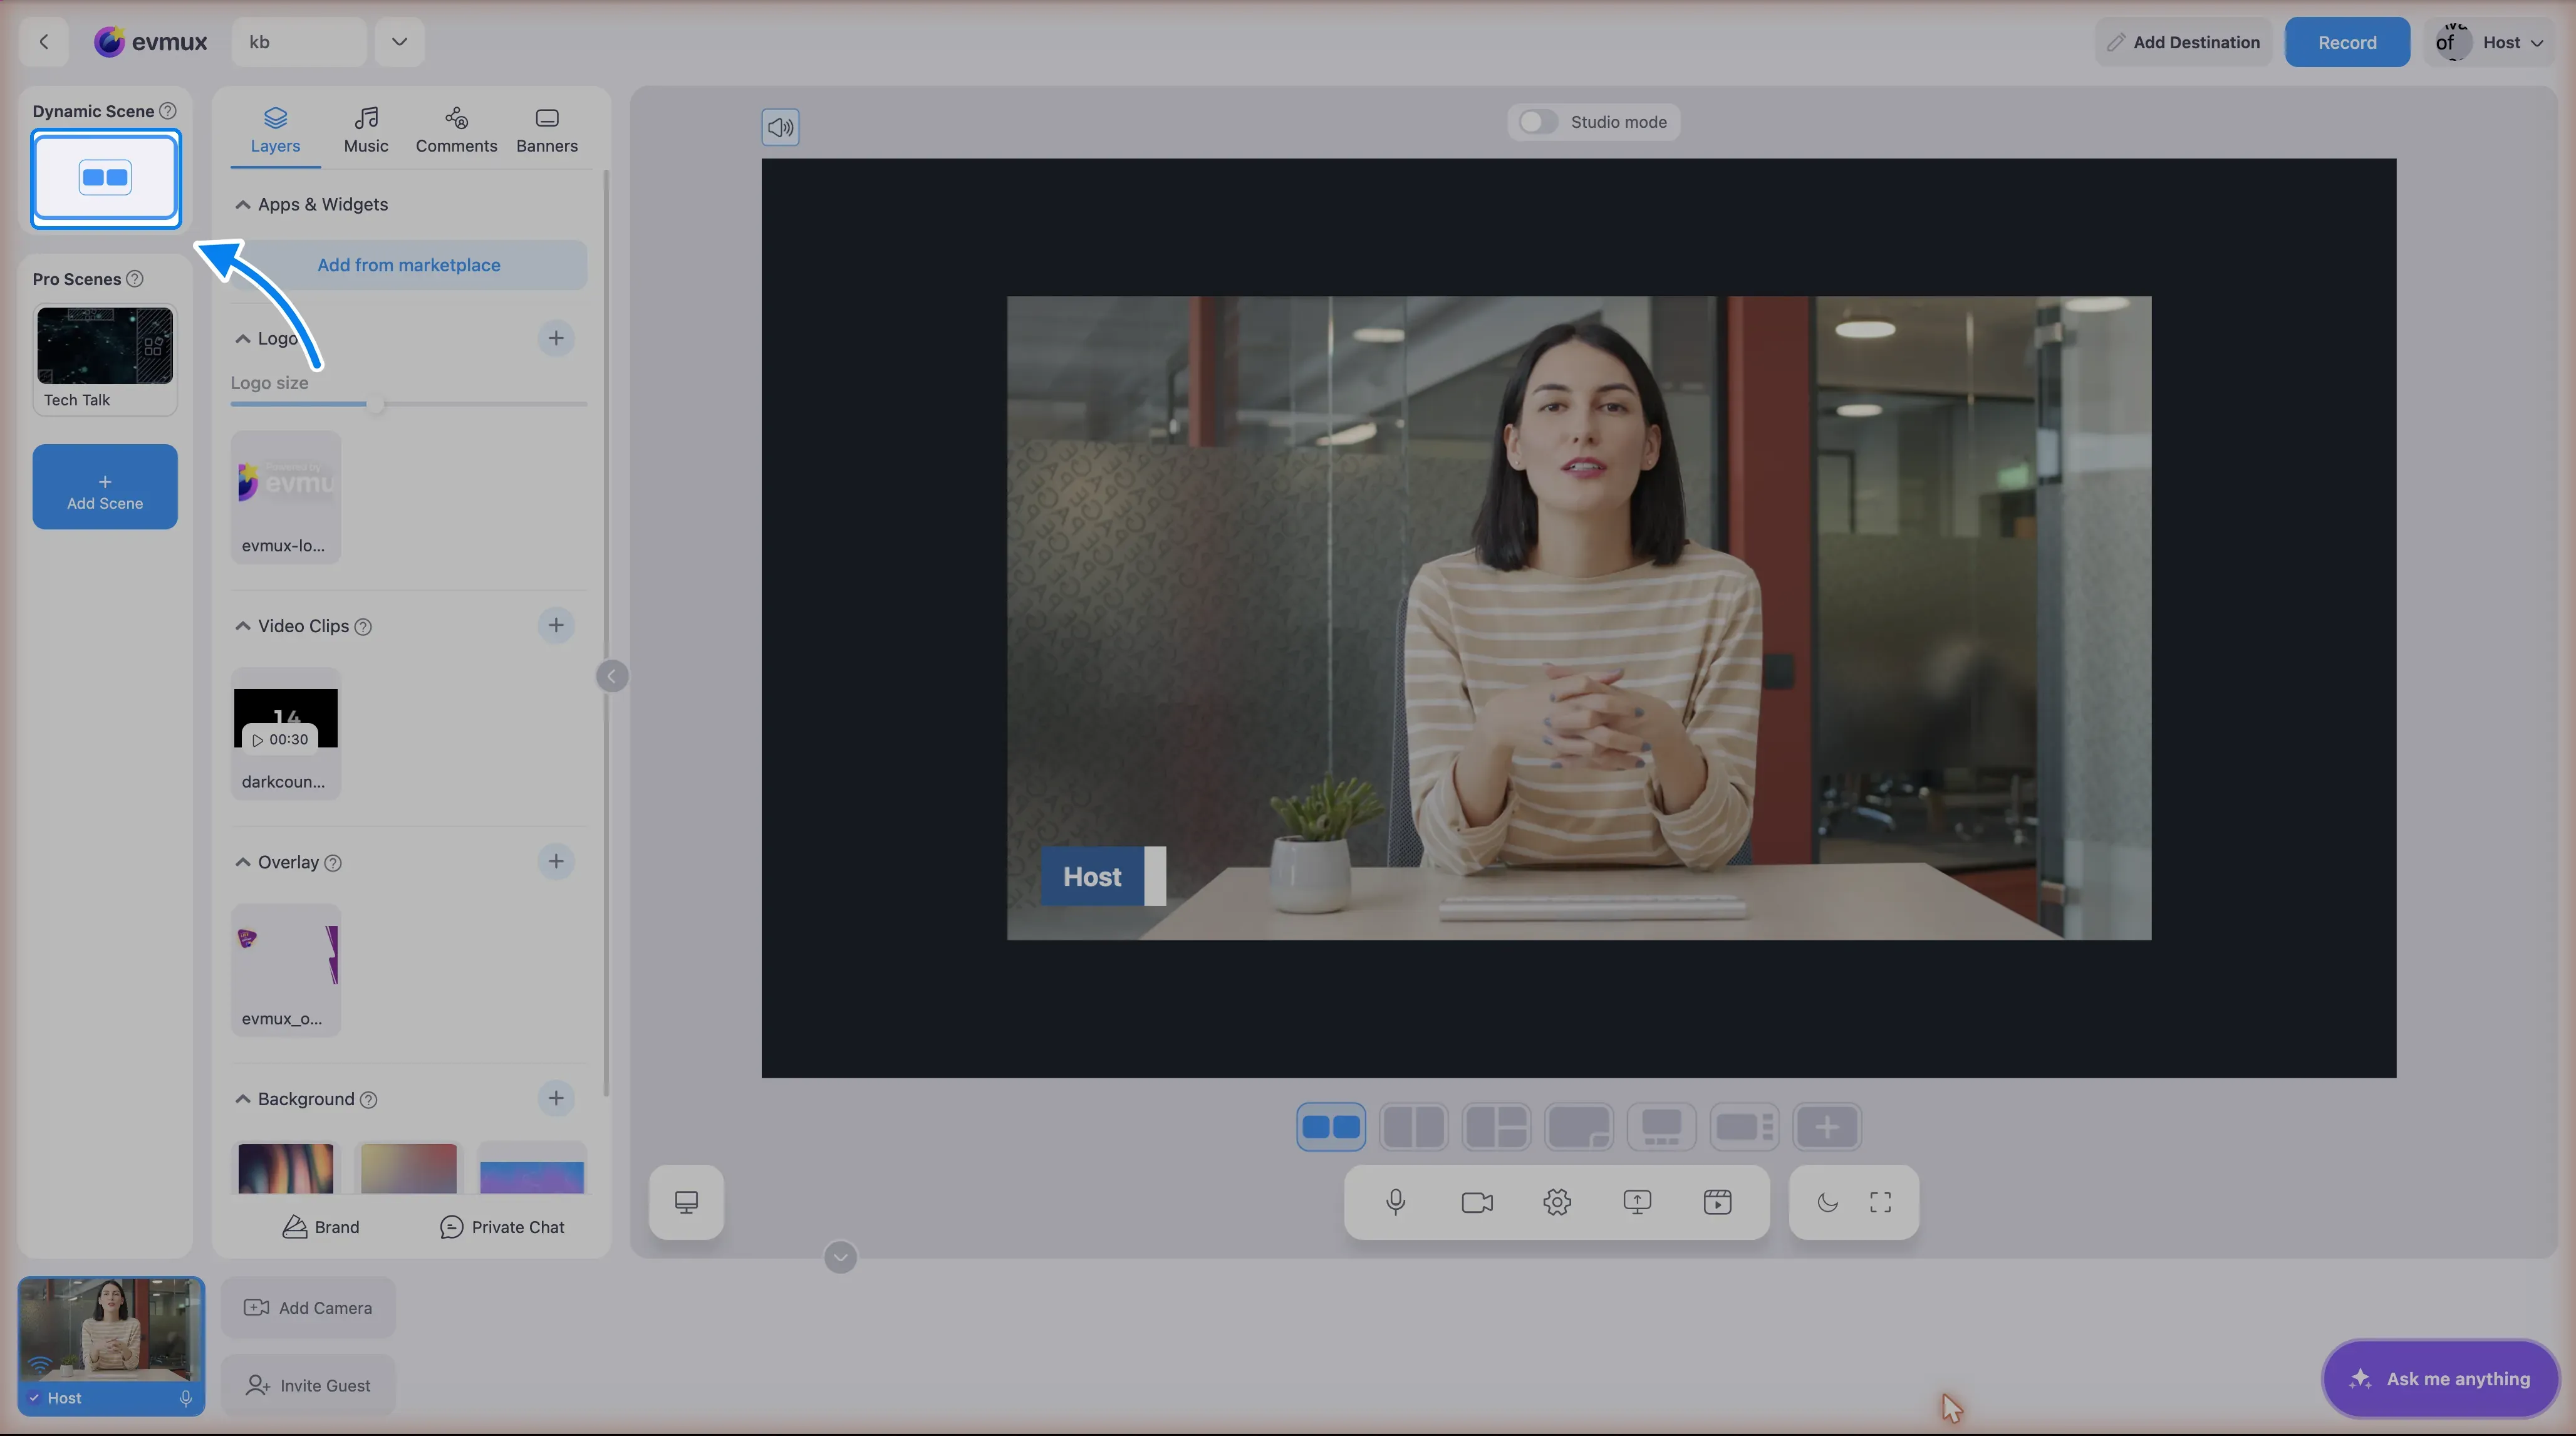
- Look at the scenes column on the left of the editor
- The Dynamic Scene tile is at the top, above your Pro Scenes
- Click on it to select it
- The scene shows the auto-arranged participants
Adding Participants to Dynamic Scene
Method 1: From Fast Access Bar (Recommended)
- Look at the Fast Access Bar (thumbnails at bottom)
- Hover over a participant thumbnail
- Click the Add button that appears
- Participant is added to the Dynamic Scene grid
- Layout automatically adjusts
Method 2: From Options Flyout
- Hover over a participant thumbnail in Fast Access Bar
- Click the three dots button
- Select Add to Dynamic from the menu
Removing Participants from Dynamic Scene
- Find the participant in the Fast Access Bar
- Participants currently in scene show highlighted
- Hover over the highlighted thumbnail
- Click Remove
- Participant is removed, layout adjusts
Using Layout Templates
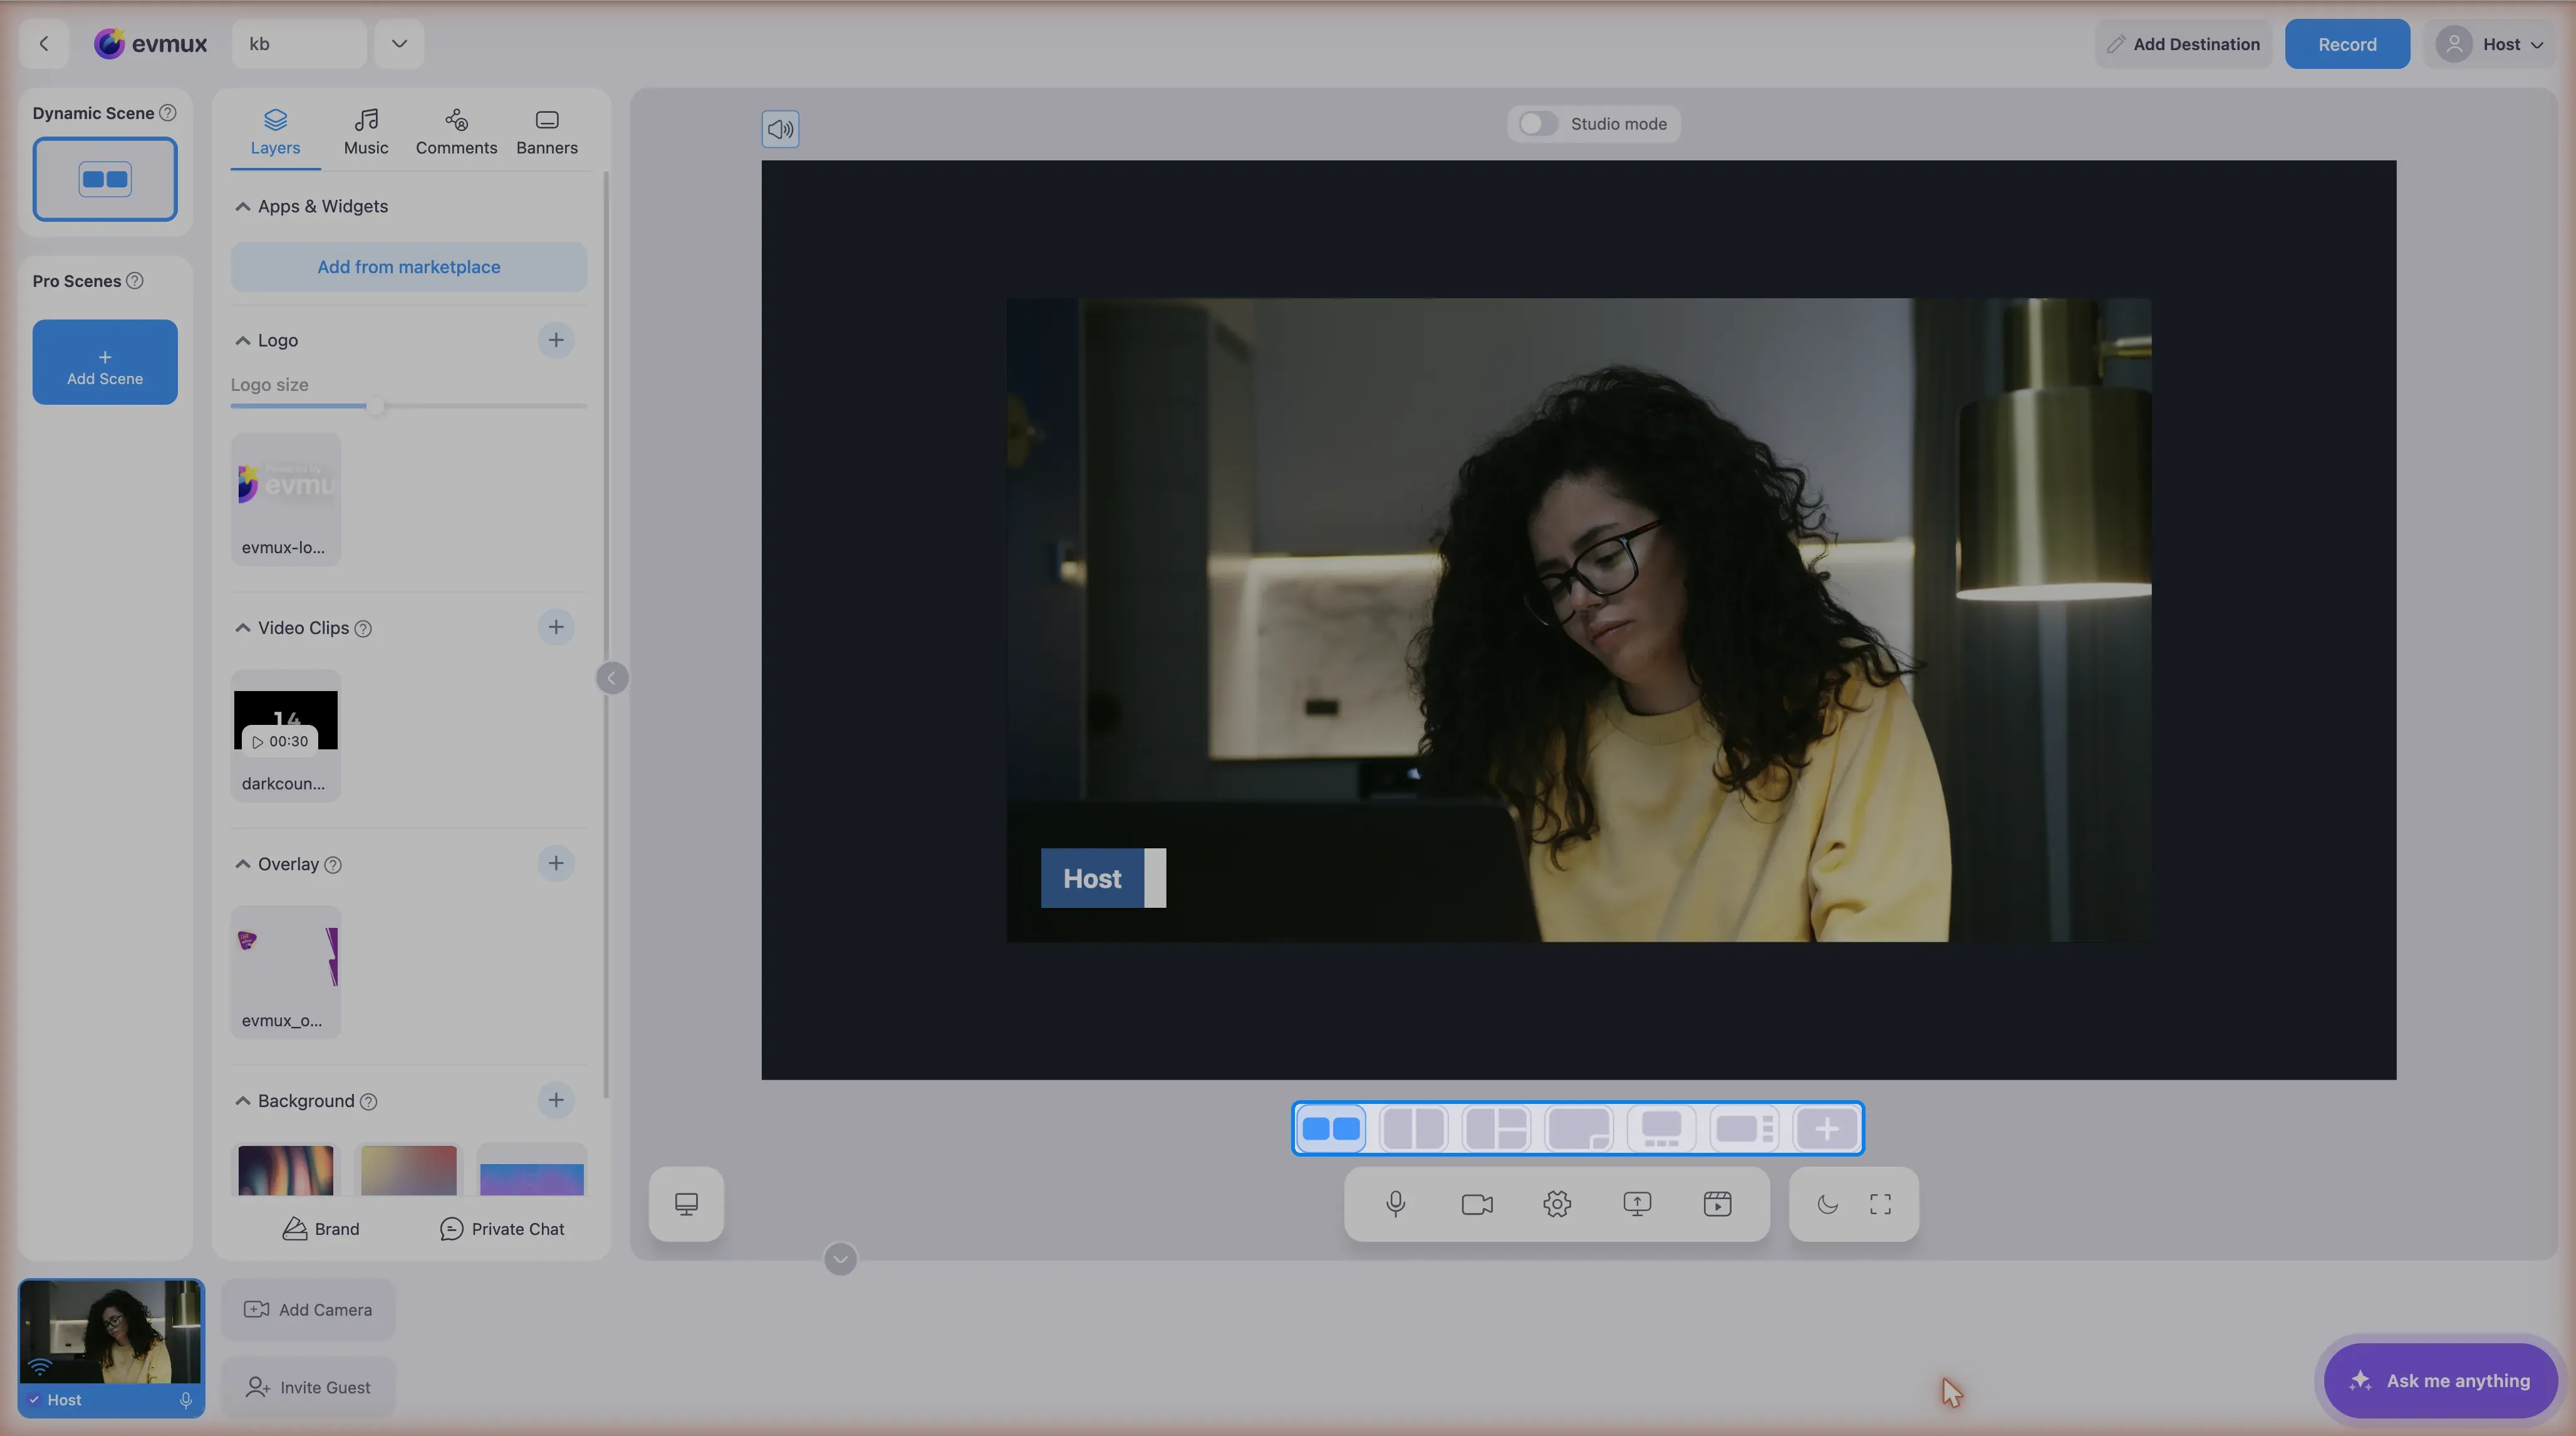
The Fast Changes Bar provides 6 quick layout templates:
Available Templates
| Template | Layout | Description |
|---|---|---|
| Template 1 | Side-by-side | 2 equal boxes |
| Template 2 | 50-50 split | Left/Right split |
| Template 3 | Main + stacked | Main left, 2 stacked right |
| Template 4 | Main + PiP | Main with picture-in-picture |
| Template 5 | Main + row | Main top, 3 thumbnails bottom |
| Template 6 | Main + column | Main left, 3 thumbnails right |
Changing Templates
- With Dynamic Scene selected
- Find the Fast Changes Bar (template icons)
- Click a template icon to apply
- Layout changes immediately
Note: Templates are disabled when a Video Clip is playing. Tooltip shows: “Changing layout not available during video clip playing.”
Custom Layout Option
- Click the last button in Fast Changes Bar
- Opens introduction to Pro Scene
- Create a custom Pro Scene for more control
Customizing Dynamic Scene (Layers Panel)
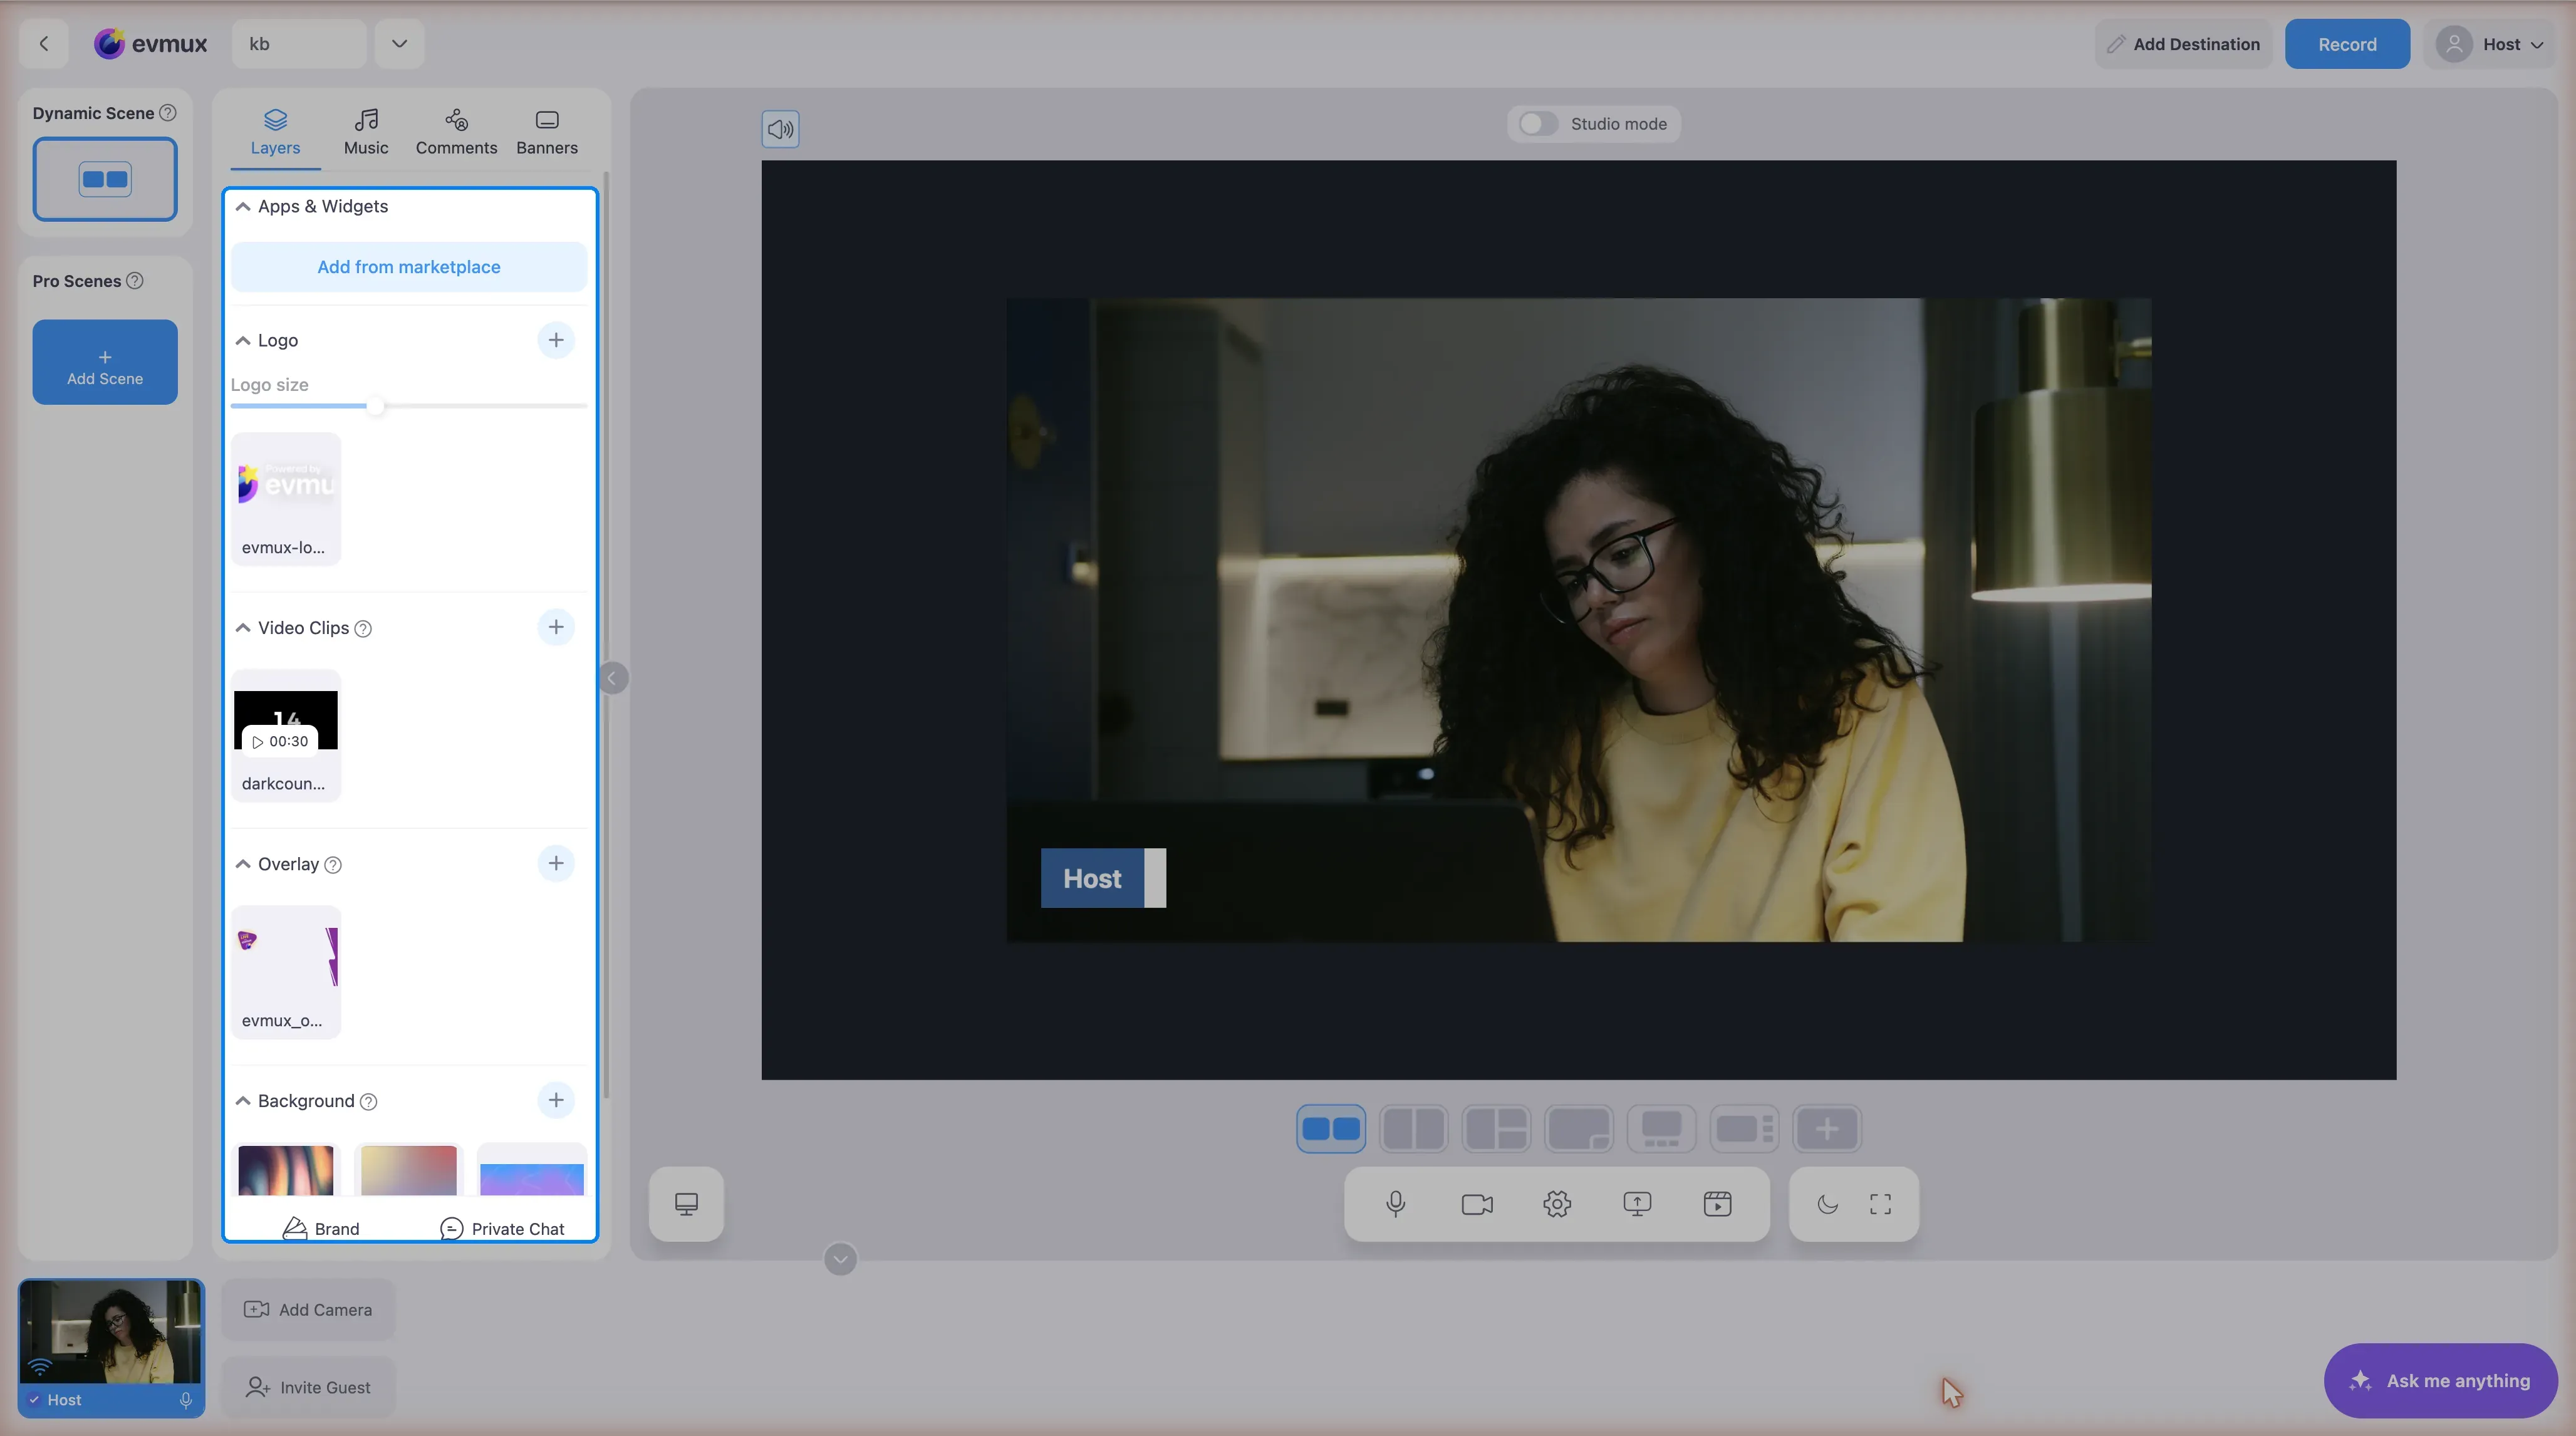
When viewing the Dynamic Scene, the Layers panel shows accordion sections:
Apps & Widgets
- Click Apps & Widgets section
- Add widgets from the marketplace
- Widgets appear on top of the participant grid
Logo
- Click Logo section
- Select a logo from your media assets
- Adjust Logo Size using the slider (50-550%)
- Default size is 250%
- Logo appears in corner of scene
Video Clips
- Click Video Clips section
- Add intro/outro videos
- Select a video to play
- Video overlays the scene when playing
Overlay
- Click Overlay section
- Select an overlay graphic
- Overlay appears on top of everything
Background
- Click Background section
- Select a background image or video
- Background appears behind participants
Using Spotlight
Spotlight makes one participant fill the entire Dynamic Scene:
Enable Spotlight
- In Fast Access Bar, hover over participant
- Click the Spotlight button (small rectangle icon)
- Participant takes the full scene
- Button turns blue/active
Disable Spotlight
- Click the Spotlight button again
- Or click Cancel Spotlight in the scene
- Layout returns to normal grid
When to Use Dynamic Scene
Best for:
- Quick setup for interviews
- Standard podcast/interview formats
- Simple multi-speaker layouts
- When auto-arranging is preferred
- Quick template switching
Consider Pro Scene instead when:
- You need precise layer positioning
- Creating branded layouts
- Complex compositions
- Multiple overlays and graphics
- Full layer control
Tips
Before Going Live
- Add all participants to Dynamic Scene
- Test different templates
- Set up logo and background
- Check audio levels for each participant
During Broadcast
- Use templates to change layouts quickly
- Use Spotlight for focus moments
- Remove participants when they leave
Working with Templates
- Templates auto-select based on participant count
- More participants = simpler grid layouts
- Fewer participants = more creative options
Troubleshooting
Participants not appearing?
- Ensure they are connected to the session
- Check if you clicked Add in Fast Access Bar
- Verify they have their camera enabled
Templates greyed out?
- Check if a Video Clip is currently playing
- Stop the video clip to change templates
Layout looks wrong?
- Try a different template
- Check participant count matches template
- Verify spotlight is not accidentally enabled
Can’t customize positioning?
- Dynamic Scene doesn’t allow manual positioning
- Create a Pro Scene for full control
- Or add a Dynamic Grid layer to Pro Scene